Showing posts with label Dark Ages. Show all posts

Sunday, 5 July 2026

Battle of Fulford Gate 1066 AAR - Impetus 2

A few sessions ago we went back to the Dark Ages and the least well know of the Trilogy of 1066 Invasion of Britain battles, the Battle of Fulford Gate! We used Impetus II to play this scenario! George and Rolf controlled the Vikings whilst Maurice and I handled the Anglo Saxons. The full scenario details are included.

The Anglo Saxon Leaders Morcar and Edwin...

The Armies...

Viking Army (VD 22/34)
Tostig Godwinson AKA George (VD 11)       King Hardrada AKA Rolf (VD 11)
1 x Hird                                                         1 x Huscarl
2 x Irish                                                         3 x Hird
2 x Raiders                                                   1 x Skirmish Bowman SB (B)
2 x Skirmish Bowman SB (B)                       1 x Skirmish Javelin
1 x Skirmish Javelin
 
Reserve for King Hardrada (VD 12) (on table edge by River Ouse 4 turns after the first turn featuring a melee initiated by the Anglo Saxons)
4 x Huscarl
 
Anglo Saxon Army (VD 25)
 
Earl Edwin AKA Maurice (VD 14)                  Earl Morcar AKA Pete (VD 11)
2 x Hird                                                          3 x Selected Fryd
3 x Selected Fryd                                          2 x Greater Fryd
1 x Greater Fryd                                            2 x Skirmish Bowman SB (B)
1 x Skirmish Bowman SB (B)                        1 x Skirmish Javelin

Deployment Picture


Tabletop
180cm x 120cm
River Ouse is at one short edge with a Swamp on its bank
A Swamp on the other short edge
A Road across the table centre long edge to long edge
Stream, Germany Beck across the table short edge, swamp to the River Ouse
Fords at the Road crossing and 2 BWs from the Swamp on Stream
Fords can be crossed without Disorder
The River Ouse can not be entered by Units
The Stream and Swamp Disorder Units
Unit Bases are 12cm

Anglo Saxons to Left
Earl Edwin deployed between the River to and including the Road
Earl Morcar deployed between the Road and the Swamp

Vikings to the Right
King Hardrada deployed between the River to and including the Road
Tostig Godwinson deployed between the River and the Road
 
Victory Conditions...
 
Anglo Saxons Win a Marginal Victory breaking the Viking army
Anglo Saxons Win a Major Victory breaking the Viking army with at least ONE Unit South of the Germany Beck
Vikings Win a Marginal Victory breaking the Anglo-Saxon army
Vikings Win a Major Victory breaking the Anglo Saxons army with at least ONE Unit North of the Germany Beck
 
Special Rules...

Shield Wall if used as a reaction requires a test and will FAIL on a roll of ‘1’, no shield walls allowed on first turn of close combat/melee (not shooting) in the game.
Breakpoints is by Army only.
Anglo Saxon Army Break Point Value is 16
Viking Army Break Point value before Reinforcements is 12
Viking Army Break Point value once Reinforced is 18
Vikings may only form Groups of like named Units ie. Raiders, Irish etc
Vikings Units must advance northward at least 1 full move each of the first 3 turns, they need not attack and will not enter/cross the Germany Beck
The Vikings initial Huscarl Unit may not attack until the other Huscarl Reinforcements arrive, it may advance northwards but not into the ZOC of an Anglo-Saxon Unit, it defends normally it can form a shield wall if attacked and it can’t pursue if successful in combat

The AAR...

The Leaders of Anglo Saxons seeing the Vikings deploying toward the Fulford from the south decided to take the initiative and attack them across the Germany Beck before they were fully organised! Meanwhile King Hardrada moved his army north to the Germany Beck there he planned to halt and await his heavily armoured Huscarls who were still unloading from the Viking  long boats to the south, but his plans were thrown into chaos when a Viking scout signalled that the enemy were attacking across the stream!

Earl Edwin with his strong force astride the River Ouse had taken the lead and advanced quickly to come to grips with the invaders south of the stream, meanwhile Earl Morcar manoeuvred to pin the Vikings right while Edwin used his superior numbers to break through!

The Vikings skirmishers drew first blood dispersing most of Edwin's archers drawing the Anglo Saxons supporting Greater Fyrd forward into combat with Tostig's superior fighters this led to high losses amongst the Fyrd!

Morcar's Warriors eagerly pushed across the Germany Beck and hammered King Hardrada's Vikings! A series of close combats ensued that favoured the Anglo Saxons and they slowly ground down the Vikings facing them. The men from the North were pushed to the limit and within a whisker of breaking as Morcar's axe wielding fighters took out many Vikings!

Despite Morcar’s successes the Battle was at this point being decided on the Anglo Saxons Left as Tostig decisively defeated Earl Edwin's poorer quality Fyrd with his Raiders and Irishmen. He then turned his men to strike at Morcar’s flank and support King Hardrada’s beleaguered forces.

With his flank in peril Earl Morcar launched a final grand charge to break through King Hardrada's thinning shield wall, unfortunately this attack was unsuccessful, this failure plus the arrival from the Viking boats of Hardrada's Huscarls ensured a victory for the invaders! The Anglo Saxons were broken and fled from the field!

Some Pictures...

The opposing armies face off Anglo Saxons to the left and Vikings to the right!

Earl Edwin...

The Anglo Saxon right advances...

...as does its left!

King Hardrada's Vikings prepare to accept combat with the oncoming Anglo Saxons.

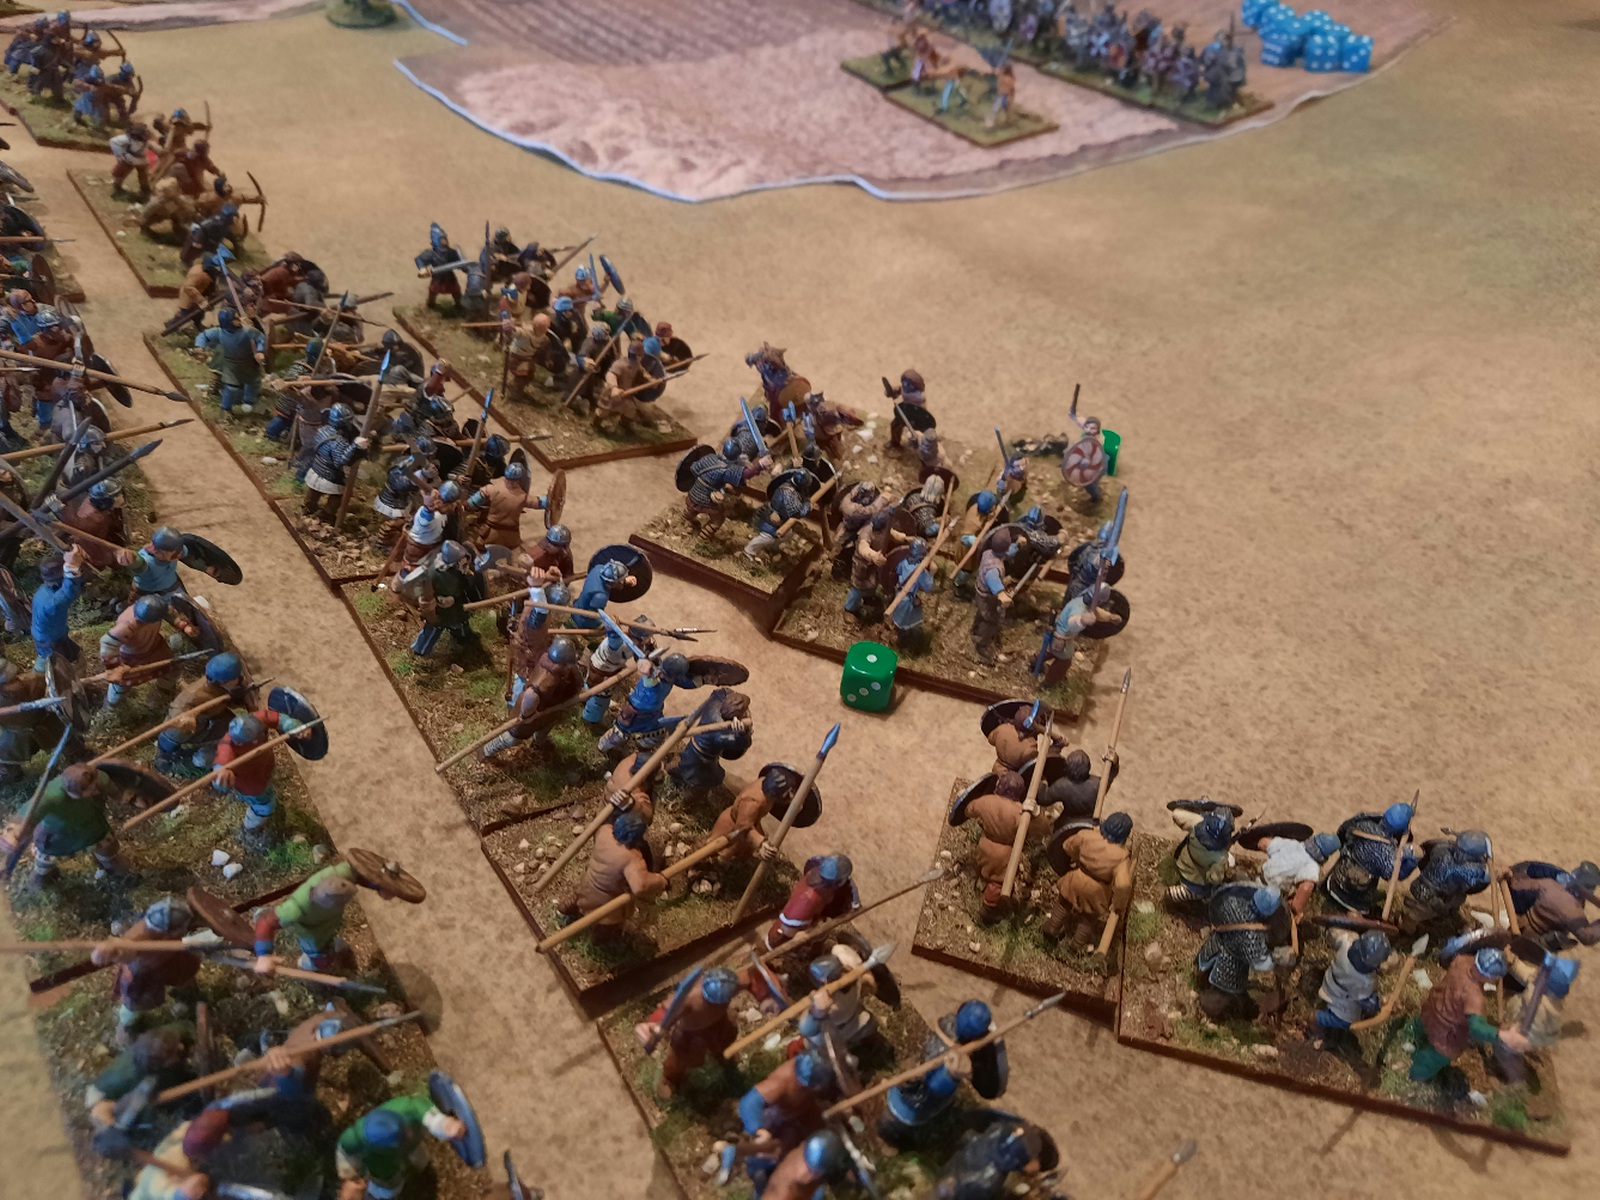
Tostig's Command holds off the advancing Fyrd at a frightful cost.

Hardrada's men take heavy losses from the Anglo Saxons of Earl Edwin and fall back from the Germany Beck.

Morcar's weaker forces begin to crumble before hammer blows from the Viking right wing!

Earl Morcar's last effective force of Fyrd try to support the left flank of earl Edwin's rampaging men...

The Fyrd on the extreme right of the Anglo Saxons line advance!

Viking reinforcements arrive just in the nick of time to save King Hardrada's Army!

The Anglo Saxons remaining units fall back as the fresh Viking Huscarls advance, the battle is over!

Comments...

A near run thing indeed, the Anglo Saxons stronger right (Maurice) did very well and were a Unit away from breaking the initial Viking force! Once the Viking reinforcements arrived the game was up for the Anglo Saxons (as it was historically)! The scenario played out well, the Anglo Saxons have two options; the short game trying to break the Vikings early (which we tried) or the long game hope to break the Vikings defending the Germany Beck and try for minor victory. Again Impetus rules worked great! We really enjoyed playing it hopefully others may give this a try and let us know how it plays out for them!

Saturday, 6 September 2025

Battle of Northam 1069 AAR - Impetus 2 Rules

Last Monday we gathered on a cold evening to recreate the battle of Northam from 1069 on our tabletop. We used my 28mm sized figures and Impetus 2 Rules.

A quick summary of what is known of the actual Battle;

It was fought in June 1069 near ironically Northam. The sons of King Harold landed on the Devon coast with an invading force to reclaim their father’s crown the army was backed by Diarmait High King of Ireland. The defending army was made up of Normans, Bretons and Anglo Saxons led by Brian of Brittany who had fought with William. There were actually two battles during the day, an initial one was a raiding skirmish encounter then there was major action where the Brothers defended their boats while awaiting the tide (this is the battle we’re covering). The battle was bloody and a draw. The brothers withdrew on their boats and vanished from history last heard of in Denmark after losing the support of their Irish patrons…


Brian of Brittany urging his men forward...


The Forces;

The Godwinsons, Edmund & Godwine's Anglo Saxon Irish
Edmund Godwinson Reliable 4H Command
Godwine Godwinson Reliable 4H Command
2 x Huscarls
5 x Select Fyrd
4 x Irish Foot
2 x Archers
3 x Skirmishers

Norman Brenton Anglo Saxon Army
Brian of Brittany Reliable 4H Command
William de Vauville Reliable 4H Command
3 x Brenton Horse
4 x Brenton Heavy Infantry
2 x Brenton Javelinmen
3 x Select Fyrd
3 x Greater Fyrd
3 x Archers

Victory Conditions;

The Normans must capture the road edge behind the Godwinson Brother's Raiders for a Total Victory they score a Minor Victory Breaking the Raiders Army.

The Godwinson Brothers gain a Victory by Breaking the Norman Army.

Note - ignore Command Morale only monitor Army Morale for both sides.

Game Length; 8 Turn

The AAR;

Both sides faced off across a valley near Northam on that fateful June day in 1069, there were only a few hours of daylight left and the fate of William’s fledgling Kingdom hung in the balance! The Leaders of both great hosts ordered them to advance and it was not long before archers and javelin men were exchanging fire.

The Brenton Horsemen on Brian of Brittany’s right were sent a missive to turn the flank of the Raiders Army and end the battle swiftly so they charged forward! The long spear armed Anglo Saxons facing them under the direct leadership of Edmund Godwinson cunningly deployed so the mass of horsemen was broken up and hit multiple bands of warriors at the same time! The great surge of the Brenton Knights broke like a wave hitting the shore, many fell to the rabid spearman who drove them back! This one action smashed the Brenton Horsemen and they were no longer strong enough to play any decisive part in the battle, spent they retired under pressure to play little part in the rest of the battle spending it screening the Norman Army’s right!

Brian though dismayed at his setback urged his line of foot forward aware that William de Vauville's flank of his army were already in action against the invaders right wing!

After seeing off the Brenton Knights the Godwinson Brothers were confident they could defeat the enemy before them and pressed the advantage on their left with Edmund’s personal Body Guard leading the way! A grinding clash of shield walls occurred in the centre of the line with the Normans slowly giving way.

William de Vauville now proved his metal and launched his extreme left at Godwine’s flank, led by archers the local Fyrd had great success pushing back the Irishmen guarding this part of the Godwinson’s line! Gritty hard fought melees were now occurring all along the line and both sides believed they were on the brink of victory!

The whole battle line started to pivot around the central units, the Norman right pulling back while their left advanced! The fighting continued with heavy losses on both sides niether would break though!

The light was failing with the two battered lines still fighting and with darkness the fighting subsided. Brian of Brittany had failed to destroy the Raiders and capture their ships but importantly he was not defeated, King Harold’s Sons had not been defeated but their grievous losses and failure to establish a base for themselves on mainland England meant their attempt to regain their Father’s Crown was over, for now!

A DRAW!

The Raiding Anglo Saxon Irish Army lost 9 VDs 6 short of breaking
The Norman Brenton Anglo Saxon Army lost 10 VDs 4 short of breaking

Some Pictures;

Our Battlefield Raiders to the right and the Normans to the left…

Both sides advanced…

Edmund’s flank troops watch the Brenton Knights approach with confidence!

A few final taunts are exchanged before the biffo begins…

The Brenton Horse find their charge contacts multiple foot units thanks to Edmund’s clever deployment! They are soundly defeated!

The Horsemen are repulsed and Edmund’s foot soldiers attack them in turn!

Long Spears are useful against mounted troops as the Brentons found at great cost!

The overall situation after Brian’s failed attempt to roll up the Godwinson Brothers army with a great cavalry charge…

William de Vauville's local troops advanced on Godwine's Raiders with success!

The Brenton Foot form a line and move out, to the right their Horsemen can be seen under attack from Edmund's Spearmen...

Godwine's Body Guard engages and defeat some Fyrd...

...while more of his warriors come to grips with a Band of Select Fyrd they were not so fortunate!

de Vauville begin his attempt to turn Godwine's flank, but the sun was setting and time was running out!

All the while on the Raiders other flank they press the Brentons back!

The Brenton Knights continued to withdrew before the Raiding Forces!

With darkness gathering Godwine's Body Guard take a pounding from a second Band of Anglo Saxons!

The back and forth continued as a group of the Godwinson Brothers Irish grind more Brenton Heavy Infantry into the Ground! Despite losses both armies continue to fight on the action only  ceased with night falling.

Summary;

Well this was a hum dinger of a game, I planned for eight game turns but added a ninth on the night to see if the battle could be resolved, that didn’t help, it was definitely a bloody draw! We recreated history to a tee! The rules played well and we completed the game in around two and a half hours giving us a time for coffee and a chat. Everyone walked away having enjoyed the night!

Next time I think we’ll be play a Napoleonic scenario using Blucher Rules.

Wednesday, 22 May 2024

Ravenfeast AAR - Scenario Back to the Boats!

Monday night (May 22) we tried a new set of rules, Ravenfeast and played a Dark Ages skirmish.

We used the first scenario in the rules book called ‘Back to the Boats’. We played the game with two rival Anglo Saxons war bands. The smaller (blue) force had to exit a Lord/Hero from the opposite table edge to the one they started on with at least half their war band to gain a major victory, exiting just a Lord or a Hero would gain them a minor victory anything else was a victory to the other side (the red side), there was no turn limit.

Lord Neugegg commanded the smaller blue force of 301 points;
1 x Lord                                           
1 X Hero Hearthguard                     
2 x Hearthguard                              
2 x Veteran Fyrd                              
3 x Fryd                                           
2 x Bowman                                    

Lord Copley commanded the main red blocking force of 255pts
1 x Lord                                              
2 x Hearthguard                               
2 x Veteran Fyrd                               
3 x Fryd                              
2 x Bowman

And Sheriff Galloway commanded the flanking red forces trying to block Lord Neudegg;
2 groups of totalling 248 points each comprised…
1 X Hero Hearthguard                     
1 x Hearthguard                               
2 x Fyrd                                              
1 x Bowman

The tabletop layout, blue is where Lord Neudegg deployed...

The AAR, or should I say Saga...

It was a miserable wintery day as Lord Neudegg lead his hearty war band on a foraging foray to the north of their hillfort, all did not bode well though and evil portents gathered from the gloom. Sensing the direness of their situation the Lord and his men were struck by an uneasiness, fearing for their lives and hastily turned south to regain the safety of their encampment!

They felt danger with good reason, Lord Copley whose own 'Kingdom' was nearby had heard tales of Lord Neudegg's sortie and had struck out with all his available fighters to bring him to his knees and either gain his allegiance or dispatch him for the scoundrel he was.

The sun broke through the dreary clouds as Lord Neudegg sighted his foes, he roared to his breathren, "Ye foes are to our left, to our right and also before us, charge into yon valley of death my brave men and gain glory in defeating our wretched enemies!" (hmmm Shakespearean Tennyson type Dark Age speak interesting). Lord Neudegg's noble few charged forward while archers covered their flanks!

Lord Copley seeing his enemy told his men to prepare to receive a charge and signalled his lackey the Sheriff Galloway to take Lord Neudegg in the rear (ouch!)!

A fierce struggle ensued where every one of Lord Neudegg's retinue was slain, epic struggles took place here and there on the field of glory as several Heroic figures clashed with their lessers and took many a good man to their grave, after this slaughter Lord Copley and Lord Neudegg faced off man to man, well actually Lord Neudegg faced Lord Copley accompanied by several of his warriors and in a spectacle to end the ages they fought long and hard in the end Lord Copley prevailed!

Some Pictures

Lord Copley's war band in the foreground awaits the charge from their foes!
Sharp eyed may notice since I don't have any painted Anglo Saxon archers so some suspiciously ancient Germanic looking guys are standing in!

On rushed Lord Neudegg's men, uncharacteristically both the Lord and his 'Heroic' offsider Bob are in the last rank...WHAT!?!

Our field of glory! Lord Neudegg's Band can be seen in the central position...

Archers loose! In general the archers performed badly and we quickly realised they are best used to pick off lowly types as armoured warriors save/armour factors are too high!

Lord Neudegg's men avoid the four man 'shield wall' Lord Copley had created and picked off easier targets hoping to break through to the exit area! Not sure you can form a shield wall with four blokes but I suppose the term adds character and perhaps they are just huddling close for support?

The Sheriff's men quickly catch up with Lord Neudegg!

Lord Neudegg and a few of his war band break through the defensive line victory is in sight!

Lord Neudegg's men are cut down...

...he (on the left below) is engaged by Lord Copley (on the right with red and black shield with a white bit…)

Outnumbered...

…Lord Neudegg is felled...or is he?

Afterwards Stuff

Well the game played well, even though this was our first go at these rules everything ran smoothly and quickly, we only referred to the rules themselves a couple of times and the only thing we couldn't find in the rules we easily resolved! Did the rules play out historically we're not that sure but it felt like a brawl with is probably what you'd expect from a group of blokes some in mail with shields, swords, spears and bows! A Lord vs Lord fight could go on for quite a while both hitting on 5 or less on D6s and saving hits on 5 or less on D6s and needing three successful hits! In our game once Lord Neudegg was alone and surrounded by foes his demise was only a matter of time...well did he actually die or was he just left bruised in a pool of blood, I think we may see him again in future Ravenfeast games!

Monday, 5 February 2024

Saxon sv Vikings battle AAR - Impetus Rules

Last Monday Maurice hosted an Impetus game for us, more importantly he also laid on some neat dinner!

Dave took command of the Vikings and I led the Saxons! It was quite a large battle and Maurice's figures and terrain were excellent.

It was a grinding action. The Saxons in the village which was the Vikings main object held out long enough for their right flank to defeat the Vikings facing them and bear down on the rear of the Vikings right!

Some pictures...

The Saxon right advances! 11 Units faced 5 Viking ones, but the latter were of better quality and included 2 units of vaunted Berserkers

The Viking Berserkers charged but were repelled and then overrun by the Saxons...hmmm...

The terrifying Vikings warriors then followed up the Berserkers and attacked and they too were repulsed!

On their other flank the majority of the Viking Army advanced on the village...

The defenders were out numbered but the Saxons in the village were the best the Army had to offer up!

Saxons counter charged the main Viking force!

Meanwhile the Viking left was overwhelmed, not a good day for the Norsemen!

The Vikings were held by the village defenders!
Here we found the fact units get locked in combat until one side or the other is defeated made it hard to deploy fresh second line units into the fray to beat worn defenders!

Another view of the fight for the village...

Close up of some of Maurice's excellent figures!

It was a close battle. We like the Impetus rule set, the combat takes getting your head around but once that is done it gives us a good fight that can be completed in an evening!