Saturday, 17 October 2020

Wild West Town - Building One In 1/56 Scale!

We have only played Dead Man's Hand once but it was such a hoot and the reaction so positive we knew we'd play more often and of course what do you need to play an Old Wild West game but an Old Wild West Town!

Before I go into the details of construction here is the town all laid out!
The street width is pretty wide but can be adjusted and does allow easy game play...

I was in two minds when it came to this build, do I make just facades and have a Hollywood town or make complete buildings, well I went with the latter! 

I figured we'd need; a Saloon, A Bank, a Post Office A US Marshalls Office, a Blacksmith with adjacent 'Corral', two other miscellaneous Buildings and a railway Platform. Big ask from scratch. I had a Battlefield laser cut Shearing shed which could easily be a blacksmiths or a building under construction and Al (our master craftsman) said he had a Wild West Saloon already built great news!

My on hand parts included; 2mm 1mm & 0.5mm sheet styrene, pop sticks (ice-cream sticks or coffee stirrers to others), wood skewers, some roughly cut squares of thin wood, a piece of Masonite and some balsawood.

Here's my initial work, a floor of pop sticks dictated the building size...four slab sides and the usual Wild west high front for signage...

A door and windows only on the front wall only and it would be topped with a flat roof. I scored the sides at 5mm intervals to give a planking effect...

Okay so I had cut parts for; two buildings 10.5cm x 12cm x 6cm, two buildings 12cm x 12cm x 5cm, one building 16cm x 12cm x 6cm (only one with a peaked roof) and a railway platform 22cm x 6.5cm x 1.5cm and the building frenzy commenced. At this point Al brought over his magnificent Saloon/Hotel with a store along side it. Crickey it was good and surprisingly was a façade only, the very construction type I was going to do initially DOH. Doesn't matter it will all be fine on the gaming table!

Here's the basics of one of the buildings cut from 1mm sheet styrene...

In this picture the scored wood planking can easily be seen, the only issue with this technique is it causes the sheet to curve hence the bulldog clips required to keep things looking square!

The production line in full swing with Al's beaut Saloon in the background...


...and of course the railway platform...track is also from Al's great terrain stash!

All the details such as windows, door frames, signboard edging were cut from 0.5mm sheet styrene. For the signs I downloaded a free Wild West Font called Western Bang. The bases are cut from Masonite and 'flocked' with sand...

A close up of Al's Saloon and Mining store, unlike my rough buildings this was painstakingly made from balsawood with delicate detailing!

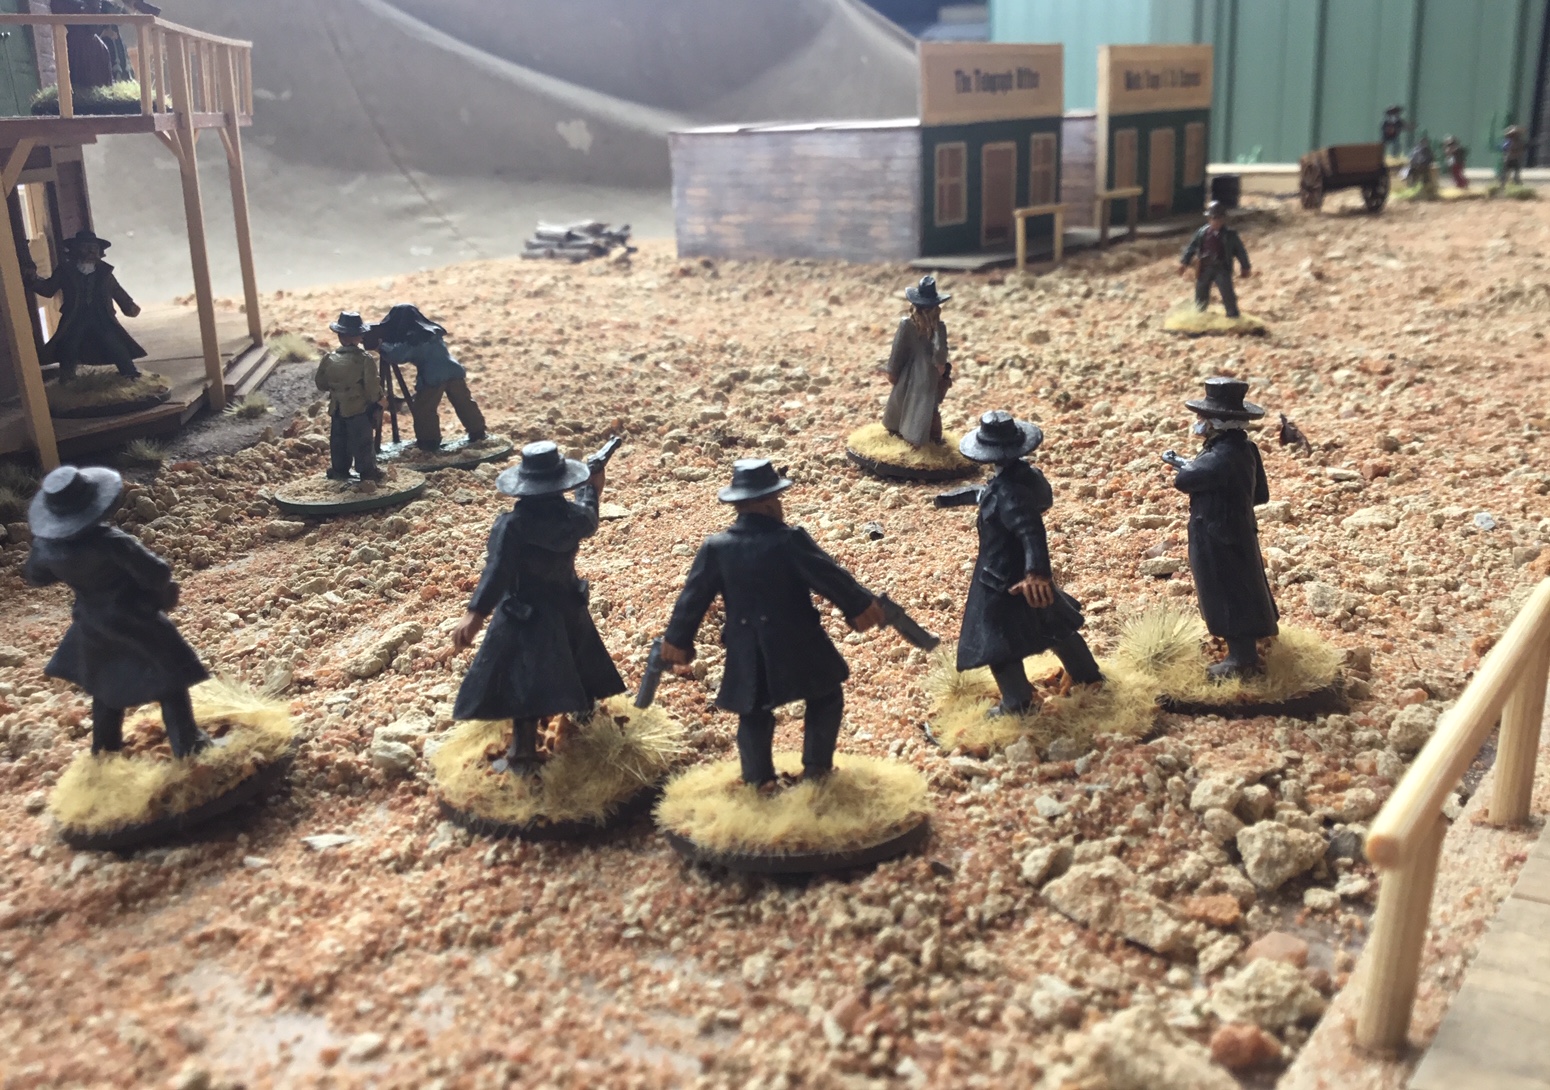
Some figures testing the lay of the land!


Hope this inspires others to crank out their own buildings!

Stay tuned for a game (and town name) soon!

Wednesday, 14 October 2020

Chain of Command AAR USMC vs Japs!

Recently we played a PTO Chain of Command game, USMC against the IJA, Dave wrote up the below AAR...

In the shadow of Kolombangara - New Georgia, Solomon Islands, late 1943.

After the long fight to secure Guadalcanal in late 1942 and early 1943 the drive up Solomon Islands was commenced to secure the left flank of Nimitz's drive across the central Pacific.  Key objective was the island group of New Georgia in the south-central Solomons. In the shadow of the volcano Kolombangara, USMC and Japanese troops fought without quarter for this remote corner of both tropical paradise and hell on Earth.

2nd Platoon, Baker Company has been tasked to reconnoitre and secure an area of ground in the island group. Dense jungle, limiting visibility, broken by some low hills, rocky outcrops and swampy ground. 

The Japanese score very highly on morale as these are fresh troops confident of victory. The USMC are tired and score low on morale but highly on support weapons. So the stage is set for the spirit of Bushido versus firepower.

1st, 2nd and 3rd squads deploy left, centre and right to find, contact and engage the enemy. 2nd squad push forward first in the centre, detaching a two-man recon team to their left who are quickly taken under fire by the defending Japanese from what appears to be a bunker and a rifle squad.


The 3rd squad deploys on the right near a swamp and commence firing on another bunker and rifle squad of Japanese who seem reluctant to return fire.

 
The 1st squad deploys on the left and begin to manoeuvre to take the defenders in the flank, when they too are hit by heavy fire from what appears to be yet another bunker and rifle squad, which kills two of the squad in the opening bursts.

 
Support teams and platoon command begins to arrive with Sgt Stryker, a Guadalcanal veteran bearing a more than passing resemblance to John Wayne, situated between and behind the 1st and 2nd squads to the centre-left. The lieutenant is positioned to the right, nearer the 3rd squad, to direct the firing and movement of the support teams which are deployed to the right side in support of the 3rd squad. They are the closest to the enemy they are engaging and seem to have the best chance of taking their position and turning the defenders left flank. 

Well directed Japanese mortar fire begins raining on the 3rd squad who are slow to organise their support teams of a flame thrower on loan from the Aussies, and MG's. However the platoon mortar team brings fire on the left flank of the Japanese behind the swamp.


The 1st squad on the right begins falling back and under the barked orders of Sgt Stryker, prepare to pass behind the 2nd squad in the centre to reinforce the main assault on the USMC right. However their progress is hampered by the jungle terrain and Japanese opposing them gamely move forward to continue to bring them under fire. The 2nd squad in the centre remain engaged in their own firefight, steadily taking casualties.


3rd squad on the right are whittling down the opposing Japanese across the swamp but taking casualties of their own from accurate mortar fire despite one of the mortars running out of ammo. The 3rd squad is lucky as the Japs do not seem to have enough command and control to return fire with the rifle squad. The USMC platoon support weapons are slow to join the action but once an MG joins the fight it is quick to take effect. Eventually the flame thrower team reach a firing position and take out the bunker from longer range. The 1st squad are too slow re-deploying across the centre-rear to support 3rd squad on the right.


The US morale has been reduced by losses but the Japanese morale has hardly flagged despite the loss and rout of the squad on their left flank. It has taken too long to reduce the Japanese left flank and night falls so USMC advance is halted, having not achieved their terrain objectives for that day.


The lieutenant is summoned to the Company CP for a chewing out and both sides settle in for an uneasy night in the jungle separated by only a few tens of yards. Today Bushido has triumphed, but eventually firepower will carry the campaign.

Wednesday, 30 September 2020

Napoleonic Skirmish French vs Russians Song of Drums & Shakos AAR #8

Well we were set for some colonial action last Monday but George fell ill at the last moment so we played another Song of Drums and Shakos game as the rules, figures etc were all still close at hand from our last session. We played one of my home-grown scenarios and used French and Russians!

Jaunty French Voltigeurs taunt their Russian foes!

Capture the Bridge!

The French
Line Officer Lieutenant Francois 60 points Leader Pistol Sword
Light NCO Sergeant Davide 66 points NCO Light Musket Sword
Four Voltigeurs 128 points Elan Light Musket - shouldn't of had Elan DOH actually 200 points!
Five Fusiliers 130 points Musket - should have been four 
for 104 Points DOUBLE DOH!

The Russians
Officer Captain Beria 60 points Leader Pistol Sword
NCO Sergeant Budyonny 56 points NCO Musket Sword
Four Grenadiers Strong Musket
Five Musketeers 150 points Steadfast Musket

Scenario Rules
the Game is ten turns long
All non Leader & NCO eligible figures get the Leadership Activation bonus on turn of entry
Orchid, fields, fords & fences are difficult for movement
The bridge is two figures wide
The stream can only be crossed at the bridge and fords

Victory Conditions
Victory Points are determined at the end of turn ten only
1 VP per upright figure within 2L of the centre of the bridge
2 VP's per upright figure on the bridge
2 VP's per upright figure on the opposite side of the stream than it started
Note first and third conditions are cumulative

The AAR

Both sides entered the battlefield in two groups, the French light troops deftly negotiated the fields and prepared to ford the stream while Lieutenant Francois busy sipping Napoleon Brandy and smoking a Gauloises cigarette (I know the time line issues there!) lackadaisically led his Fusiliers forward. Meanwhile the Russians commanded by Captain Beria entered along the road and fanned out as they neared the bridge. The game then split into two actions as the French Voltigeurs crossed the stream and entered into a firefight with the Russian Musketeers while the French Fusiliers slowly moved up and faced off against the Russian Grenadiers. Both took light losses in the musketry duels and the final turns saw a lunge forward by all toward the bridge! The skirmish ended with the French in a better position despite losing three men to the Russians two casualties.

The Russians advanced keeping clear of the fields!

French Sergeant Davide urged his Voltigeurs on in a jaunty fashion!

Lieutenant Francios suffered from bad luck with the dice, he lagged behind his advancing men quickly leaving them out of his command range!

Overall view of our battlefield after two turns...

Turn three and Francios bad luck continued NO activations!

The Russians deploy to face their French foes! Taking fire as they moved.

The initial fire from the French Lights was very effective, one Russian casualty and another man knocked down!

The return fire from the Russians was just as effective two Voltigeurs were hit! After these initial volleys no further casualties were inflicted in this area despite the large amount hot lead filling the air!

Near the bridge both sides lost one man in an exchange of fire.
The Russians had their own dice rolling issues at this point, they would have loved to get their 'strong' Grenadiers into close combat with the French Fusiliers but lacked the initiative to do so!

View of the centre of the battlefield just before the dash to the bridge began!

Last turn and Sergeant Davide realised his men were not in the ideal position!

The final positions of the Russian Musketeers and French Voltigeurs all close enough to the bridge to earn VP's.

A last turn pot shot by Sergeant Davide just missed the Russians on the bridge! This figure couldn't move close enough to the bridge to gain a VP so hope to reduce the Russians VP's by taking out one on the bridge! 

Francios, his brandy and Gauloises finished caught up with his men and claimed a victory!

The Result...A French Victory! Well played Dave and Al!
French 15 VP's
Russian 14 VP's

A close game (even though I mixed up the French OOB!)! The French Voltigeurs Elan and Light status gave them a great advantage and probably made the difference in the game. Worth remembering when picking your forces for a game of Song of Drums and Shakos!

Sunday, 6 September 2020

Napoleonic Skirmish Russians vs Ottomans Song of Drums & Shakos AAR #7

This fortnight we returned to the Song of Drums and Shakos rules, we played the Attack on the Farm House Scenario. Dave and Maurice took command of the colourful Ottomans and I girded up my loins and led the Russians. Last game we played in our Russo-Turkish War 'campaign' the Ottomans were given a drubbing by the Russians who defended their 'strong point' with vigour! In this game the Russians will be defending a farm house behind a stream. This time though the Ottomans have an even greater advantage in numbers, 29 to 12! The undisciplined but ferocious Bashi Bazouks hope to avenge their recent set back!

Privates Boris and Igor apparently swamped by Bashi Bazouks make a stand that will change the course of the battle!

The Story

Late August 1810

With Captain Popoff on leave to receive an award after his glorious victory over marauding Turks Sergeant Putin redeployed their small picket force from the bloody site of their last action to a farm house behind a small brook. This would allow the men time to regroup and rest. They believed they had broken contact with the Turks they had just defeated, they were wrong!
Meanwhile Bashi Bazouk leaders Yildiz and Arslan stung from their setback gathered reinforcements and pursued the cursed Russians and they vowed to catch them and slay them...all of them!
The Ottomans Boluk-bashi quickly reengaged their Russian quarry, they split their force into two wings and advanced

The Forces

Ottoman Bashi Bazouks - Attackers

Morale 15
‘Boluk-bashi’ (leaders); Berlin Yildiz & Baler Arslan
Q - 3
C - 2
Weapons - Pistol, Sword
Special Rules - Leader 
‘Bashi Bazouk’ Musket x 13
Q - 4
C - 2
Weapons - Musket
Special Rules -Strong (attack only), Poor Shot, Green and Unreliable
Bashi Bazouk’ Obsolete Firearm x 6
Q - 4
C - 2
Weapons - Obsolete Firearm, Sword
Special Rules - Strong (attack only), Poor Shot, Green and Unreliable 
‘Bashi Bazouk’ Obsolete Firearm x 8
Q - 4
C - 2
Weapons – Pistol, Sword
Special Rules - Strong (attack only), Poor Shot, Green and Unreliable
National Trait
Fury                         Once per game a close combat opponent may be killed by just beating                                       its modified die roll (no need to triple), this must be nominated before
                                rolling the die and may not be used against the Russian NCO

Imperial Russians- Defenders
Morale 7
NCO Sergeant Putin
Q - 3
C - 2
Weapon - Musket, Sword
Special Rules – NCO leadership range is 1M (scenario rule)
Musketeer x 10
Q - 4
C - 2
Weapon - Musket 
Special Rules - Steadfast
Jaeger Carabineer x 1 = 47 pts
Q - 4
C - 2
Weapon - Rifle
Special Rules - Light, Elan
National Trait
Stubborn                   Force Morale updated due to this

Scenario Special Rules
Woods don't reduce leadership range but give light cover and is difficult for movement.
The stream can be forded at any point at difficult movement rate.
Bridge is two figures wide.
Fences, the farm house and bridge sides give light cover.


The AAR

Our battlefield!
The Russians deployed a group of six Musketeers along the farm houses fence facing the
stream supported by Sergeant Putin and Jaeger Vassily and four Musketeers formed a
skirmish line masking the bridge.

 Arslan's group of Turks advanced down the road toward the bridge...

 ...while Yildiz's Bashis moved furtively through the woods!

Putin ordered an early volley which caused a casualty, in fact one of the Turks had his
head taken clean off which set back their advance as a few Bashis retired on seeing this
gore!
Note - with these Rules 'green' soldiers like these Bashis require a morale check when
'violent death' is caused by fire or close combat nearby!
Also where you see a shell by a figure/group of figures their weapons are unloaded.
  
Undeterred Yildiz's Bashis pushed forward, returning fire which resulted in a Russian
casualty, Vassily the Russian Jaeger had leapt the fence impetuously and was struck!

Meanwhile with Sergeant Putin's attention focused on the advance from the wood
Musketeers, Boris, Igor, Ivan and Fred fought a skilful delaying action! They begrudgingly
gave ground while inflicting losses on the Ottomans!

Seeing the red mist a Bashi charged and engaged Ivan in close combat (he rolled a double
six when activating allowing a bonus action) despite the Turk having the better melee
weapon and having a close combat bonus Ivan dealt with him swiftly, Ivan rolled a six and
the Turk rolled a one when determining the result! Another 'violent death' which caused
several other Bashis to hesitate. This flank was holding on by the skin of its teeth!

Ivan's luck did not hold as shortly after he was gutted by a wild sword wielding Bashi! Fred
withdrew to the farm at this point leaving Boris and Igor to handle a horde of Ottomans!

This overview shows the Turks having trouble crossing the stream faced by volley after
volley from the Musketeers manning the farm's fence while the Turks having crossed the
bridge were making headway albeit slowly!

Igor and Boris make their stand! For two full turns they held off the crowd of Bashis inflicting
losses...In the background the third Musketeer from the flank, Fred can be seen arriving at
the farm house just in time to help the defence as Bashis can be seen at trying to gain entry
to the yard!

 Finally Igor fell but Boris was able to decamp and retire to the farm house!

The sacrifice made by the Russians in the field meant that Yildiz's Bashis had no support
when they reach the farm's fence. It had cost the Turks several men to get close but
there was still enough of them to clinch a victory. Vicious hand to hand fighting ensued as
they came to grips with the Russian defenders! It was looking dire for the defenders...  

...but under Sergeant Putin's direct orders Igor took an aimed shot at a Bashi barely feet
from him and scored a hit, but not just any hit, his victim crashed to he ground writhing in
pain and in a screaming like a banshee

It was the pivotal point of the battle, the Russian were hard pressed and Arslan's men were
just about to engage them when Igor's well aimed shot not only put the fear of Allah into the
hearts of the Bashis but pushed them to the limit of their morale! They broke! many would
keep running to Istanbul! Arslan himself was injured in the stampede to the rear! The
Russian cheered heartily!
A point on rules here, the Turks were really unlucky with the morale dice at this point. Many
of the Turks took morale checks because of the 'violent death' which some failed, this took
them passed their 'force morale total' which required all figures to take a morale check and
to top it off one of their leaders Arslan failed his check totally seeing him flee which meant
the few survivors around him took a leader morale check, this cascade left them with little
chance of getting back into the fight! The rules reflect 'green' forces well!
The Ottomans can be seen fleeing!

Another exciting game of Song of Drums and Shakos resulting in a Russian victory, but it
was  a close run thing! The final casualty count didn't reflect how close the Ottomans came
to winning with 19! Turks lost to 6 Russians. At least a third of the Turkish losses resulted
from failing morale checks!

PS - I've finished reading the Song of Drums Large Battle rules now they look very
interesting so will get a run soon!