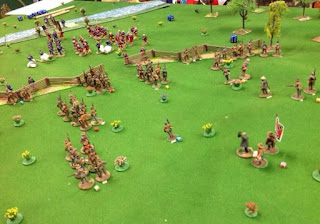
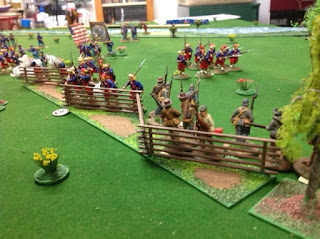
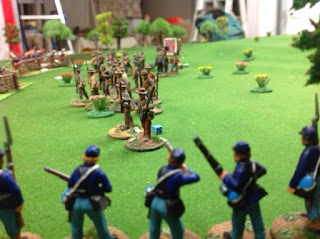
The Syracuse Zouves, E Company of the 7th New York Infantry Regiment tackle Confederates of the 7th Virginia infantry...
Well Dave and I liked the Sixty-One Sixty-Five Rules so we played them again this fortnight and Al joined in! We replayed Scenario 1 from the rule book with the rules clarifications from our first play at hand from the Ganesha team!
Al and I took on the Yankees, he commanded the Zouaves and I was in charge of the regular volunteers. Dave took on the boys from the South for a second time.
With experience from our first run through we completed this game in about 2.5 hours and used the skirmishers to their full potential!
The First Blood scenario has the USA on the attack with 8 Squads of militia quality infantry and the CSA have 6 Squads 5 of militia and 1 Squad of Veterans (better armed and a higher activation score)...the objective is to break the enemy i.e. inflict one third casualties...
The AAR...
The sides face off...2 Yankee squads are off picture to the left of the main force in the top left...
The main Yankee attack rolls forward Al's Zouaves to the left and my regular infantry to the right. 1 squad got three activations and in column that gave them 3 moves they can be seen with some skirmishers rushing to the fence far ahead of the rest stuck in the ford...
The last 2 Yankee Squads on the Union right struggled across the second ford (our modification to the scenario)
The Northern skirmishers reached the fence first and can be seen here firing on the slower deploying Confederates (yep poor activation rolls for Dave again!)
The Rebels picked up their pace and their formed infantry reached the fence line pushing the Yankee skirmishers back
The Yankee right prepare to charge the fence line...
During the same turn as the Yankee right faced the fence the out numbered Rebels took up the attack and their right charged across the fence threatening Al's Zouaves...
The struggle for the fence line from the Southerners point of view, they have secured its length and on the right are across the fence menacing the Yankee left!
Under pressure the 7th New York tries to rush their 2 detatched Squads on their right into the action...
Mid game overview as the Confederates on the fence start to inflict casualties on the Yankees but the game is about to turn! Unseen to the left of the below picture a Yankee Squad has flanked the fence through the woods and on the right of the picture hidden by the trees 2 pairs of Confederate skirmishers were broken, this allowed the Yankee skirmishers to harass the Rebels who had crossed the fence shaking several men!
Next turn the Yankees in the woods poured devastating fire into the Rebels and they began to withdraw and on the other flank the Rebs who had dared to cross the fence line were put to flight by a Squad of Zouaves after being shaken by the Union skirmishers...
From above you can see the Confederate right fleeing and on their left a pair of skirmishers have been deployed to try and cover the flank from the Yankees at the tree line...
Then disaster for the Rebels! They started to withdraw their line starting on the left and due to poor communications (read here a turn over of the initiative due to failing 2 out of 3 action rolls) the flank of the second squad was left exposed to the Yankees in the trees...these Yankees charged them in the flank inflicting enough casualties to push the Confederates past their breaking point, the picture below is post the close combat the 4 survivors of the Rebel squad hit in the flank can be seen fleeing and the flank of the next squad in the Rebel line can be seen....
Overview at the end of the game...
Okay game 2 of Sixty-One Sixty-Five done and Al like Dave and I is pleased with the rules. In this game both sides deployed their skirmishers more aggressively. These guys can reduce the effectiveness of the formed troops and also act as screens protecting the Squads behind them. They were often driven back but then just redeployed and were particularly annoying when used well. When Al caused casualties to 2 of Dave's skirmishing pairs putting them out of the fight that proved decisive on the Union left/Rebel right as it put great pressure on the Rebels formed troops. All in all a very entertaining evening! We decided to play this on our next session so that Stu can give the rules a try...this time we'll use the second scenario in the rules which includes an artillery piece oh yeah!


Bring on the guns! nice game again cheers.
ReplyDeleteCheers Anthony!
DeleteNice report. I'm planning on trying these rules for Franco-Prussian War games.
ReplyDeleteHey Andy thanks, it’ll be good to see how these work for the FPW. Like all rules they are a trade off between reality and playability, they certainly give players a good game in our experience!
ReplyDelete😊