Operation Brevity – Top of Halfaya
Pass - 15th May 1941
(1/72 using Rapid Fire 2 rules)
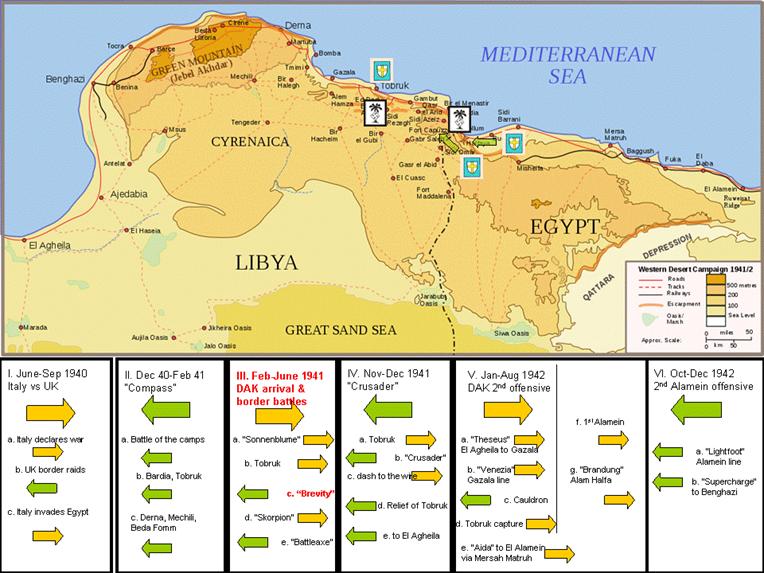
Figure 1
This
scenario played out the action at the top of Halfaya Pass inside Egypt, near
Sollum. Dave was scenario designer and umpire, Stu played the Axis, and Pete
and Alan the Allies.
TSOG
had previously played the action in Operation Brevity at the bottom of Halfaya
Pass and it was an Allied victory, as per history. The location of Halfaya in
the border region, the terrain at the top (north-east) and bottom (south-west) of
the pass, and some images of the escarpment separating them are shown in Fig 2.

Figure 2
The
terrain at the top of the pass is shown in Fig 3. The Western Desert Force is
attacking from the right and initially hold one control point. The
German-Italian defenders hold four control points. Hence the game commences as
an Axis substantive victory.
The
solid line road up the escarpment, through the Village and south is a ‘good
track’. The dotted road running south-west from the Village is a ‘poor track’.
The yellow area is soft sand, the dotted areas rough ground, and the dashed
ovals are rocky outcrops. Each square is 12”, representing 600 metres.

Figure 3
Order of battle;
Allied
Elements
of the 22nd Guards Brigade Group – 4th Indian Div –
Western Desert Force
- No overall HQ on
board, but command & control derived from the Allied control
point. C2 level: 1D6 = 4,5,6 (50%
success chance). 24” range to Infantry Battalion or tank squadron HQs
which have a 12” range to their companies or troops.
- 2nd Battalion Scots
Guards: 3 rifle companies (A,B,C) and Support Company (D) [Pete]

- C Squadron, 4th
RTR (3 troops of Matilda II and HQ troop of Vickers MkVI) [Pete]

- 3rd Battalion
Coldstream Guards: 3 rifle companies (A,B,C) and Support Company (D)
[Alan]. (An optional reserve selected by Allies)

Axis


and Ariete Div

(C2 level: 1D6 = 3,4,5,6 for DAK (66% success chance) and 5,6 (33% success chance) for Italians)
- BHQ for the 15th
Kradschützen Battalion (overall command & control)
- 1st
Kompanie
- PaK Kompanie
(section of 37mm PaK-36 and section of 50mm PaK-38)
- 2nd
Infantry Company (reduced), 12th Bersaglieri Btn, 8th
Bers. Regt, Ariete Div.
- Artillery Battery,
1st Gruppo, 24th Artillery Regt., Ariete Div (100mm
100/17 battery)
The above Axis units can be deployed dug-in.
- Optional Reserve:
Intended for the entire border defence. So if taken for the top of the
Pass then certain Allied losses must be inflicted or a penalty is incurred,
as they are not defending another point on the front. Deployed in the open
(not dug-in).
- Batterie, 18th
Flak Regt., 15th Pz Div. (88mm Flak 36/41 battery) [Taken by Axis. Penalty of having to heavy
damage or destroy two troops of Matildas.]
- Batterie,
Artillerie Regt 33, 15th Pz Div (105mm FH-18 battery) [Taken by Axis. Penalty of having to
destroy or rout two companies of allied infantry]
So
the Axis were outnumbered, but commence mostly dug-in. The Allies were on a static
command & control anchor, with only 50% success chance and range just short
of the road and control points. The Allies also had a time constraint of only 6 guaranteed turns (4hrs 30min) with a sliding chance of operations being stopped after that.
As
usual we commenced with a briefing shown in Fig 4 before the Axis defenders
deployed. The new DAK and Ariete symbol
dice can be seen on their first outing.

Figure 4
Battle opened with C Squadron 4th RTR advancing on the centre, between the sandy ground and rocky outcrop seen in Fig 5.

Figure 5
The Axis gunners knew the
Matlidas formidable reputation and held fire until they were within medium
range (1500 m) of the dug-in guns along the road. The 88mm battery could engage
at much longer range (3000m) but with low probability of hits, and so also held
fire until the other guns commenced.

Figure 6
The
fearsome 88’s did not live up to their reputation and the section of PaK-38 50mm
took first blood, brewing up troop A of 4 RTR, seen in Fig 7. For the first
time the Western Desert Force realised the Matlidas were no longer ‘Queen of
the Battlefield’ as they had been in Operation Compass.

Figure 7
4
RTR survived their morale check and lumbered forward aiming at the Village and
subsequent axis AT gun attempts on them were unsuccessful. The Scots Guards
entered and drove at full speed towards the broken ground on the Axis left
flank, before disembarking into cover on the rough ground, shown in Fig 8.

Figure 8
Meanwhile, the Coldstream Guards had entered on the southern side of the soft sand, to attack the Bersaglieri on the Axis right flank, shown in Fig 9.

Figure 9
The weaker Allied command & control began to let them down and slow their movement as they reached the end of the automatic C2 ranges.
Fig
10 shows the entire action as the Coldstream Guards on the Allied left are
closing with the Axis position behind the control point at the southern edge. The
Scots Guards were working their way on foot through the rough ground on the
Allied right covered by their 3” medium mortar section deployed in the open. 4
RTR positioned themselves behind Halfaya Village, to block line of sight from
18th Flak Regts 88’s.
The
Axis gun line of PaK-38s and Italian 100mm behind the road continued to engage
the Matildas but with no luck. The PaK-36 ‘door knockers’ and anti-tank rifles had
no hope against Matildas and engaged the transport of the Coldstream Guards
support company D, destroying their trucks and forcing them to disembark. The
Axis infantry are holding their fire due to not being able to see the Scots
Guards in the broken ground and waiting till short range to reserve fire on the
Coldstreams.

Figure 10
Figure
11 shows two companies of the Coldstream Guards disembarking to close assault
the under-strength 2nd company of the 12th Bersaglieri
Battalion. Reserve fire slightly depleted the Guardsmen, but the Bersaglieri
were annihilated, heavily outnumbered in epic hand to hand fighting.

Figure 11
Fig
12 shows the action from the view of a Fiesler Storch. The control points in
the Village and at the head of the Pass (behind barbed wire) can be seen still
in Axis hands, although the Coldstreams have overrun the point at the southern
end (2-3 = Axis marginal victory).

Figure 12
Two
companies of Scots Guards, the MG section and BHQ can be seen in close-up in
Fig 13 working their way through the broken ground. The reserve company is
still en-trucked.

Figure 13
The
Matildas advanced over the control point on the edge of the Village (3-2 =
Allied marginal victory) engaging infantry with hull MGs, seen in Fig 14. The
Vickers MkVI of the HQ troop joining in and losses amongst the 1st
Kompanie in the Village forced a morale check. The Scots Guards reserve company
also drove forward to disembark and attack the Village.
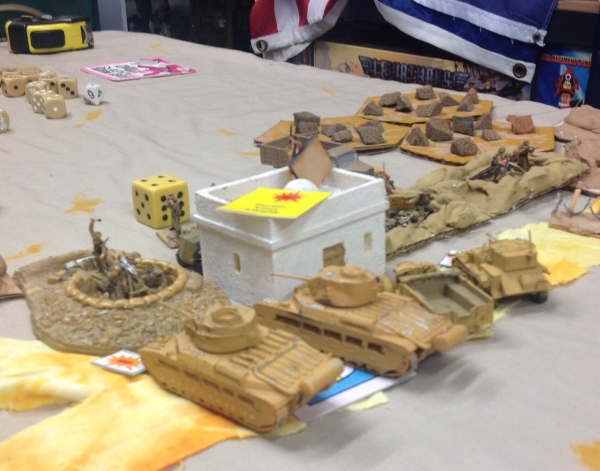
Figure 14
The Scots Guards breached the wire near the head of the pass and took the control point on the northern end of the road (4-1 = Allied substantive victory, plus 2 victory levels as 2 Matilda troops and 2 infantry companies had not been destroyed despite the optional reserve gun batteries).
So
history was repeated, with the Allies taking the top of the Pass. Their
considerable numerical superiority meant the Axis were probably less than 50%
likely of winning.
However,
a stunning platoon level victory was achieved by the Pak-36 crews of the 15th
Kradschützen Battalion who, after their guns had been destroyed by mortar fire,
repelled a close assault by a company of Coldstream Guards, despite the gunners
lack of training in close combat and the Guards elite status. Iron Crosses all round !!!

Figure 15
The
next game was the Axis counter-attack in Operation Skorpion to try and re-capture
the Pass.
Great post, a well designed scenario and good game it was cool to be involved!
ReplyDeleteThanks!
Also nice to see those Airfix figures gracing a battlefield.