Wednesday 27 December 2017

The Great Antipodean Adventure - Figures, Rules & Stuff

Well the project continues!

A couple of TSOGers are looking at scratch building some period terrain already! I'll be calling on my existing terrain but am looking at buying some bibs and bobs. What would really be cool is if we could create a 1800mm by 1200mm table top filled with a Sydney city block! Having an industrial area and train station with track would also be useful for scenarios so lots to do!

I'll be drawing from figures from my various collections for this Campaign as well as buying some new ones. I hope every TSOGer will be able to build up a force so we can get some really big games happening! The 'alternate history' will call for citizen 'armies' so I envisage except for Government forces most of the figures will be in civilian dress. So a figure that serves as a member of a Union mob in one scenario can be a far right member of the New Guard in another. This is useful as building a faction will mean getting a uniformed leadership group and then backing them up with the generic citizen forces...anyway that's my thoughts and it fits with the idea of an instantaneous revolt by the people!

Below are pictures of my existing forces drawn from my VSF, WW I and WW II collections! They include many makers and a few of them like the WW I Diggers I bought already painted and have no idea what manufacturer they are from!

The masses!

More masses...

Firemen, Coppers and some brown coated fellows...could be some sort of Fascists?


World War I figures pretty spot on for period army dress...

What would a revolution be without some armed sailors making an appearance...could be supporting any side! I have some unarmed sailor from the second half of the19th Century who would probably fit in too!

Some more mixed uniform army chaps and a couple of Soviet Commissars. I think even mixing some early WW II Brits in wouldn't be too out of place!

These are some VBCW BUF figures (Warlord?) I just bought from the LAF and will make a great command group for a bloc which can they be beefed up by the civilian clad masses...

The first scenario is already planned, its a small one and will be played with various rules to determine how we go ahead in that area, it's called 'A Visit To The Governor's House' and just needs a play test. The rules I'm looking at currently are FUBAR, TW&T and The World Aflame but I will put it to the others for more suggestions! We want a skirmish set that is 'easy' allowing for the quick and 'fun' games which this genre calls for but that also can have period special rules easily incorporated.

Anyway thanks for putting up with my ramblings I just hope my fellow gamers will!!!!!

Wednesday 13 December 2017

The Great Antipodean Adventure - Factions/Blocs

Well here we go fleshing out The Great Antipodean Adventure, remember this is alternate history stuff here so no rivet counters please hahahaha!

My Rather Uncivil Australian Disturbance all revolves around the Australian Constitution's 'Reserve Powers of the Crown' and how their use caused quite a stir in 1932 (again of course in 1975!). Australia in the 1930 was in the grip of the Great Depression and the Federal Government proposed and implemented the Melbourne Proposal (Premiers Plan) to pave the way to recovery! The State of NSW led by Premier Lang's Labor Government chose an alternate route known as the Lang Plan which ran contrary to what every other State moved forward with. This led to great tension between the States, the Federal and NSW's Governments and even within the NSW Labor Party itself. These tensions came to a head on the 13th of May 1932 when the NSW Governor Sir Phillip Game dismissed Lang's Government and appointed the United Australia Party's Leader Bertram Stevens as Provisional Premier. Game called for an election to be held on June 11 however within a week of the dismissal unrest had spread within the State of NSW and so began the Rather Uncivil Australian Disturbance!

Purported photograph of a mob in George St Sydney being harangued by 'leftie' Unionists!
Picture from State Library of NSW

THE FACTIONS/BLOCS
The main belligerents in The Great Antipodean Adventure are listed here. These will be the core of the factions/blocs that will be drawn upon for forces in the scenarios planned. As more information becomes known on their leaders and motivations, they will be updated. This does not rule out new groups that may arise during the course of the uprising against both the State and Federal Governments and they will be added as required. 
These should give me plenty of background for a mountain of fluff to go with the scenarios!

The Federal Government

The Australian National Government was naturally keenly interested in keeping the State of NSW in the fold and part of the youthful Australian Commonwealth.  The Australian Army at the time was small but a well trained force unrivaled in the region. It included infantry, mounted infantry, artillery and it even had a section of modern armoured tanks at its disposal. It was a formidable force but untested when it came to firing on its own citizenry!
The Prime Minister Joseph Lyons governed at the head of the United Australia Party and was not long into his first term. He wished to maintain a unified Australia in the eyes of the world so turned to his Defense Minister Sir George Foster Pearce and tasked him with quashing the rebellious factions that had emerged in Sydney and the surrounding environs as a result of Governor Game flexing his constitutional muscle. Sir Pearce a career politician in turn asked his Generals for advice...

The NSW Government
After the removal of the radical Premier Lang and his cronies the new Provisional NSW Government was led by new Premier Bertram Stevens. Stevens formed a Coalition with Michael Bruxner's Country Party and within a week of being placed in power put an indefinite hold on the election Governor Game had called for June 11 1932. This was due to the civil unrest in the streets of Sydney and his wish to allow time for the 'people' to calm down and cast their votes in a less troubled environment. His decision had the reverse effect, he was called a despot by groups pushing their own agendas and he was vilified by the Forth Estate being pilloried unmercifully!
The NSW Government was bereft of organised military forces so was reliant on its Federal counterpart for such assistance however it did have at its disposal limited State level organisations to draw upon to try and maintain the order; the Police Force, Fire Brigade etc were a pool from which they could muster 'units'. Even though makeshift these men were well disciplined and used to violent and extreme situations which would put them in good stead to face the mobs. Arms were garnered from Australian Army Arsenals.

The Anglican League
Fanatical members of the Anglican faith with a strong distrust of Republicans, Catholics, Atheists and Communists and enjoying ties to the Mother Country rallied to face off against the unruly mobs and support the NSW Provisional Government. They had an agenda though to wrest control of the State and secede from the Commonwealth!
Their leaders were instilled with religious fervour but had little real idea of the leap they were taking! Little did the League realise but they were nothing more than an unruly mob themselves, basically enthusiastic volunteers armed with everything from clubs to Lewis guns! This left these Conservatives perfectly matched with the other mobs on the streets of Sydney!

The Royalists
A small but highly motivated group of Monarchists believing the Governors actions proved the stability of a Constitutional Monarchy as a form of Government. They mobilised support amongst the Australian Royalists and soon were offering up a new NSW Constitution. They believed the time was right to invite Albert Frederick Arthur George of the House of Windsor and second in line to the British Throne to establish a new dynasty based in Sydney and lead an independent New South Wales Constitutional Monarchy.
A minor but very vocal group they included many of NSW finest gentry who held in their sway many businessmen and industrialists. They believed with such backing and resources they could quickly organise a Militia Corps the like of which could quickly dispatch the rabble and face any organised opposition.

All for Australia League
The All for Australia League was a minor Australian Political Party that was established in 1931. Its foundations lay in the popular people's movements of the Great Depression and was an alternative to many who were tired of the existing Conservative Parties. They were also considered more right wing than the mainstream Conservatives. Their leadership having connections with Prime Minister Joseph Lyons this group tended to support the Federal Government yet it was highly suspicious of the motives of the NSW Provisional Government even though both were allies a strange position indeed!
The former and popular First Australian Imperial Force General Gordon Bennett was prominent in the League and he drew Great War veterans to the ranks of the All Australia League's Volunteer Rifle Companies making them formidable!

The New Guard
The New Guard was a paramilitary right wing splinter group with a simple philosophy, defend the King and Empire and maintain a fine British social structure through strict law enforcement! The new Guard was led by Lt. Colonel Eric Campbell a First World War veteran. They willingly clashed with anyone who did not agree with their policies and even sometimes those who did!
Never large in numbers the New Guard was well funded and highly motivated. This ensured its ranks were filled with many experienced and well equipped fighters.

The Reds
The Reds were initially disjointed Union mobs fired up by their officials. Each Union/Group kept to themselves but they all had a single goal to transform NSW into the Australian Socialist Republic and use the fledgling USSR Government as its model!
Many of Australia's workers had been radicalised by the Great War, the Great Depression, poor working conditions and the sidlining of their hero Premier Jack Lang by a flunky of a foreign Monarch! It did not take much cajoling by their Union Chiefs and American Communist Harry Wicks who was in Australia consulting with the Australian Communist Party to set them on a path of social upheaval!
The initially poorly armed and organised Union mobs were rabid, unruly and unpredictable but still a force to be reckoned with as they had numbers and their fervour was infectious!
Within a week of the first riots following the Lang Government's dismissal several Soviets Commissars landed discretely in Sydney. They had decamped from the Soviet Union and arrived in Australia on Stalin's orders to Felix Dzerzhinsky's Cheka, they were to act as advisers and agitators. These men were pivotal in transforming the Union mobs into well-organised Communist Militia units.

The Australian Irish Front
There were a large number of New South Welshmen with Irish blood and the Australian Irish Front, which became jokingly referred to as the second A.I.F. consisted of a loose confederation of Catholic Irish ‘gangs’ following a charter laid down by a colourful character, Frederick Santa-Maria. Santa-Maria came to Sydney from Cork County Ireland and based himself in the Rocks area and planned to create an independent NSW which would be a prominently Catholic Australian State, however many suspected that the Australian Irish Front were more interested in profiteering than any real idealist dreams.
These gangs were comprised of brawlers, they were not well armed or organised but were more than capable when engaged in a bit of close quarters biffo!

More to come soon, the first skirmish is ready to go!

Thursday 23 November 2017

ACW Skirmish - State of War AAR

This fortnight it was just two of us so we quickly set up an ACW Skirmish game using Richard Bradley's fine State of War rules (with a couple of minor modifications). With the better weather we decided to pay outdoors and enjoy the evening!

I love skirmishing with the 28mm sized figures, the colour the flags...


We went for a meeting engagement the Yankees and numbered the Southerners slightly but the strong Zouave contingent was of lesser quality than the other units engaged. Ominously Dave deployed several stone wall sections around the central crossroads our objective. I've done a write up on these rules on Captain Darlings blog as I modified them for use with my hypothetical Imperial Russian invasion of South Australia Campaign set in 1879 so there's details there with a link. There would be 8 turns and the player with the most 'living' men within 20cm of the objective at the end of that time the winner. It's a good mix the limited time and the small objective area means you're guaranteed to get close up action.

We both started at our respective sides and the first couple of turns were a race to get position!

The Rebs marched into the sun!
 

Whereas the Yankees skirted the terrain but one group of Southerners  lost a lot of time marching through a field of crops...

The Commanders accompanied by standard bearers urge their men forward, the standard bearers are both non combatants and do not count for toward the victory count...they wouldn't accompy such formations in actuality but they just look good to not use!


Both sides reach the stone walls by the crossroads at the same time. A lot of shots were traded across this roadway to very little effect over the next few turns.

Turn three and the first casualty a wounded Yankee private!

Both sides now used their right flank section to turn the oppositions flank! The Northern Zouaves got the jump and were in position quickly

At the same time the Confederate flank move slowed by the crops were still on the road under fire...

At this scale flank attacks are not punishing but it did allow the Zouaves to get a lot of men up against a few Rebs when they charged. Even though the Zouaves were green compared to their Reb opponents thanks to the multiple attacks and good dice rolling the Southerners took heavy loss...

...and fled across the roads finding cover in the trees!

The Rebels flank attack hit home soon after and with evenly matched troops and even dice rolling both sides took losses and the melee continued...

and continued...

Elsewhere the Zouves fire then broke the Rebs left leaving it wide open!

With the sun setting it was all over! the Northerners won a sound victory!

The State of War rules are not the most comprehensive set of rules ever written but as usual a good game was had! There was plenty of dice rolling, we used everything from D4 to D12, heaps of action and most importantly lots of fun!

Wednesday 22 November 2017

The Great Antipodian Adventure - The Rioting Begins!

Did a little work on my Great Antipodean AdVenture idea...AVAD...A Very Australian Disturbance? Still working on that title and a set of rules and just about everything... but got an idea, a freshly printed period union banner and figures for the first scenario...

In the days following the NSW Governor-General’s dismissal of Premier Lang’s Labor Government in May 1932 great unrest filled the streets of not only Sydney but many of New South Wales rural communities.

Small and radical Political Groups fuelled discontent in every suburb and street. Many of the far left and right factions and societies believes Governor Games actions had given them a window of opportunity to simulate their European equivalents. The State authorities were quick to react to this but their entreaties for Australian Army troops to the Federal Government were tied up in the machinations of the Civil Service and would take time to come to fruition. This led to the arming of the Police, Fire Brigades and other Civil Authorities so there was muscle to keep the peace.

Led on by far Left Radicals the Australasian Engineering Union conceived a daring plan to rock the establishment, they would carry out a twilight raid on the Governor’s residence in the Botanic Gardens and substitute the Australian Flag with one of their Banners!

As the shadows grew longer on the evening of May 20 1932 an unruly mob entered the Botanic Gardens from the north and moved furtively south towards Government House but little did they know that just that afternoon the Chief of the Metropolitan Fire Brigade had due to the absence of Federal Military troops being available deployed a section of fully armed Firemen to patrol the grounds of the Botanic Gardens to keep an eye out for revolutionary types and incendiaries...

Fire Chief Archibald Smith...

The Firemen deployed to patrol the Botanic gardens and defend Government house...

The unruly mob composed of members of the Australasian Engineering Union...

A close up of some mob the unruly mob and their banner man!

Sunday 19 November 2017

Longstreet 4 Player Campaign Game 1 - Battle of Seven Oaks


At the height of the action at the Battle of Seven Oaks as the Yankees looked to be breaking the Rebel right dispersing a regiment an unnamed Confederate Officer rallying his Alabamians yelled, “Look Boys! Over yonder there’s Colonel Leghorn standing firm like a picket fence!” his men gathered around the Stars and Bars fluttering proudly in the breeze and the tide of battle turned decisively in favour of the Men of the South…

After this anecdote was relayed through the ranks of the Confederate troops Colonel Leghorn was oft referred to as ‘Picket Fence Leghorn’!


Dave, Stu, Al and I hit the ground running with our second four player Longstreet Campaign last Monday. Instead of three games we're going for the full nine we'll play the second in a fortnight while the momentum is up.

Not listing the forces for this game as we're all starting with the same base force of three infantry regiments, a cavalry regiment and an artillery battery. We've all got characters and a State we'll be associated with, here’s everybody’s details;

Alan - Colonel Firefly from Massachusetts (European Service & Artillery Officer)
5th Massachusetts Volunteer Infantry
9th Massachusetts Volunteer Infantry
14th Massachusetts Volunteer Infantry
2nd US Cavalry
4th Battery Light Artillery

Dave - Colonel Leghorn from Alabama (Scout and Cavalry Officer)
3rd Alabama Infantry
1st Alabama Infantry
14th Alabama Infantry
1st Alabama Volunteer Cavalry
1st Battalion Alabama Artillery

Peter - Colonel Clampett from Tennessee (Drillmaster & Artillery Officer)
14th Tennessee Infantry
7th Tennessee Infantry
Walkers Legion
2/22 Tennessee Cavalry
Baxters Artillery Company

Stu - Colonel Zook from New York (Political Savvy & Indian Wars)
Good on Stu for picking a real dude unlike the rest of us clowns!
52nd New York Infantry German Ranger or Sigel Rifles
53rd New York Infantry D'Epinuil Zouaves
57th New York Infantry National Guard Rifles
2nd New York Volunteer Cavalry
Harris Light Battery B, 1st New York Light Artillery

AAR
The CSA with Dave as CIC won the scouting roll and chose to defend. The two scenarios laid out side by side were the Hilltops and the Wheatfields. So began the Battle of Seven Oaks.

Early moves saw the USA advance along the line with the intent of forming a grand battery around a hill in the centre of their line. The CSA right advanced along the line and deployed a battery on their extreme right. The CSA left swung their flank toward the USA advance and their cavalry saw the red mist at the sight of limbered Yankee guns and they advanced directly at them!

The first CSA Cavalry charge fell on the Yankee guns and horse on the vital central hill, the USA guns and horse were driven back. The CSA right and USA left also clashed and the 14th Massachusetts was hammered by the 3rd and 14th Alabama Regiments. USA cavalry then counter charges the CSA Cavaliers driving them from the central hill.

The USA left recovered from their losses deployed their guns and moved infantry into a position to attack the Rebels. Simultaneously the Confederate right did the same. Then while the USA guns fired the infantry attacked, they were successful but either side of their charge another Southern attack rolled forward the Yankee infantry holding but their artillery was driven back and put out of the action!

While these attacks played out the USA right and CSA left charged and counter-charged around the central hill the Rebel cavalry being beaten soundly!

With the USA right advancing along the line the left launched a great attack routing the 14th Alabama and boy could those lads run! Meanwhile Yankee horseman charged the 1st Alabama Infantry in the flank, they shrugged them off and withdrew with minimal loss!

Late in the day the CSA right under the steadfast Colonel Leghorn held an Union attack while a charge by Rebel infantry and cavalry devastated a USA infantry regiment leaving a gap in both side lines! This combined with attacks by the pushed the Union forces to their breaking point and the Battle of Seven Oaks cam to an end!

A sound win to the Confederate state of America!

A good fast paced game, everyone got into the spirit of things and there was some fluid movement. The issue of charge or move was agonised over on more than a few occasions! I’m pretty sure we got all the rules right and the game was followed by an entertaining Campaign Phase where units recovered stragglers, then lost men to desertion, disease etc., played the campaign cards which awarded everything from artillery reinforcements to new leader personality traits and then fresh units were deployed to bring our forces up to their minimum strength! All this completed and in the space of about four hours. The decision was unanimous we’ll be playing game two next fortnight!


I'll note we have deviated from the multiplayer rules in that we are allowing non CIC players to use blue interrupt cards against an opponent they are engaged with but only the CIC can play red interrupt cards. A maximum of one interrupt against an player per phase is allowed, i.e. two non phasing players can play one interrupt each against their opposites. This just allow non CICs some interaction!

A good game was played by all except maybe me! I'm not going to analyse each players actions but I'll say I became obsessed with capturing the central hill with my cavalry. This lost me the 2/22 Tennessee Cavalry Regiment and locked my infantry in place when they should have been advancing a big mistake! I won't let that happen again! Also I'd like to congratulate Dave on a very good plan and some of the best dice rolling I've seen!

Unfortunately I didn't take the usual number of pictures I do during a game as I was concentrating on rules and score keeping anyway here's what I got that came out okay...

On the Hilltops battlefield the Yankees toward the top advance cautiously...

While on the Wheatfields battlefield both sides push forward vigorously, Rebs are closest!

Rebel cavalry charge up the small hill pushing back the Yankee guns and cavalry...

In the Wheatfields the Rebs in the foreground jostle with the Yanks to line up charges!

Results of both sides charges among the wheatfields, two Yankee regiments are successful in the centre wheatfield either side of them Reb regiments push back Yank artillery and infantry


Finally Colonel Clampett moves the bulk of his boys forward, they are in the foreground!


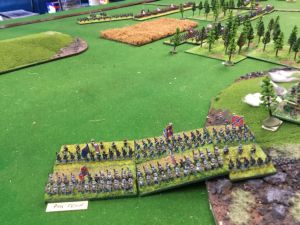
End of game the Confederate right the Rebs are closest

End of game the Union centre right the Yanks are closest

End of game the Confederate left the Rebs are closest


Next Fortnight we'll play campaign Game two, I'll list the revised forces and after the Post Game process then!

Friday 13 October 2017

Longstreet - House Rules Test AAR

Monday night we used one of my previous Longstreet Campaign games to test the proposed House Rules for Morale and a Move/Charge phase. When this game was first played the out numbered Rebels on the attack actually scored a win over the Yankees, they were lucky with cards and the 'Rebel Yell' cards were telling. This time it was the reverse the Yankees had more luck in cards and with the dice which gave the Southerners a hill that was just too steep to climb and they lost.

The important thing was the House Rule tests It turned out the Morale rule did favoured the defender as it affected forward motion more than expected. But on the night the dice heavily favoured the Yankees and they had more units with less than 6 bases than the Rebels, well initially at least. So perhaps it needs to be looked at as it did affect the flow of the game but maybe we've been spoiled with previous games even units down to two bases advancing gaily into the teeth of enemy fire with barely a thought of retiring? The Move/Charge rule was only played once so really didn't get a run so there was really no way to determine the affect of it on game playability (is that a word!). The short of it I will do some more solo testing before running these up the flag pole again!

The AAR Longstreet - The Wheat Fields 1863

The sides face off Yankees defending to the left Rebels on the move to the right!


The Union troops kept up a steady and VERY successful bombardment...

...as the Rebels advanced!


Even before meeting the Northerners the Rebels had taken many casualties and were having to redeploy their batteries (bottom left of next picture).


The Yankee line erupts again pouring withering fire into Johnny Reb!


Reb left flank at the ready to charge!


Reb right flank stuck in the crops...


The Yankees pushed back but not broken! A coloured unit retreated through two white regiments causing losses!


The Union troops reoccupy their front to charge the Confederates!

The Yankees counter charge and push the Rebs past their breaking point!

Well the consensus (I think) was to play some more Longstreet next week so we'll go with a four player game using I think just the standard rules!