Showing posts with label ACW. Show all posts

Wednesday, 13 August 2025

WW II West Front 1944 - Iron Cross Rules AAR

Last week we played another game of Iron Cross pitting the Yanks against the Jerries late in the war situation. We used the Escalating Engagement scenario.

USA OOB
4 x M4s
2 x M18s
7 X Infantry Sections 4 with LAWs (includes HQ)
2 X HMG Units
3 x Trucks

German OOB
3 x Pz IVs
1 x STUG III
1 x PAK 38 + Transport
7 x Infantry Sections 4 with LAW (includes HQ)
2 x HMG Unit
3 x Trucks

The Game;

Both sides deployed armour with tank riders initially and looked for the best terrain in which to deploy, the vehicles duked it out over the first few turns  while the balance of the forces arrived on the field of play!

Vehicle losses quickly mounted, the Mark IVs were on equal standing with the Yanks vehicles and the STUG had slightly better frontal armour but was knocked out spectacularly exploding on Turn Two! The duel of armour which featured some tank hunting infantry prowling from cover to cover ended with the Americans retaining two M4s while the Germans had only their PAK 40.

Using their mobility to avoid the PAK the remaining Yank armour whittled away at the Jerry infantry breaking their sides morale, a Victory to the Allies!

Some Pictures, not many though I was too busy playing!

The Yanks gained control of the central ridgeline but the German PAK 40 sorted them out, not before they took out a couple of Panzers and an Infantry Section!

A US Hellcat ran rampant through the German lines it became the target of the PAK 40, a Pz IV and some tank hunting Infantry who in the end took it out...

Th infamous Germán PAK 40, it was the most prolific Unit on the table when tallying up Kills but the Yanks prevailed!

Summary;

This game went well, the forces were balanced and aggressive 🙂! Ended up with the side with remaining AFVs wins (Yanks)! We did again mange to forget a step in the rules but it was across the game and effected both sides equally. We’ll be playing Iron Cross yet again in a couple of sessions time and will try to get the rules down pat!

Tuesday, 4 April 2023

Song of Drums and Kepis AAR - Assault the Farm Scenario

Last Monday we continued the ACW theme with another skirmish game using the Song of Drums and Kepis Rules.  We picked the Assault the Farm Scenario and followed up the topic of our first game. Again we join Ewell's Corps in the summer of 1863 as they continue their advance north to the Susquehanna River. Our forces also carried over, the Union Conscripts and Militia received a few reinforcement and remained under the command of Master Sergeant O'Higgins whilst the severely depleted Southerners were bolstered by more men from their Company and were led by a new Officer, Lieutenant Haggerty.

The Rebels 'Take the Bridge...'!

The Forces

USA
1 x NCO with Rifle and Revolver
1 x Veteran Marksman with Rifle
10 x Conscripts with Rifles
3 x Militiamen with Rifles

CSA
1 x Officer with Revolver and Sword
8 x Veterans with rifles
4x Veterans with Muskets

The Game

The Union played a delaying strategy believing the Rebs would come straight down the road and across the bridge, also a couple of privates were dispatched across the ford to threaten the Southerners flank but they held their nerve and kept together and pressed their attack! The Confederates planned to capture the bridge destroy the isolated Yankees in the open then assault the farm!

For a couple of turns the Yankee skirmishers held the Confederates on the bridge and that proved to be crucial for the game, it allowed the Union Marksman time to inflict three important casualties on the Rebs unfortunately he was wounded and taken out of action seeking a fourth hit! At this point the three surviving Union skirmishers ran for the farm and the two privates feigning an attack on the Rebs flank also returned to the defensive position.

The Yanks appeared to have the advantage being in cover and more men but a gratuitous kill from a Reb hit sent several conscripts fleeing. Taking this opportunity the Rebs pressed the defender, but just a few good shots from the Farm's defenders inflicted just enough losses on the Southerners to break them!

A Northern Victory, but only just!

Some Pictures

Yankee skirmishers try to delay the Rebs giving their marksman targets!

The Rebs pressed the attack across the bridge, eventually pushing the Union troops back but losing three men to only two Yanks

O'Higgins dispatched two privates to feign an attack on the Rebs flank...they were too clever and didn't fall for the bait!

The Union Marksman on the left was able to hit three Rebs whilst they were held up on the distant bridge!

Lieutenant Haggerty directed his men's fire and a few volleys later the Union marksman was silenced!

The defence of the farm in the balance, four conscripts can be seen running after one of their number was hit in the head by a Reb Minnie Ball! Two Yanks fled entirely from the board due to seeing their fellows fall in action!

Th Confederates final push on the farm!

Get at 'em boys!

The Union conscripts rally!

The Union fire tells as Reb casualties mount and they break off the attack...

The battlefield at games end...

After Game Stuff

Well this was one of the closest results we've seen for quite a while, for a couple of turns both sides were only one or two casualties from breaking, luck went with the Union on this occasion! The Song of... series of rules is universally liked by TSOG!

Next fortnight we are keeping in theme with the season playing a Biblical game!

Tuesday, 28 March 2023

Song of Drums and Kepis AAR - Foraging Mission Scenario

Monday March 13 out come the Song of... Rules but this time using the ACW Supplement featured in 61 to 65 so time for some Song of Drums and Kepis! We picked the Foraging Mission Scenario, having read Flames Beyond Gettysburg (S L Mingus Sr) we placed our game in June 1863 as Ewells Corps pushed north to the Susquehanna River. Our force selections reflected this; the Northerners were mainly Conscripts and Militia (read lots of poor quality troops) whilst the Southerners were a few seasoned Veterans (uhoh!), would numbers or quality prevail!

Rebels 'Foraging'...

The Forces

USA
1 x NCO with Rifle and Revolver
1 x Veteran Marksman with Rifle
10 x Conscripts with Rifles
3 x Militiamen with Rifles

CSA
1 x Officer with Revolver and Sword
5 x Veterans with rifles
4x Veterans with Muskets

The Game

From a Northern Newspaper
...the gallant but desperate decision of Master Sergeant O’Higgins to throw himself into the front line turned the tide. Knowing that his command was not going to get out of their tents before the butternut wave of Secessionists swept through the camp he threw himself forward loosing off both his rifle and revolver. Singlehandedly he drove the Southerners back over the encampments fence. it was then he was struck to the ground by a lucky blow from a Rebel. Momentarily dazed he looked up to see one of his trusty men, Private Masters leap the fence and fell the the Confederate soldier who was about the skewer O’Higgins. after this Masters raced forward in a maddened rage bayoneting the Rebel's Leader. Mortified at the loss of their Officer the Confederates fled into the woods where only a sort while earlier they had emerged whooping in excitement!

Some Pictures

The Rebels entered the tabletop, quietly formed up at the tree line and prepared to launch themselves on the slumbering Yankees whose few sentries were oblivious of the danger...

Charge Boys! Get amongst them! Roared the Rebel Lieutenant...

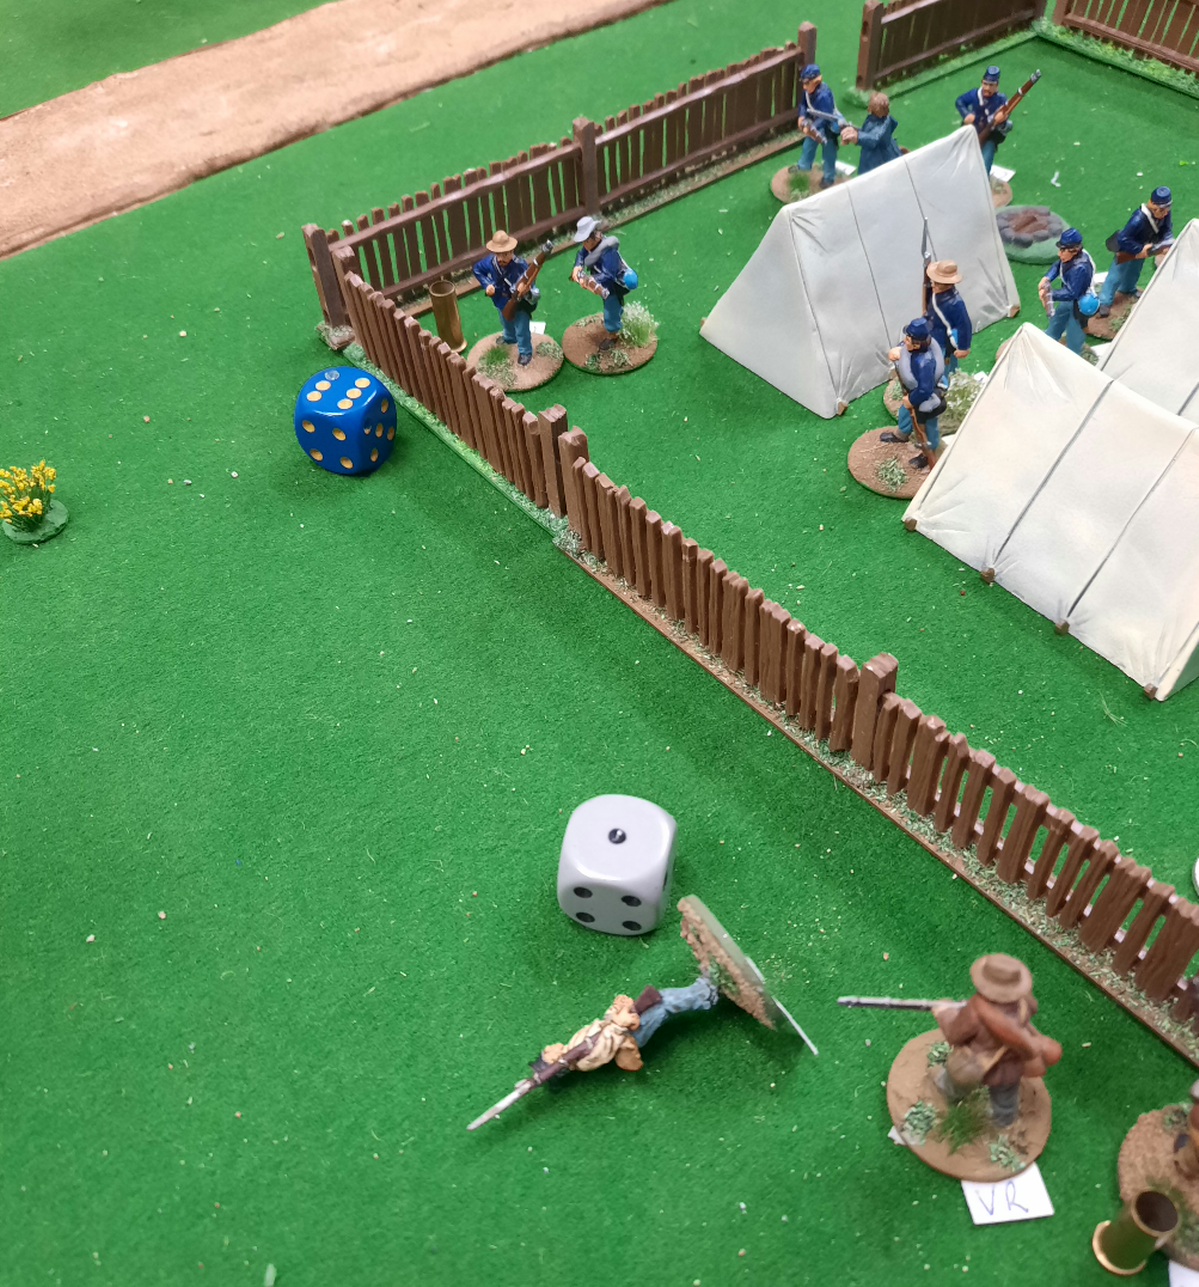
Quickly the Rebels overcome the sentries and they found themselves inside the Union perimeter...

The last sentry crashes to the ground....

The drowsy Union troops manage to take out one of the attackers! At this point a few Conscripts fled seeing Private Parts suffer terribly from a head wound.

Ooops forgot to take pictures covering the rallying of the Yankees, Master Sergeant O'Higgins being knocked down and the Union resurgence... DOH!

Private Masters comes face to face with the Confederate Officer...

...and fells him in a brief tussle! A resounding Yankee 'Huzzah' is heard across the battlefield!

After Game Stuff

Well we had a lot of time for coffee and biscuits after this little game in hindsight I should have set the figures up again and we should have replayed the scenario. In this game both sides exposed their Leaders officers recklessly and pushed men forwarded unsupported a recipe for disaster! Either side could have won at one point the Rebs missed the opportunity to finish off the Yankee leader as he lay prone, given a similar chance the Southerners leapt at it taking out the Confederate Leader resulting in a victory!

Next fortnight we are playing Song of Drums and Kepis again!

Saturday, 4 June 2022

ACW AAR - the Battle of the Bridges - FS2CS Rules

With the great success of our ACW Test game using the From Shakos to Coal Scuttles Rules last Monday we played a two player game fielding two 12 Unit equally balanced forces in a meeting engagement! The objective of the game was to be in possession of the two bridges on the tabletop at the end of the game or break the enemy! We included the Exhaustion Rule this time to cover the 'breaking the enemy' victory condition and boy was this rule was telling in the exciting climax of the battle!

Confederate Gunners at work targeting Yankees...

The Forces

The Yankees;
1 x Command base Brigadier Copley
2 x Veteran (Elite in rules) Regiments - 3 bases each
5 x Trained Regiments - 4 bases each
1 x Raw Regiment - 6 bases
1 x Cavalry Regiment - 4 bases
2 x Artillery Batteries Early Rifles - 1 base each

The Rebels;
1 x Command base Brigadier Neudegg
3 x Veteran (elite in rules) Regiments - 3 bases each
4 x Trained Regiments - 4 bases each
1 x Raw Regiment - 5 bases
2 x Cavalry Regiments - 4 bases each
2 x Artillery Batteries Smooth Bores - 1 base each

The Battlefield

The Confederates started at the top of the below map and the Federals at the bottom.
The Rebels concentrated in the centre of the battlefield while the Yankees advanced on a broad front!
.

The AAR

While a great battle raged the Leaders of both sides recognised the importance of two bridges over a stream that should be occupied to allow the easy transit of artillery and wagons in that area. Each side assigned troops to occupy them!
CSA Brigadier Neudegg was confident he could accomplish his task easily advancing on a narrow front his horsemen leading the way whilst the Union Commander, Brigadier Copley advanced his forces on a wide front with strong flanks hoping to envelope any opposition he may encounter while carrying out his mission. Importantly just as the battle commenced the Confederate Commander was incapacitated leaving the Southerners with no one in overall command giving the Yankees an edge!
The Southern horseman arrived at both bridges before anyone else, one Regiment  dismounting while the other remained mounted and ready to charge! Union infantry engaged both of them and under fire the cavalry retired from the crucial bridges.
Rebel infantry replaced the horsemen and a race to occupy the best positions along the stream began! Once in place the Regiments of both sides deployed into line and engaged their opposition! A frightful firefight commenced, the infantry exchanged volley after volley resulting in significant casualties! Several units suffered badly wavering and then falling back. The battle was in the balance as the exchange continued.
Then a great Hoorah emanated from the Union right flank a brave Regiment charged defeating the Rebels they faced and with artillery support they started rolling up driving in the Rebels line! The deadlock was broken s was the Confederate morale! The Southerners fled followed by the enthusiastic cheers of their Union foes...Hoorah!

Some Pictures...

The Confederates advance, their two Cavalry Regiments can be seen scooting ahead of the infantry toward the bridges!

The Federal Right moves forward...

......as does their left!

Brigadier Neudegg leads from the front during the approach and was injured, he was 'hors de combat' for the rest of the game, his Command Dice was lost! 

The Yankee centre advances.

View from the Confederate side as their Cavalry dismounts at their objective, the right hand bridge...

The same dismounted horsemen were driven back by two Regiments of Union infantry!

At the other bridge more Union infantry fire drove the Southern Riders back!

Rebel Infantry replaced their mounted brethren and crossed the left hand bridge putting pressure on the Union line.

Meanwhile the Union right flank attack started to pose the Rebs some issues!

A Southern Regiment also secured a stone wall near the bridge! Just beating a Union force there!

The Union upped the ante in this section of the field when one of their flanking Regiments started to envelope the Confederate position.

Flanked and under artillery fire the Rebels were driven back across the bridge and forced from the stone wall position, the Confederate left was literally in great disarray!

The Confederate right despite being pushed back from the bridge looked in better shape and were deploying into line to face the Federals!

A Confederate Regiment took position on high ground on the extreme right of the line and their volleys pushed back the Rebs facing them.

The Yankees left was preparing to launch an attack with a fresh Zouave Regiment when events on the other flank of the battlefield decided the action, the Confederate troops exhausted began to withdraw...

The end of game positions the broken Rebels are toward the top of the picture! 

A very close battle! Both sides were destined to break on Turn 8 due to their high levels of Disarray so whoever gained the Initiative for the turn was in big trouble. Dave and his Confederates drew the short straw and went first and at the end of the player turn the Rebels  reached their Exhaustion Point! The game played well and very quickly, once the basic rules were mastered we only had to check them occasionally! Our ''ACW period adjustments' worked well so once we get a full team of four players at a session we'll be playing a super 24 Units a side battle...I can't wait!

Just a point on the Exhaustion Rules, it reads as follows...
...with so many Units on the table we think the base level of 12 is too low unless we played an extraordinary battle on the night. Based on our experience we think with armies of 12 Units you should try 18 as a base and work from there, anyway that's what we'll do next time! This game both sides high level of disarray by Turn 8 saw them both set to roll over twenty dice each for their Exhaustion roll!

Wednesday, 25 May 2022

From Shakos to Coal Scuttles ACW Test Game

Monday night George and I tried the FS2CS Rules in the ACW period. We wanted to test all the rules so set a central objective and a one and a half hour time limit to make us advance and engage. Both sides had 9 units and 6 Command Dice. We set up a busy tabletop typical of the conflict, we also ensured there was the obligatory ACW stone wall 😊. The idea was to try every rule we could so we included some larger, smaller, elite and raw units.

At the end of the session and eight turns completed we were pretty happy that FS2CS would allow us to play a huge ACW battle on one of our Monday night sessions. Like any set of rules covering a broad time frame they will never be perfect for a particular period but this one worked okay so we'll definitely schedule it in for a Monday night!

Below are the changes we will be using for our ACW FS2CS games, some of these will also be used for other wars/time frames when we use FS2CS. Just a note for ACW games for which we use these rules we are assuming each foot unit is a regiment and each base within it represent around 125 soldiers.

FS2CS ACW Rules Updates:

Army Rating Leadership & Command Dice;
We will allow you to not use your leadership Dice when rolling Command Dice (a big call) but if you do include the dice allocated by Leadership in your Command Dice Roll include a D12 in the throw, if a '1' is rolled on the D12 subtract one from the Leadership value (minimum of ZERO) for the rest of the game, this indicates a Leader casualty. If your Leadership level is ZERO obviously you can disregard this, If your Leadership starts at say 3 this result could occur up to three times!
This is in addition to the existing Lead from the Front and Heroic leadership rules.

Formations;
For the ACW period, we will have three formations for Foot/Dismounted Units;
Existing 'Advancing' Mode is really a March Column, it acts as per rules but may not move within 12" of an enemy unit in its Line of Sight. If it starts a movement phase within 12" of it must deploy from this formation.
'Attack Column' Mode will be 2 bases wide and at least have one base in a second rank, once a unit reaches only 2 bases in strength it may not use this formation, the remaining two bases automatically go to 'Battle' mode. This formation may turn up to 45 degrees before moving or charging, it moves the same distance as the 'Advance' Mode.
'Battle' Mode for Foot/Dismounted Units must have room to extend to a full single line to deploy and act as per the rules.
Interpenetration of foot units by foot units is allowed if they can clear the other at no penalty.
Interpenetration of horse units by horse units is allowed if they can clear the other at no penalty.
Interpenetration of artillery units by foot and horse units is allowed if they can clear the other at no penalty.
Single Base Units;
A unit reduced to a single base may still function as a 'Battle' mode unit, for this period many Regiments had very small compliments and still functioned, they are still able to merge with another unit as per the rules.

Movement:
In addition to requiring a Shock Die to enter or move through Dense terrain a unit also suffers the Sparse terrain movement modifier i.e. 'Whenever a unit enters a sparse feature or begins a move within one, roll 1D6 per stand in the unit. For every 6, reduce the remaining available movement allowance of the unit by 1”. This can force a unit to halt, unable to move any further.'
Rear/Flank moves, when in 'Battle' formation units may move at half speed directly to the rear (retain facing) or directly to their flank, no oblique moves.
Infantry in 'Battle' mode may about face for free and follow it with either a move or fire.

Fire Combat;
Artillery firing directly at a Unit with a second rank receive a plus one die modifier.
Artillery firing directly at a Unit with a third rank or more receive a plus two dice modifier.
Artillery enfilading an infantry formation receive a plus one die modifier.
Note the first two modifiers above will encourage players to follow the usual formation doctrine used during the war of operating in extended lines.
Push Back Result, if a unit is in cover and receives a Push Back result they can at their discretion can take one level of Disarray per Push Back this replaces the 2" move(s).
Move & Fire Phase;
Units should be marked with Move or Fire 'markers' as they complete their action, we are doing this purely for our own administration purposes.
Marking Firing/Moving, unlimbered/Limbered Artillery bases, if an Artillery base moves replace it with the limber this indicates it moved so can't shoot, we are doing this purely for administration purposes so we don't accidently fire and move a gun!

LOS Clarification:
Two linear obstacles between firing units that they are not adjacent to block LOS

Important rules that can will be using to give units ACW character are;
The (Obligatory) Rebel Yell Rule, using two Shock Dice to activate a Rebel infantry unit to charge gives it two extra dice in the Impact Phase of the the Charge sequence.
Elite, these will be for Veteran units for ACW purposes, they can be no larger than three bases, Veteran units will also be hardened so have a Disarray rating of 5 and have a 50% chance of being Hesitant (role before the game).
Raw units are fresh eager ones, these will have only three Disarray as per the rules but can be five or six bases!

Some pictures from our 'game'! 

Our Battlefield, both sides objective was to control the bridge in the centre and we were playing to a fixed time of 1.5 Hours, in which we had 8 turns!

There were two formations for each foot and horse unit: 'battle' i.e. line and 'advancing' a single base wide column. Below you can see regiments of four bases in 'advancing' formation. for these ACW games we believe the latter required changes!

A Yankee Zouave Regiment in Line shooting it out with Rebels, they have two levels of Disarray as shown by the mini die. We are only going to allow single rank lines for our ACW regiments.

A Yankee regiment in trouble, it is up to four levels of Disarray (so will be required to retire next Union Moral Phase unless they reduce this total!) and in the sights of two Confederates Units!

Rebel Guns unlimbered and drawing fire from the Union troops, they ended up with three levels of Disarray, lesson learned, don't unlimber too close to the enemy!
In the foreground is the Confederate CiC.

If by chance you use FS2CS please let us know your thoughts on our thoughts!

Sunday, 10 October 2021

TSOG Longstreet Grand Campaign #2 - Game 2 AAR

Monday night after a rather tasty BBQ the TSOGgers adjourned to a pleasant evening of wargaming! We played Game 2 of our new Longstreet Grand Campaign! The player line up was as per our first game and everyone was fired up and ready for a tough fight!

Entrenched, Colonel Clampett's 'Boys' prepare to receive the Yankees, who were the Zouaves of Colonel Zook!

Onto the Game... The Battle of Twin Peaks

Scenario; The Hilltops
The CSA Won the Scouting Roll and elected to defend
Extra CSA Terrain 1 x Swamp, 1 x Rough Ground
Extra USA Terrain 1 x Rough Ground, 3 x Woods

Attackers George and Pete
Spalding Character Trait: Friend in the State House
 
Defenders Dave and Maurice
Driftwood Character Trait: Fire & Brimstone Preacher

The AAR

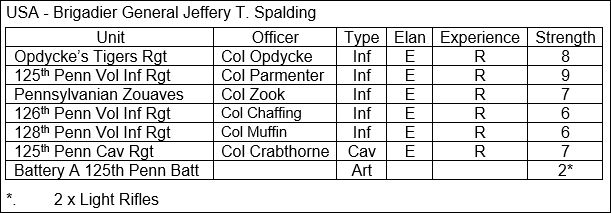
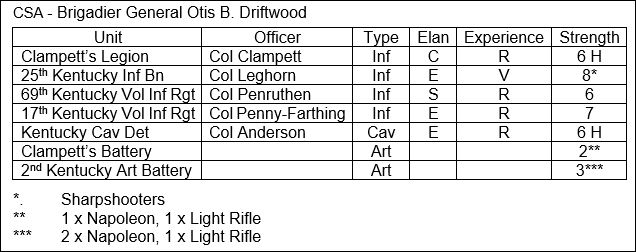
The Union Army of the Potomac pushed south into Confederate territory in 1862 and Brigadier General Spalding’s Brigade was in the vanguard! His orders included securing a pair strategically important hilltops known by the locals as the Twin Peaks.

Spalding reconnoitred the Rebel positions and decided on a massive attack using his right wing while his cavalry pinned the rest of the Rebel force in place, he was convinced this would see a quick victory, orders were dispatched and the attack began. Confederate General Driftwood was quick to see the Yankees intent and acted promptly redeploying his Regiments, he also sent a message to Colonel Clampett’s Regiment entrenched on the smaller of the Twin Peaks to hold at all costs and await reinforcements!

Initially the Federal Regiments moved as ordered making good ground and the Confederate right was successfully pinned as they hoped by the Cavalry, but and the Rebel artillery and reserve cavalry did moved to face their advance and assist Colonel Clampett’s men.

It wasn’t long before the Yankee right hook lost all co-ordination, the main columns experienced unexpectedly poor terrain that slowed them while lost orders and rivalries between Officers led to two uncoordinated (and unsuccessful) charges on Colonel Clampett’s stout Confederate Boys! After these events Colonel Zook his Regiment broken and looking dishevelled was heard to comment, "Those damn Rebs they're immovable just like a stonewall!"

The situation was now looking worse for Colonel Spalding and his Yankees but even though the Confederate Brigade had redeployed to face his main attack Spalding continued with his original plan and launched a second charge! This onslaught failed too and under heavy Rebel fire the defeated Federal Regiments broke and Spalding's entire Brigade retired leaving the Rebels in command of the crucial high ground.

A stunning victory to Driftwood's Southerners! They had inflicted heavy losses on the Federals and beat them back decisively! A defiant Rebel Yell echoed across the battlefield!

Some pictures of the action!

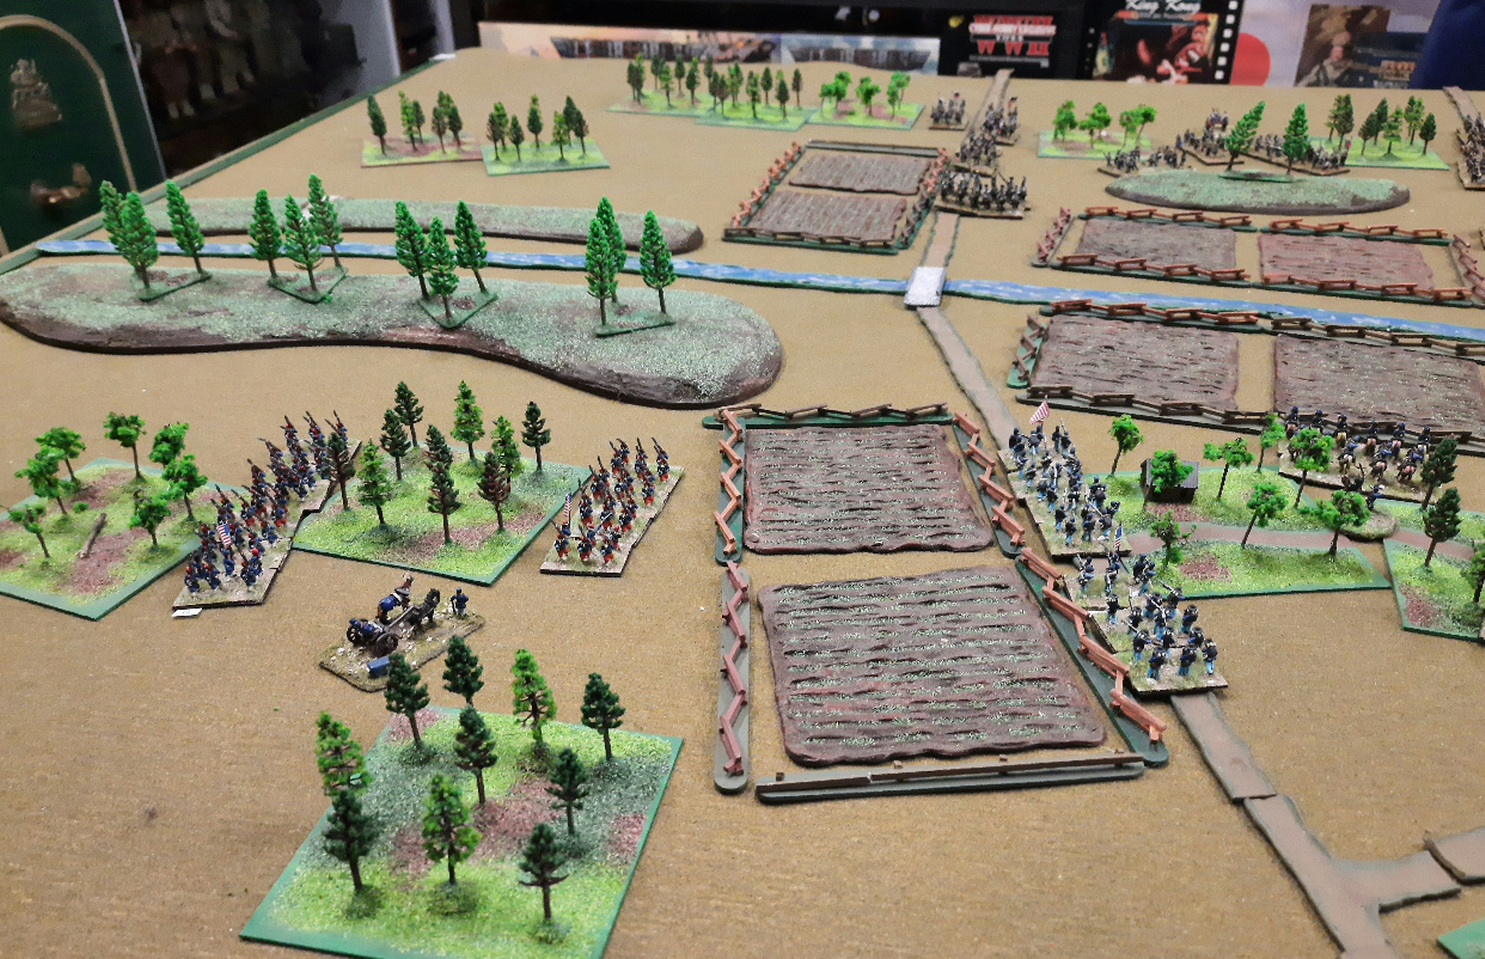
The initial Yankee deployment looked promising! Four Infantry Regiments with artillery support facing a single Confederate Regiment!

The best Confederate Unit was on the wrong flank so unable to face the main Union force, in the distance behind the trees the Yankee cavalry can be seen.

The Yankee artillery target Clampett's Regiment as the infantry march past them, unfortunately the guns did little damage!

The Union columns knew there was rough ground before them but the swampy terrain behind that was a surprise and this was to cost them dearly!

Rebel Colonel Clampett ordered his men to 'dig in' on their high ground as the Bluebellies deployed before them! 

The Yankee Cavalry launch their own flank attack!

Colonel Spalding's grand attack unfolding...

The first Union charge on the smaller of the Twin Peaks hill failed as one Regiment failed to get its orders in time and the other attacking alone was easily repulsed by the Southerners!

The shattered Pennsylvanian Zouave Regiment (at the bottom of the hill to the right) retires after getting no support during its charge taking heavy losses!

The Yankee Cavalry's grand ride continues!

After the Yankees initial charges against the Rebel hilltop position failed they prepared to advance again but now that Confederate reinforcements had arrived to cover the rear of the hill and any chance of a breakthrough had all but evaporated!

The Union Cavalry continued to play cat and mouse with Rebel Infantry they faced.

Colonel Clampett's Regiment continue to hold their hilltop position despite being changed twice, bombarded and fired on! To the rear of the hill the Yankees form up to advance again all the while taking casualties from fire!

The Confederate Right wing was tied down successfully by the Union horsemen but it was of little significance in the final result!

The Yankees second large charge was a gamble which they lost, here you can see them attacking with inferior numbers against defenders supported by artillery! Still it looked good for the Northern Reporters!

Well a decisive victory to the Confederates losing only five bases to the Federals seventeen! Dave's skilful interrupt card play really ran the Union attack off the rails initially and with the Rebels reserves redeployed the Yankees were never able to recover! Still the Yankees managed to coordinate a couple of very large (albeit unsuccessful) charges giving them a slight edge in epic Points in the end. Also the Union's heavy losses and a rather lack lustre post game 'process' will make game three in the Grand Campaign interesting! They will start it with four Regiments of four or less bases, a rather fragile force! The Confederates will have a more compact yet intrinsically stronger group of Regiments! Stay tuned for the next game!

Post Game process was completed and the below resulted.

USA Epic Points 6
CSA Epic Points 5

BG Spalding Promoted
BG Driftwood Promoted

New OOBs for Game Three