We played
Dead Man's Hand again this time with four gangs and in a town.
Before the action began the town Sheriff took the time to be photographed by the famous Hanging Tree by Burt Willoughby and his assistant!

Dave played
the Lawmen, Al played the Banditos, George the Indians and I played the
Cowboys. Also in Town was 'The Willoughby Travelling Photography Company'.
These are
our four five character ‘gangs’...


... the objective was to be the last them standing and
alliances were allowed via verbal agreement at the beginning of a turn. Plus each gang had some special rules that they alone knew!
The Lawmen
The Sheriff is immune to the Joker card.
The Cowboys
Can’t shoot at Lawmen unless the Lawmen fire on or combat them or are last rival Gang in town.
Rancher Owner is immune to the Joker card.
The Banditos
Can’t shoot at Indians unless the Indians fire on or combat them or are last rival Gang in town.
The Indians
If the Braves run out of Ammo it is permanent, they can’t reload their revolver. They are down to using their Big Knife in Hand to Hand!
We had one
special rule for all gangs I threw in and that was ‘Get ya new fangled photograph taken’
rule. For this scenario if you drew your decks Joker you ignored the value and
text and the affected figure moved to the photograph area by the hanging tree
and would have to spend two turns there (not including the current one!). There
was a 10cm safety zone around the hanging tree so no one getting their ‘picture
took’ could be targeted! It worked a treat! Next time though we’ll reduce the
time to only one game turn.
The AAR!
The Lawmen
started around the crossroads with the other gangs deploying along selected
edges.
The shootout
got off to a hot start with the Indians rushing to close the range on the
Lawmen and despite the Law taking a couple of pot shots at the Cowboys at the beginning
of turn two came to an arrangement to defend the town. The Indians and Banditos similarly ganged up...there’d be some falling out of bed fellows to
come!
The Indians
soon worked out their Hand to Hand superiority was their best weapon and so they
got in close to the Lawmen and were soon cutting them down! Note here - even
though I reminded everyone including myself before we started about ducking for
cover and snap shots NO ONE used the snap shot rule against the rampant Redskins, much
to their character’s disadvantage!
The Law were
down to one man quickly, with one other having his ‘picture took’ so they
required a Big Nerve test despite having the Sheriff still in the action failed
rolling a one!
The Cowboys
managed to shot down an Indian but they too were soon left with town figures as
they tackled the Indians and Desperados, they took a Big Nerve test and rolled
a two. They too skedaddled!
Well it was
just down to the allied Indians and Banditos, the Indians called out let lot
the town to their ‘friends’ who replied with a volley of shots and calls of “This
town aint big enough for you and us!”
It was on
and both sides lost figures and required simultaneous Big Nerve tests...the Banditos passed and the Indians failed (rolling of all things a one!) a victory
the Banditos!
A great
game, everyone had fun and even though we had four players while anyone had
their gang still in the fight everything ran quickly, we diced off all ‘tied’
cards. The verdict was we would be visiting the Wild West again very soon!
Here’s some
pictures of the action...didn't take too many was busy playing!
Our town before the carnage began!

The Indians sprinted into the town and I'Gopi Tu one of their warriors overpowered one of the Lawmen...

Overview of town showing the Lawmen in the town centre and the Cowboys entering town, seen in the lower left and in the corral...

Another overview, the Law still in the centre the Banditos have entered from the road at the top of the picture and are by the bank and hotel, the Indians have entered via the road on the left and can be seen advancing!

Indian Dog Soldier Goshi Wolf then gunned down Little Jimmy! It was looking like a bad day for the Law!

The Indians were in the thick of the action while the other gangs fired ineffectively! I'Gopi Tu seeing the red mist continued into the Town after his hand to hand success only to be hit by both barrels of Deputy Ol' Jacks shotgun! Bystanders in front of the Hotel and Wells Fargo office were horrified at the sight of the brazen Indians!

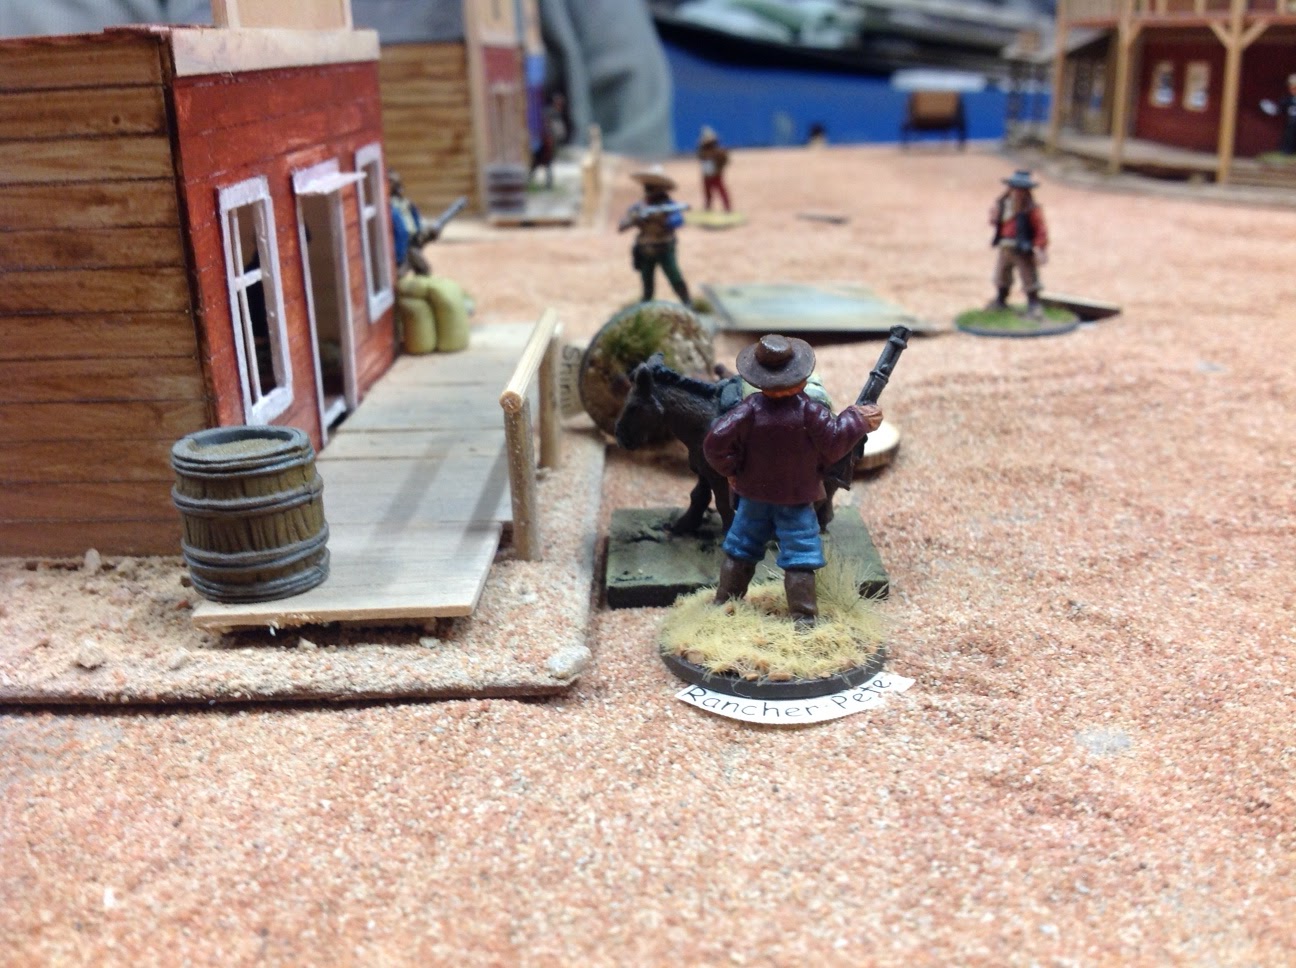
A general melee began in the street in front of the Post Office and the fighting was fierce, Indian Brave Shinii stabbed a Lawman and two Cowboys...firstly Clint

...and then Ben...

...before getting a belly full of lead from Ranch Owner Pete.
At this point with both the Lawmen and Cowboys fleeing after failing Big Nerve tests the unscathed Banditos declared war on the Indians! Five versus three!


During the Game one lawman, one Bandito and one Indian took advantage of The Willoughby Travelling Photography Company's service!

And a group
shot of the TSOGers getting into character!

Adios Amigos!


