So Game 2 of this four player Longstreet Campaign sees Dave and I win the scouting role and electing to defend. The two scenarios combined together are the Railway Embankment and the Outflanking.
I line up my Tennessee men along the railway with plans to place my guns on a nearby hill supported by cavalry and my reinforcements. Dave defends the tree line and a stone wall. Our plan is to hold the first attack and then counter charge the Bluebellies. The Yankee tactic is to blast the railway embankment with artillery while charging the Rebel right.
Here’s our forces...
Alan - Colonel Firefly from Massachusetts (European Service & Artillery Officer &
Friend in the State House) 44 Bases
5th Massachusetts Volunteer Infantry S R 5 Bases
9th Massachusetts Infantry S R 6 Bases
14th Massachusetts Infantry E R 8 Bases
21st Massachusetts Infantry E R 10 Bases
4th Boston Light Cavalry E R 6 Bases
21st Massachusetts Infantry E R 10 Bases
4th Boston Light Cavalry E R 6 Bases
2nd US Cavalry E R 5 Bases
4th Battery Light Artillery
7th Auxilary Art Coy 2 x Howitzer
7th Auxilary Art Coy 2 x Howitzer
Dave - Colonel Leghorn from Alabama (Scout & Cavalry Officer & Indian Wars) 36 Bases
3rd Alabama Infantry E R 7 Bases + Hero
1st Alabama Infantry
14th Alabama Infantry S R 4 Bases
2nd Alabama Infantry E R 8 Bases
2nd Alabama Infantry E R 8 Bases
1st Alabama Volunteer Cavalry S R 6 Bases
1st Battalion Alabama Artillery 1 x 6lbr 1 x Howitzer
2nd Battalion Alabama Artillery 2 x 6lbr
2nd Battalion Alabama Artillery 2 x 6lbr
Peter - Colonel Clampett from Tennessee (Drillmaster & Artillery Officer & Personal Physician) 38 Bases
14th Tennessee Infantry E R 8 Bases + Hero
7th Tennessee Infantry E R 7 Bases
Walkers Legion E R 8 Bases
2/22 Tennessee Cavalry S R 4 Bases
2nd Tennessee Cavalry E R 6 Bases
2nd Tennessee Cavalry E R 6 Bases
Baxters Artillery Company I Batt 2 x 6lbr 1 x Howitzer
Baxters Artillery Company II Batt 1 x Nap 1 x LR
Baxters Artillery Company II Batt 1 x Nap 1 x LR
Stu - Colonel Zook from New York (Political Savvy & Indian Wars) 40 Bases
52nd New York Infantry German Ranger or Sigel Rifles S R 3 Bases
53rd New York Infantry D'Epinuil Zouaves S V 6 Bases + Hero 'old Reliables'
57th New York Infantry National Guard Rifles E R 5 + Hero
66th New York Infantry Governors Guard E R 10 Bases
140th Pennsylvania Infantry E R 10 Bases
2nd New York Volunteer Cavalry S R 4 Bases
57th New York Infantry National Guard Rifles E R 5 + Hero
66th New York Infantry Governors Guard E R 10 Bases
140th Pennsylvania Infantry E R 10 Bases
2nd New York Volunteer Cavalry S R 4 Bases
Harris Light Battery B 1st New York Light Artillery 1 x 6lbr 1 x Howitzer
Let the game begin!
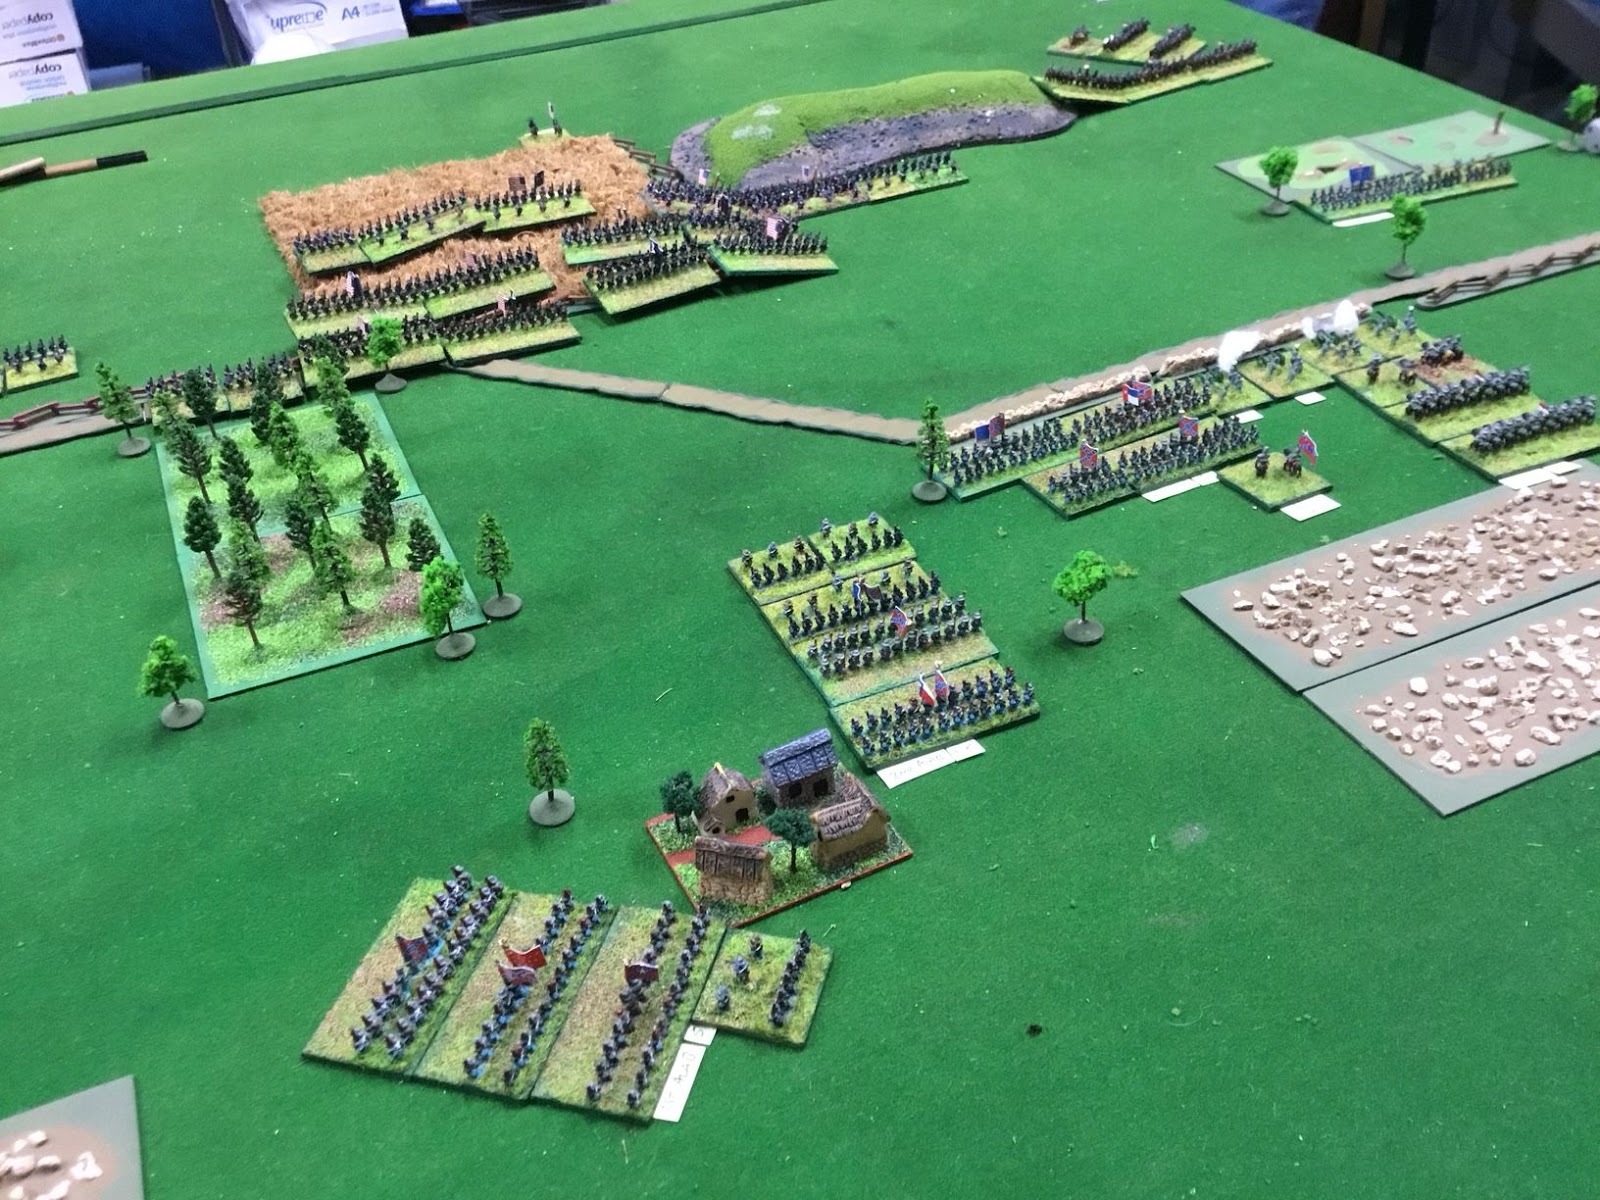
Colonel Leghorn won the scouting roll and chose to defend. The Rebels were well placed behind a railway embankment and a stone wall, in woods and with a nicely placed hill in their centre the perfect spot for a battery or two.The Yankees to the left below just lined up. Colonel Zook's plan was to attack the Rebel right and centre and place all their artillery on the long hill on their own right.

Turn two and the Yankees move forward and the Rebs place their guns on CowHill on the centre of the battlefield, the creek in the foreground near the railway line is Cow Run...

The Rebel right in the foreground they are deploying toward the centre of the battlefield to link up with Cow Hill and their armies left. In the background wave after wave of Colonel Firefly's enthusiastic Yankees advance covered by the hill and fields...
Turn three the Confederates stay to the plan and deploy two batteries onto Cow Hill, beyond the road Yankee artillery can be seen on the move while their infantry advance...

Overview of the battlefield on Turn four the Yankees to the left the Confederates to the right, the 6mm figures look good manoeuvring about the table...

The Yankee right one battery on the long hill is already in action two more are about to unlimber. The measuring stick on the left is the range of musketry and Zook's Yankees are carefully staying out of the range of the defenders...

Meanwhile the Yankee left is moving into charge range. The cover helps them and the Rebel infantry fire is of limited effectiveness...

Turn five and the Yankees bring the gun crews on Cow Hill under fire wiping out a battery as they kill two bases of guns, the return artillery fire is poor even though colonel Clampett is on the spot to direct the gunners

Turns six to ten for some reason I forgot to take many pictures! Perhaps I was thrown off when I split one beer and caused another froth up...not a good night! anyway during these turns the Yankee left launched two successful charges and Colonel Firefly's boys in blue got the better of the Rebs. Colonel Foghorn Leghorn wasn't helped rolling a SIX when the 'They Couldn't Hit an Elephant...' card was played against him on turn eight and he lost a whole turn.
The Union right tried charging up Cow Hill and splitting the Rebel army but they were unlucky as Colonel Clampett's reserve Regiment, Walkers legion arrived in the nick of time to assist the gunners.
The Rebs of Colonel Leghorn straightening their line around turn ten...

The Yankee right turn nine near the top left the 140th Pennsylvania Infantry Regiment can be seen after an unsuccessful assault on Cow Hill...

Last turn, eleven and the game ends in a Confederate Victory, the Yankee's thinking discretion is the better part of valour decided to withdraw from the field of conflict and lick their wounds leaving the ground in Rebel hands. Maybe their commanders feared a Rell Yell inspired Confederate counter attack?
Overall view of the Rebel left at the end of game...

Cows Hill turn 11 the gunners were lucky the reserve Rebel infantry were able to deploy themselves to be art on any Yankee charge! Lesson learned artillery by itself is not impregnable against large units of infantry armed with rifled muskets...

Three pictures of the Yankee left and Rebel right were still in good shape and Colonels Firefly and Foghorn were squaring up against each other as the battle ended...


Battle Summary:
Break Point was 37 Bases
Losses:
USA 20 Bases
CSA 9 Bases
Epic Points:
Alan 5 Campaign Total 11
Dave 4 Campaign Total 13
Pete 4 Campaign Total 9
Stu 2 Campaign Total 5
Campaign Game 3 looks interesting as our forces develop. There are now a few Veteran Regiments but more importantly some units have been whittled down to only a few bases, one being down to just two! These will prove brittle in battle and we're all waiting until 1863 when we can start to create Provisional Regiments!