Wednesday 31 January 2018

The Spark That Ignited Armed Conflict - The Great Antipodean Adventure!

The Newspaper Headline that tuned The Great Antipodean Adventure Nasty!

In the days following the dismissal of Premier Lang's New South Wales State Government on the 11th of May 1932 the streets of Sydney were filled with throngs of people stunned by this highly controversial use of Australia's constitutional powers! The thought of a government's term being cut short on the whim of a lackey of a Monarch half a world away was unheard of and of great concern to many! The more the citizenry mused the more they were angry and the news of the new Premiers deferment of a state election turned the anger of many into fury!

The many Political Factions which had been in existence for years took this opportunity of uneasiness to hit the streets spruiking their agendas and plans on how the state of New South Wales should be governed and in doing so whipped the masses into a frenzy. Seemingly uncontrollable rioting began! The Constabulary on order from the Police Commissioner waded in to clear the streets but their efforts were unsuccessful and there were many injuries! Due to the number of Constables with head injuries they were ordered to discard their military style caps to dye their summer helmets to match their uniforms and don them for protection. Of more importance and in a disturbing escalation of events Constables were also issued long arms from military stocks for 'their protection'.

May 17 and the fighting around barricades erected by rioters in the Rocks District was becoming particular intense. It was late in the afternoon as the shadows grew longer near the defences at the end of Mavis Street that an alcohol fueled mob cheered the darling of the Unions, Mrs Slocombe as she taunted the Police facing them! No one knew exactly what happened next but a Constable was struck, a flaming Molotov Cocktail was passed to Mary Slocombe and their was the sharp crack of a rifle...Mary was killed instantly and with her any hopes of peacefully quelling the rising feeling of the populace against the caretaker Government of Premier Stevens!

Mary's death opened the floodgates and now with the 'gloves off' the crowds armed themselves with every manner of firearm they could lay their hand on...blood thirsty chants rang through Sydney Town and the 18th of May 1932 dawned with a blood red sky...


Next Post the first Great Antipodean Adventure AAR - A Visit to The Governors House!

Friday 19 January 2018

A World Aflame Rules - The Great Antipodean Adventure

Okay I’ve decided to try Osprey’s A World Aflame rule set for this campaign. I’ve completed three test games with the rules will use them with a few clarifications/modifications. I’ll run through them with the rest of the Ol’ Gits when we start our regular sessions later in January and see if they agree/are happy with the choice. I think they’ll be happy...If not I’m going back to the drawing board.


I picked A World Aflame as not only are they written for the period The Great Antipodean Adventure is set in but they are simple and will lend themselves to the colourful gaming which I believe all this hypothetical interwar type stuff is about. You want to have your tongue set firmly in your cheek when your All For Australia League’s 1st Volunteer Rifle Company throw themselves into action against a force of armed Police to capture that vital communications hub i.e. the street side Phone Box!

I’m not going to write a full review on a set of rules that were released several years ago as there are several already online. These rules look good for the social games we’re looking at but they could be have been more comprehensive. I’m just giving you my thoughts on each section of the rules. Oh and just so you know there is no pre-measuring allowed.

What you’ll need, well it lists all the usual suspects from figures to an opponent(!) but there are a few ‘items’ that interested me;
-Arrow die to use for scatter, don’t have any so going to use a D12 and a clock face (noon pointing north or a designated table edge).
-Average Dice well I haven’t used these suckers for years and at least one of the Ol’ Gits said “What are they?” I for one don’t mind seeing Average Dice in play, I don’t have any but it’s easy 1=3 and 6=4. Nice inclusion for me but think I may be in the minority here!
-Chance Cards well I like this idea to include randomness into the game as well of some of the lightheartedness I mentioned above. A selection of sample cards is included in the rule book and you are encouraged to create your own.  Being sick of making cards after doing them for TW&T, IABSM and Longstreet what I’m going to do is used regular cards with a chart listing what each one means and I’ll update the chart for each game...easy. Here’s my only real gripe I have with the rules, I know it’s hard to include cards that cover every conflict and imaginary conflict in the 1919-1938 period but a lot more support should be offered here by Osprey even if it’s just with a larger selection of cards available online with generic ideas, the author himself says “I now have far more cards than I’ll ever use” well Mr Eaglestone how about sharing them online as if they aren’t directly useful they can at least give gamers ideas for their own?
No scale is given but it’s not an issue for our skirmishing games.
There’s an explanation of unit organisation from section upwards which is straight forward and is helpful in setting up games.
A Unit sheet is supplied as you need to record a units strength, quality, leader ability, morale and ammo levels etc. In my trial games I only needed to record ammo the rest was just stuck to the base of the unit leader or covered with markers (morale).
Command and control is included and this is good as so many games just leave this out (even abstractly) allowing our toy soldiers to do whatever we want when we want 😒. There’s levels of command, squad unit level where anyone within 15” of the leader is in command and that commander needs to be within 5” of the next level leader to be in command. This can be repeated depending on how big your army is! Units start the game with an overall written order/directive they must follow to the best of its ability until changed by a new written order which must be received from the command at the next level at 5” range, by a runner or phone/radio then that must be followed. This order can be as simple as ‘capture the phone booth’ or 'exit board south edge', this process will probably be academic in our TGAA scenarios.
Building strengths against fire and weather (affects visibility and smoke drift) are included which are nice touches.
They are suggested victory point allocations again helpful in creating scenarios.
The turn sequence is:
-Draw a Chance Card
-Carry out initiative checks with moves and firing
-Carry out Melees
-Final Morale checks
The initiative checks are carried out in pairs, I pick a unit you pick a unit we roll for initiative winning unit goes first loser second. You continue to do pair by pair the same way until one player runs out of units any extras then carry out their actions in any order the player desires. I’ve not played anything like this before and it worked well.
Movement covers foot and vehicular units with units having a base movement amount which is augmented by average dice adding extra inches. Nice to see bicycles are included. A cool rule for movement but listed in the Anti-Tank section is the ‘curiosity test’ where vehicles approaching obstacles or structures need to roll to see if they will halt as they are suspicious of said obstacle or structure...why isn’t this in every set of WW 2 rules where we see tanks racing through towns or up to trench lines fearlessly! In the Movement area Engineering type activities like entrenching are listed as well. 
For Firing the full range of weapons is covered from hand guns to artillery and smoke is dealt with too in this section (I like how smoke can be generated by fires as well as smoke shells). The mechanics of firing is stock standard with a hit number for each weapon at various ranges and then a number of dice each weapon rolls, these are modified successful results are kills. All looks pretty deadly. The bit I like here is units have limited ammo (though they can be resupplied). There’ll be no firing at extreme range as you husband your supply of rounds. Running out of ammo unsurprisingly affects a units morale, great rule! This will entail bookkeeping or markers but the trade off in tactics and play in my opinion are worth it.
Looking at the ranges on the firing table I think they relate to ‘realistic’ in the field ‘effective’ maximum ranges rather than maximum weapon ranges. Plus they play well on our 6' x 4' tabletop.
There’s a basic set of aircraft rules but in The Great Antipodean Adventure these may not get a run in as most of the action will be in the street of Sydney and terror bombing of cities was still a way in the future...but I suppose you never know!
Melee is pretty simple and deadly. Cool that the attackers need to pass morale to charge the defenders and if successful, the defenders then need to take a morale test to see if they’ll stand their ground. If both pass the melee goes ahead, each figure rolls a D6 with modifiers and the highest wins. There is a maximum of two figures attacking one.
Morale rules worked well. Every unit has a morale rating roll a D6 add/subtract the modifiers and a 5+ result is good. There is a need for a markers here as your units can be 'confused', 'demoralised' and 'routed' plus taking a morale check in a previous turn has consequences in the current turn an interesting idea as pressure can build up on a unit turn to turn. May simplify some this for The Great Antipodean Adventure!
The rest of the book contains 3 scenarios, the above mentioned sample cards and a unit roster template.
There’s no QRS, a sad omission! Working on one now (got some guidance online)!

The book is well printed. The layout is good but a few less glossy pictures may have allowed for more space for the rules to be fleshed out or more scenarios to be included. It’s a funny but the PDF version of these rules actually would have cost me more than the AUST$14.00 the printed copy did (thank you Book Depository for the free shipping!).

Next time I write on the TGAA I’m hoping it’ll be an AAR.

Thursday 18 January 2018

Longstreet Demo Game -TSOG Meet Group North

A couple of weeks ago the TSOGgers trekked up to visit Group North and run a demo game of Longstreet. After some enjoyable Thai for tea we set up the Railway Embankment Scenario with 'balanced' forces. We used 1863 card decks so the total number of cards for each side was balanced. The Rebs were attacking. I umpired while passing on some words of advice and Stu and Dave acted as advisers to Marcus and Steve. Well we experienced a rollicking game with both side trying to turn the others right flank. In the end due to judicious use of cards the Confederates scored a victory.

Some pics from the night!

Yankee cavalry advancing the E means they are Eager (good on the attack) and R means Recruits (average for  shooting and combat) 

The Confederates cross the fields using them as cover as they approach the Northerners

A Reb battery guards the flank of the attacking units

The Yankee cavalry approach the Rebs flank

A couple of pictures of the Rebs destroying the Yanks left flank...
The Confederates use of Confusion and Old Rivals cards allowed them to score a massive attack against vulnerable Union troops.


This game showed you really need to get to know you cards. Interestingly the Move or Charge option wasn't really a point of contention which was good! Finally it was mentioned firing was ineffective and a couple of thing here almost all the troops were recruits so hitting on 5+ rather than Veterans and I've never seen such poor rolling for artillery in my life! I think if we're asked again we'll visit Group North again for another round of Longstreet. 

Monday 15 January 2018

Crossley Armoured Car - The Great Antipodean Adventure

Okay a bit of eye candy to keep the interest up! Here’s a uniformed command group from the Anglican League with their civilian clothed troops accompanying their shiny new Crossley Armoured Car into action!

I bought a selection of three Matchbox vehicles for $6.00 each, a Crossley and two Fords...they're actually 1/48 but fit in perfectly.

Here the Crossley in civilian form...

Here's my armoured rear cab and HMG turret...

The armoured car conversion ready to go...

The finished product in full colour in situ!

Thursday 4 January 2018

First Improvised Armoured Vehicle - The Great Antipodean Adventure

With unrest rife in the streets of Sydney Government and Revolutionary groups continued to clash. Initially the military were uncomfortable firing on civilians but these feelings evaporated as the crowds grew in animosity became armed and finally inflicted casualties on their units.

With the situation escalating more and increasingly deadly weapons were deployed by all parties. This lead to the introduction of improvised armoured vehicles to increase their men’s survivability in the face of a storm of lead...

Here is a group of men from one of the All Australia League’s Volunteer Rifle Companies advancing around an armoured Crossley Tender.


Last year I bought a ‘lot’ of 1/56 vehicles off EBay attracted especially by a Trenchworx Crossley Tender and Warlords Opel truck, BMW M/C Combination and Kubelwagon. Unfortunately the seller neglected to mention the Crossley was missing the firewall, lamps and steering wheel! Anyway I made a simple firewall to complete the kit. The lot included extra German drivers with steering wheels so I adapted one of those to fit so I just need to keep my eye out for some suitable lamps/lights. I am a fan of Trenchworx kits but there were a few fit issues here; the wheels were very loose and the passenger cab side rails lugs needed a lot of ‘shaping’ to fit correctly not sure if that’s how this would be how you get it from Trenchworx’s though! As it turned out is it’s eminently usable  for 1932.

The Crossley ready for use...

But the vehicle will also double as an improvised APC I made a simple ‘sheet steel’ front end and rear cab...I may add an LMG to the passenger side of the front shield if I can find one...this whole lot still needs a 'black wash' to bring out highlights.


For my VSF games I scratch built the below vehicle, without the mudguard MG's I think it too could pass as a 1930 improvised armoured vehicle on a sedan so I'm thinking I’ll build one chassis that I can then add various armoured superstructures too???

I’ll be keeping my eye out for cheap 1/48ish civilian die-cast vehicles and kits to use in games or even as scenery. Vehicles will not be the norm for the games I'm envisaging but they'll be a nice distraction when included!


Anyway going to run a trial of my first scenario with the A World Aflame Rules to test them out, used FUBAR last weekend and that worked okay still I like some of what these offer period wise! Slowly getting there.

Monday 1 January 2018

Devotion to Duty and No Courts Martials - Frigate Captains FTW

A hastily organised scenario, three French of the line (actually, a first rate, and two 3rds under Commodore Darling) attempt to break out of Brest and escort two troopships into the bay of Biscay for destinations across the Atlantic. The blockading Royal Navy Fleet was broken into an inshore squadron of 4 frigates, one a Razee (Alan) and a supporting force of two 74s over the horizon (myself). The rough victory conditions were that if the french could get a troopship away they won, anything else was a Brit victory.

Ships are the 1/300th scale VICTORY collection, some cut down, some shortened.

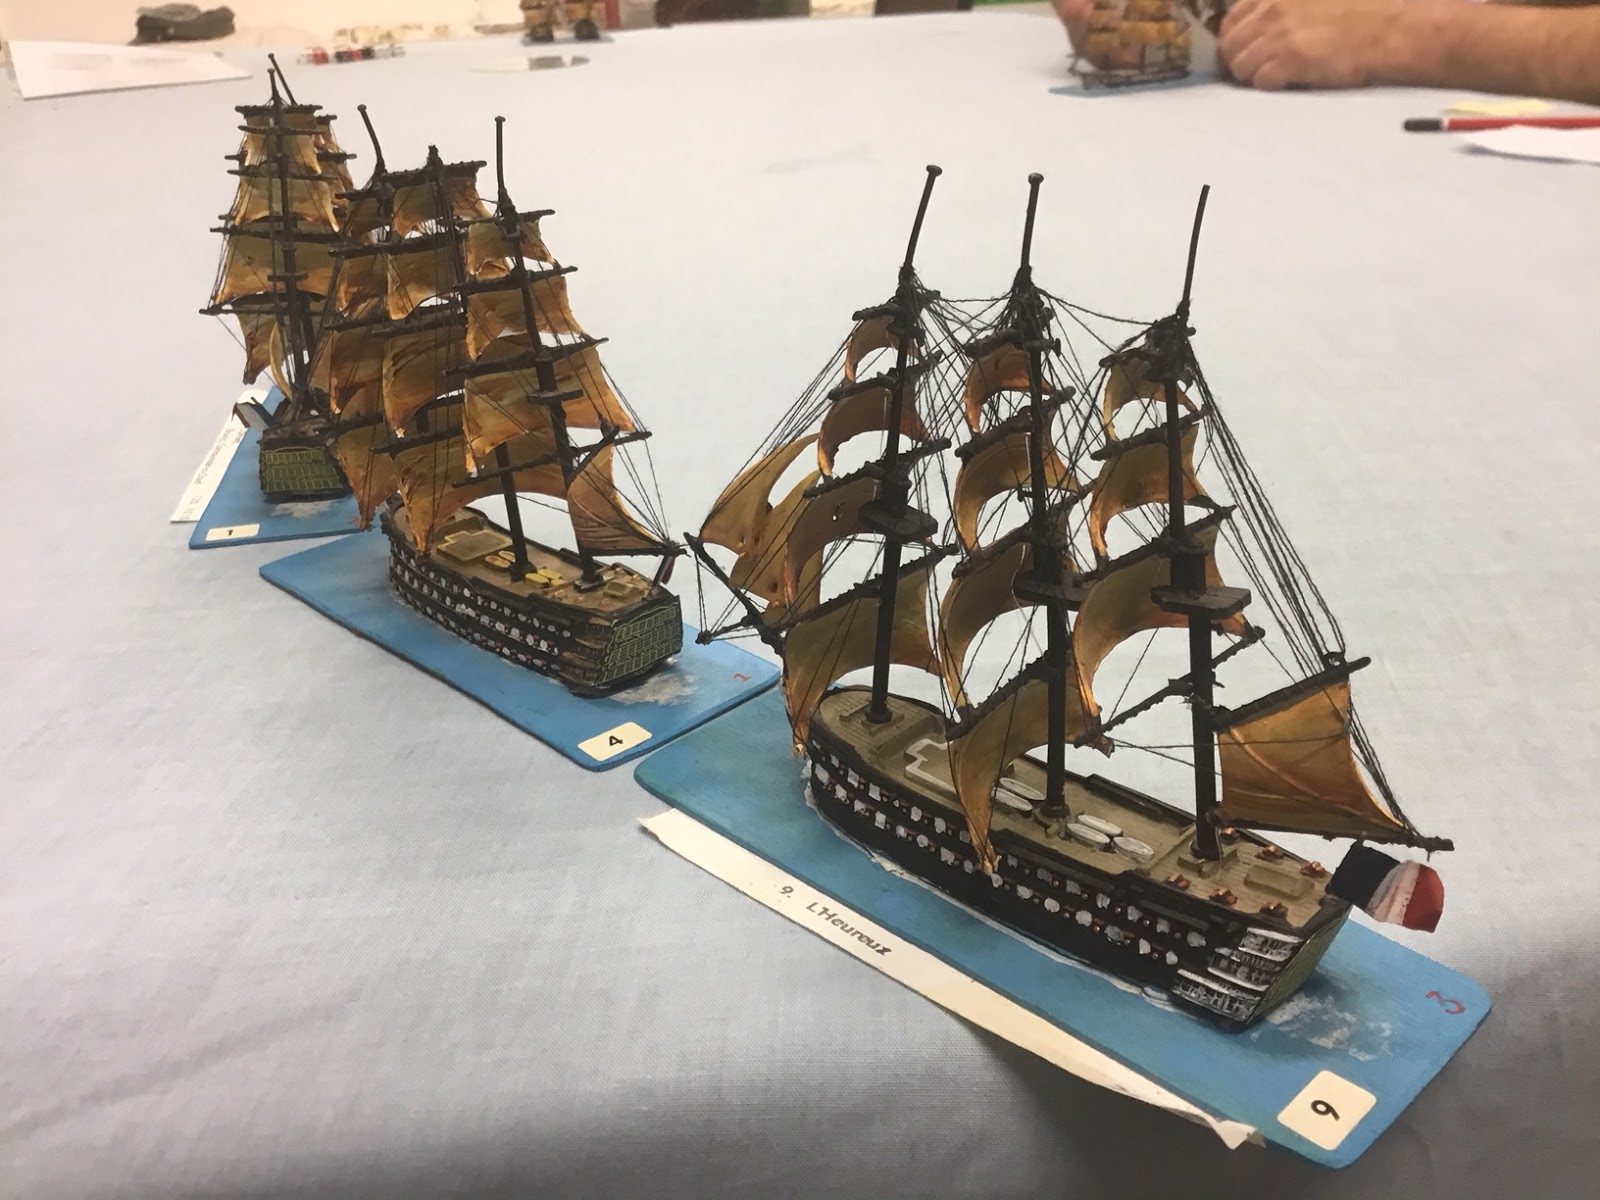
The French ships of the line lead out. The inshore RN squadron has observed the preparations, signaled the offshore fleet and lies waiting to delay them

Looking offshore from the Brest roadstead, the RN frigates loiter just upwind to the right, the two transports (proxies) astern of the ships of the line. Wind is blowing steadily from the right side of the picture (from the north). Brit station keeping is a bit tardy !

Picture looking inshore. The supporting RN 74s. They entered the game late and somewhat randomly. 

The frigates (near to camera) spot the opportunity to cross the T and form line of battle


To take the first broadside from a french first rate. The French broke the gentleman's agreement and fired on the frigates. 

The frigates put in a meagre reply, but are unable to cross the T, end up starboard to starboard.

The French bear away and engage in an uneven broadside battle, the RN unable to disengage quickly enough to windward. We use modified Trafalgar (GW) rules but have changed the sailing arcs to reflect a bit of reality. The frigate (right) is close hauled on the port tack and her only other option was to tack and present her stern to the enemy.

Overview, the French line bearing away to port, the frigates upwind.

Looking inshore again, from the offshore RN squadron. The frigate pointing south (right) is already out of action, the frigate astern of her is about to be out of action, the razee is furthest upwind (left) while another frigate soaks up the french fire.

But, while the frigates sacrificed 2 of their number for no appreciable damage to the french line, the French realise the danger to their transports and attempt to turn away to port (left side of picture) as the other RN frigates skirt around upwind. The two transports nearest to camera in mortal peril.

Finally, success, the surviving frigate stern rakes a transport with the second transport on her starboard bow ready for the next volley.

Looking offshore, the two 74s join and follow the upwind path to get around the rear of the french line, navigating around the two frigate hulks middle right of frame. The French first rate (furthest from the camera) is frustrated trying to tack to rejoin the fight and her compatriots are also struggling to come around. Near left, on the table edge is the RN Razee, having delivered the killing broadside to the second transport is bearing upwind again on the port tack, wind is from the right. The ship nearest the camera is a frigate pointing upwind, half way through a tack. The second French transport has been disabled and victory to the RN.

playing on a few turns, the frigate (foreground) shielded by a 74 as the third rate frenchie runs for cover under the lee of the two destroyed transports (left). The other Brit 74 bow just entering the pic near right 

same time as above shot. Two French having tacked are rejoing the battle at the rear of the pic, to leeward a destroyed RN frigate. Two dead transports are line abreast on the left, the scurrying French 74 hugging the table edge sailing away from the danger, only three Brits left at this stage, two 74s saling SE (roughly line astern) and the frigate closest to camera, the rest are hulks. 

The French rejoin, the Brits have to tack to avoid running into the Brest roadstead and become the prey to the French of the line. The fast frigate (down to one light cannon) has moved astern of the destroyed transports seeking escape downwind, but then pluckily turns to deliver a broadside to the French. The Brit 74s have split, one running west away from the camera, the other tacking and currently pointing north, to the foreground right in the picture.

battle ends as the Brit 74 is about to tack again (nearest), the other 74 is half way through tacking (tacking takes two turns, one to turn into the wind, one to gather way on the new tack) but in doing so is able to bow rake the french 74. The french 74 will then pass under the Brit stern and return the favour with a stern rake. Ouch.

Summary

Both the Brit and French Commodores employed unusual tactics. The Brit for attempting to engage first rates with Frigates and getting destroyed. The French for being in line astern and allowing the frigates to skirt upwind and engage the precious transports. Two transports lost in two turns.

Probably not a very realistic scenario, but the rules seem to be working, the game ran smoothly, the simultaneous firing in every player turn seems to work (and is realistic) and the importance of the weather gauge is obvious. Thanks Pete and Alan for the excellent night of dice rolling.