Saturday 24 July 2021

Operation Barbarossa Germans vs Soviets Chain of Command AAR

We played Chain of Command last Monday night for the first time in ages, we used the Take an Objective scenario straight from the rules. We haven't played these rules for quite a while so this was really a reintroduction to them, we made a few errors early on but they did not effect the overall flow of the game or the result!

Soviets advancing supported by a mighty BA-10!

The Forces

Soviets - Attacking
Core Platoon
1 x Full Additional Section
1 x BA-10
Pre Game Barrage

Germans - Defending
Core Platoon
1 x ATR Team
1 x Mortar Team
1 'Length' of Barbed Wire

Our Battlefield, the Orthodox Church is the Soviets objective and they will enter from the far side of the tabletop...

The Patrol Phase

The Soviets were very aggressive during this phase moving their Patrol Markers deep onto the tabletop and ended up with one Jump Off Point well placed behind a building very close to the objective building! The Germans were conservative and three of their four Jump Off Points were right alongside the objective.

The AAR

The Soviets began the game with a Command Dice roll including a double 6, yes they were due a second roll before the Germans even get a chance to touch the dice, everything was looking good for the Ruskies! Two Sections of Reds aggressively deployed on their right near the road and a third one set up to support the BA-10 armoured car on the left! Hampered by the Soviet barrage the Germans slowly deployed two Sections and their Platoon Leader and they struggled facing the advancing Soviets! Not looking good for the Jerries!

But at this point with the Ruskies threatening the Germans had accrued enough CoC Points to end the game turn which also (and importantly) ended the effects of the Soviet Pre Game Barrage. Without this hampering their deployment the Jerries were able to place the balance of their force rapidly. Two more sections, an ATR Team and a Mortar Team were soon in action and well placed, an MG34 in the church tower was in a position to hit any of the advancing Soviet troops. With these reinforcements and some poor Soviet Command Dice rolls not to mention the timid advance of their BA-10 the whole feel of the action changed and  it was now the Soviets under pressure!

Disregarding of the sudden appearance of more Fascist the brave Soviets pushed forward into a hail of MG34 bullets (luckily for them the size of their Sections made them less vulnerable the Germans who needed to get a lot of hits on each of them to slow them down)! The Russian right by concentrating their firepower was able to knock a German section out of action but they received little support from the left which was inching forward hampered by poor dice rolls. It turned out that this was the high water mark of the Soviet advance. Aided by a double 6 in one of their Command rolls and then using two consecutive turns the Germans unleashed a 'mad minute'! Under heavy fire from the remaining Germans they the Ruskies sustained enough damage to put three of their five Sections effectively out of action and their BA-10 after suffering an ATR hit retired to the edge of the table negating several turns of movement in one go.

Facing this dire situation the Soviet Officers shot their Commissar and then retired! The German Officers rejoiced but ordered their men to dig in knowing the seemingly endless horde of Soviets would be back! 

Some pictures from the night...

The first Germans to arrive was a Section with a Senior Leader who covered the German right...they faced a daunting number of Soviets.

The second German Section to deploy who would hold their position successfully for the duration of the game can see a Soviet Armoured Car approaching them through the wheatfield...

The Soviet masses push forward, the jump off point just behind the barn/fence located at this part of the Battlefield was a big bonus for the Reds!

The German section that set up on the road along the fence line, their firing was crucial slowing the Soviet advance.

Early in the game German deployment was hampered by the Soviet Pre Game Barrage, at this point two German Sections were facing four Soviet Sections and a BA-10!

The mighty Soviet BA-10 advances!
(with no German armour available it is quite a mighty vehicle!)
Its first three move rolls (using 2D6 so it could fire its MG got results of 3, 4 & 3 even doubled for being wheeled with the negative wheatfield terrain modifier it moved at a snails pace!

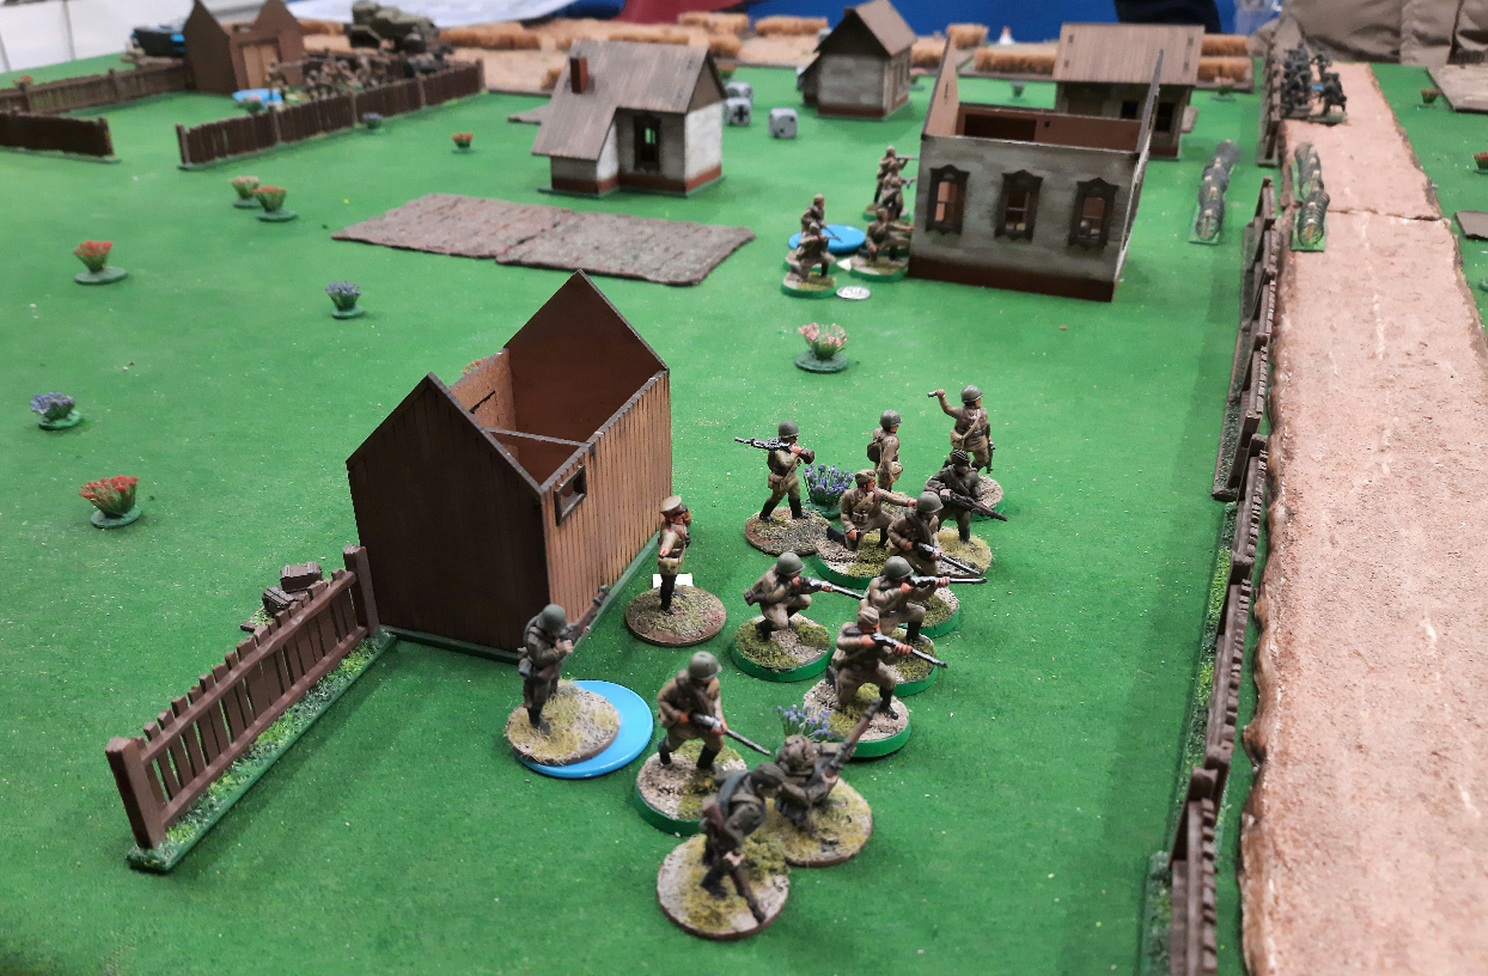
A close up of the Section accompanying the BA-10

Supporting the BA-10 a Soviet Section advances through a fenced field...
the blue discs indicate shock!

An overall shot of the Battlefield at the height of the action;
From the Soviet point of view a full German Section had been taken out of action, they had three Sections pressuring the German left but their right was only crawling forward. From the Germans point of view their MG34s were starting to hammer the Soviets and they scored a couple of hits on the BA-10 with their ATR one of which pushed it back!

The Soviets at their Zenith, their advanced stalled through a mixture of poor Command Dice and German MG34 firepower! The yellow disc indicates a pinned unit.

A view of what the MG34 crew in the church tower could see to their left...

...and to their right, a target rich environment to say the least!

Well what initially looked like a Soviet walkover turned out to be a German victory, there were a few aspects that delivered the result; German MG34s, the BA-10 rolling a movement total on two dice of 4 or less for three important activations in a row and lastly the Soviets great early Command Dice rolling turned to shite! In hindsight the Soviets would have been better off deploying their BA-10 on their right supporting infantry being placed from there most advanced JOP. We will be playing CoC again in a couple of sessions time now we are again up to speed with them with another Russian Front game this time set later in the war!

Sunday 18 July 2021

WW II Normandy 1944 British vs German AAR - Iron Cross Rules

Catching up on games from a few weeks ago still! We played a game using Great Escape Games Iron Cross rules on June 7th, the date fitted playing a game pitting British against Germans in Normandy! We choose the 'escalating battle' scenario from the rules. We played with 12 objectives made up of 9 Urban areas and 3 Bridges with the side controlling the most after 6 turns winning!

German Infantry and Armour 'On the Move!'.

The British had an infantry force with mortars supported by 3 Sherman tanks whilst the Germans had a core of infantry supported by HMG's, mortars, a PAK 38 and 2 Pz IV's.

The British got the initiative and we started! Both sides deployed their forces in three groups facing the main objectives. The British centre and right got the jump on the Germans getting to the stream first while the German right and the British left were both slow to advance.

A British Sherman secured the central bridge while infantry from both sides occupied the buildings near it and began a deadly firefight! The German's PAK 38 lost a duel with Brits Sherman which received a healthy amount of mortar support! With their anti tank support gone the Germans defending the central village on their side of the stream were getting hammered and the British found themselves dominating the centre of the battlefield. Unlike their British counterparts the German mortars had little influence in this area of action!

The German left had been beaten to their main objective, the bridge crossing the stream and the British pushed a Sherman and infantry boldly across it! Perhaps a little to boldly both the Sherman and its supporting infantry section were smashed by a swift German counterattack by a full platoon of infantry supported by a Pz IV. Still the British in this area controlled a village and the important bridge while the Germans had secured only a single urban area. Any attempt to take on the Tommies around the bridge was curtailed as their Pz IV was redeployed to their crumbling centre!

The situation on the German right was faring much better, the German mortars slowed the British foot sloggers inflicting losses leaving their countrymen able to occupy their objective the bridge and accompanying village.

Everything now rested on the centre! The Germans led by a Pz IV launched an attack to capture the bridge and push the British back! Here the roll of the dice played a decisive part! Trying to secure a second activation the Pz IV failed, yes it was an anything but a 'one' situation and they got a 'one'! The British pounced and their reaction was successful! They took out the Pz IV! But not only did they successfully react but they seized the initiative and they used it well! Their infantry secured the whole of the town and to cap off that coup on their left they at last had a success their Sherman getting in a flank shot on the Pz IV there causing it to brew up!

At this point the Germans conceded they could no longer face the British juggernaut (well not really a juggernaut but it sounds good!) announcing they were withdrawing from the battlefield! A British victory!

Some pictures of the action!

The battle begins as the first plucky British infantrymen enter the fray!

The British left starts well but German mortars zeroed in on the troops on the road pinning them and inflicting losses they retired to the nearby village! Note the small bullets represent each command token played by that unit/vehicle for the turn.

The German right, a platoon of infantry with MG and Armour support move slowly forward!

The British win the race to the central Bridge, both sides have infantry in the town and the Germans have deployed their PAK 38 covering the river crossing! The small dice represent 'hits' on each unit/vehicle and the large bullet represents a unit/vehicle that has failed an activation test and can not try to activate again in the current turn.

The German PAK 38 crew were deployed and awaiting any British attempt to take the bridge! They took a shot and missed, they were then pummelled by HE fire from both the Sherman and the British mortars!

The German left encounter greater success against the British advance their infantry faced off against the British armour...

...and they Panzerschreckt crew proved their metal, scratch one British 'Ronson'!

They then dealt with the Tommies that had been supporting the tank, the British right push had been blunted!

The Germans then redeployed their armour and attacked to capture the main town and bridge!

Here the Dice Gods intervened the British destroyed the Panzer and then their infantry swept across the bridge and the whole town was in the hands of the Allies!

The British occupy the town! The German centre is in tatters!

After they captured the town the British Sherman on their left daringly swept forward to get a flank shot in on the Pz IV there...

... and it was successful, yet another Jerry tank 'brewed up'!

A view of the German HQ section and their mortar battery in the distance the central town can be seen, along with the wrecked PAK 38 and burning Pz IV! It was at this point the Germans decided they were done for and began to retreat! 

The tabletop at games end, British to the left Germans to the right...

After playing 1914 previously to this everyone picked up the command token/initiative system quickly. It took a little longer to play than I expected but despite the Germans throwing in the towel early we would have had a result in our normal allowed playing time. These rules play well and we will be using them again! I look forward to getting out my 10mm Soviets to face off against the Jerries! It was pointed out in the post game discussion he who has the last tank(s) has the advantage but I think that's pretty historical! It is a pity these rules are not really being supported by Great Escape Games but I have been in contact with another group here in Australia who really enjoy the rules and have developed them including features like artillery support that are not in the core rules. I now have these updates and will definitely be using them in the future!

Okay only one AAR to catch up our Blucher Waterloo extravaganza I'll get to that soon!

Wednesday 7 July 2021

61 - 65 Rules AAR #8 - Looking for Hats Scenario 1863!

July 4th long weekend in the USA so we thought we’d play an American themed game, out came the 61-65 Rulebook and a bunch of 28mm ACW Miniatures! We played the 1863 scenario Looking for Shoes (renamed Looking for Hats in honour of the Susquehanna Hat Company, a flimsy link will soon follow 😃!), we based our game in the lead up to Gettysburg as Early’s Division of the Army of North Virginia advanced towards Wrightsville on the Susquehanna River late June 1863.

Federal gunners directed by Lieutenant Harrison labour to reload their might napoleon cannon!

Forces (as per Rulebook scenario, Looking for Shoes)

CSA, Elements of Rhodes Georgian Brigade Cpt Jebodiah Galloway & Lt Neudegg
8 x Units (7 + 2), 3 Veterans and 5 Volunteers plus 8 Leaders

USA, Various Local Militia and Federal Army Units Cpt Ulysses S. Darling & Lt Harrison
6 x Units at full strength (8 + 2) 1 Veteran and 5 Volunteers plus 6 Leaders
1 x Gun (4 crew).

The Situation
June 28 and Rhodes Brigade spearheads the Confederate run to capture the mile long bridge at Wrightsville that spanned the mighty Susquehanna River, the mighty mile long bridge at Wrightsville leading to the far north of the Union lay ripe for the taking!
Captain Jebodiah Galloway led his Georgians along Carlisle Road with a plan to encircle any of the Federal Militia he may engage that had been reported in the area. He was sure he'd be across the Susquehanna before nightfall leading the rest of Rhodes Brigade to victory! He boldly boasted to his men, "Tarnation if I wont be donning a new bonnet from the Susquehanna Hat Company while chowing down on my grits tomorrah morning Boys!"
Meanwhile recently promoted Captain Ulysses S. Darling had just been put in command of a rag tag group of Units and had been told to delay the Confederate advance on Wrightsville to give engineers time to blow the central section from bridge to block any movements by the Rebels north of the Susquehanna River. He planned a mobile defence based around the Napoleon cannon he had been supplied.

The AAR

Sticking to their plan the Southerners advanced on a wide front either side of the Carlisle Road looking to envelop the Yankees, in turn the Federal forces deployed around the buildings in the centre and behind a fence line on their right.

The battlefield at the end of turn one the Federals are in the foreground and the Southerners can be seen advancing from the far edge...

First blood was drawn by the Federals but the Confederates advanced steadily forward! They secured several buildings and pushed the Northerners from all but one they had occupied.

Both sides advancing into contact Federals to the left and Confederates to the right...

Captain Jebodiah Galloway urges his me to victory!

The Union Commander then deployed his gun in a position that dominated the the Rebels centre and left while his veterans advanced down the Carlisle Road and 2 Units of Zouaves swung to engage the Rebels right wing. The guns first round caused Confederate casualties and a rethink of their plan!

Zouaves advance!

The Federals Gun is deployed and belches flame and smoke (imagine that in the picture) the first round takes out a couple of Southerners (indicated by the skull and crossbones silver disks)...

The Confederates quickly react to the big gun and cunningly place skirmishers to cover the flank and skilfully redeploy their other troops!

The Southerners now moved to advanced half their force on their extreme left covered by skirmishers while their right struggled to hold off the rampant Zouaves!

The Union Zouaves are proving to be a pesky nuisance to the Rebel right flank! Both sides take losses but in this position the Yankees have the numbers.

Confederates mass toward their far left (confusingly to the right in the picture!)

The Union gunners kept up a deadly fire using grape and to clear the annoying Confederate skirmishers from their field of fire!

But the Union weren't having everything their own way a group of Southern skirmishers had turn their left threatening Captain Darling and the other Officers, a whole unit was diverted to face them!

Losses started to mount on both sides and by turn five the tide began to turn in favour of the Federals! To counter the Northerners ascendancy on their right and in the centre the Rebels began to advance their left out of the Napoleon's field of fire. Meanwhile the Union Gun was proving pivotal, the crewman laboured hard and on their own had inflicted almost a quarter of the Rebels casualties!

A ferocious duel broke out along the Carlisle Road Georgian infantry led by skirmishers took on Union veterans supported by fire from a nearby barn!

The Rebel left advanced!

At this juncture a well timed charge by the Zouaves and an accurate aimed volley from the Federal Veterans on the Carlisle Road pushed the Southerners to their limit and they broke withdrawing from the battlefield!

The Zouaves about to charge to glory in the lower right they can be seen facing a worn down Confederate Unit which they broke!

An accurate volley from Federal Veterans along the Carlisle Road cleared it of Southerners! This broke the will of the Confederates, they quickly withdrew!

The Susquehanna Hat Company was saved as was the integrity of the whole of the Union, Captain Darling and Lieutenant Harrison were applauded...anyway Rhodes men had more important fish to fry further south around the town of Gettysburg!

It was a great night and until turn six both sides were in with a chance to win. Importantly for them the Confederates wore down the Federal skirmishers giving them an edge but the Union forces placement of the gun hampered their foes while their bold advance on the right sealed the Rebels fate! These rules even though not perfect are ideal for our Monday night sessions, they are a relatively simple and well set out, they feature lots of action especially once the forces from both sides close and importantly they have a good ACW feel. Still despite having played these rules many times we still came up with a few questions which I’ve sent off to be cleared up! Something different comes up each time we play.

Thanks to Al, Dave and George! Next ACW game outrageous fake facial hair, cigars and Bourbon will be compulsory!

Saturday 3 July 2021

Another Jacobite Skirmish - Song of Drums & Shakos AAR #9

Our group played a second Jacobite themed Song of Drums and Shakos game last Monday! We chose the Reinforcements scenario from the More Song of Drums Rulebook. Maurice and I girded up our loins and reprised our roles as the Redcoats from the last game while George and Alan did a bit of Caber tossing in preparation to take up their positions as the Leaders of the Jacobites!

The Situation

A British Detachment eager for revenge after recent Jacobite successes attacked a group of cornered Highlanders in a picturesque Glen. They suspected these were the men who had successfully raided a supply convoy recently in the area, little did they know this handful of defenders were but part of a larger force most of whom were foraging when the battle began. The scene was set for an exciting action!

The Forces

Attacking:
The British 414 points
1 Leader (Lieutenant Maurice) 60 Sword Pistol Q3 C2
1 NCO (Sergeant Darling) 42 Musket Sword Q4 C2
12 Infantry 26 = 312 Musket Q4 C2

Defending:
The Jacobites Initial Force 160 points
1 NCO (Alan McDreamy) 32 sword Q4 C2
3 Clansman 32 = 96 Musket strong Q4 C2
1 Clansman 26 = 32 Sword strong Q4 C2
Jacobites Reinforcements 338 points
1 Leader (Leader of the Clan McGalloway) 48 strong sword Q4 C2
5 Clansman 32 = 160 Musket strong Q4 C2
5 Clansman 26 = 130 Sword strong Q4 C2

The AAR

The British with the initiative entered the Glen marching in magnificent formation and advanced steadfastly toward their foes who were cowering in a stone walled enclosure. The defenders Leader Alan McDreamy roused his lads into action and they scored early success flooring a couple of Redcoats from Lieutenant Maurice's Detachment! Undaunted the British continued on and their volley fire was devastating cutting down three of McDreamy's four defenders.
Unfortunately for the Highlanders their fellow Clansmen were slow to react to the sound of battle and came to their aid in dribs and drabs and while Lieutenant Maurice's men entered the Rebel 'Redoubt' Sergeant Darling's stout fellows stopped all but a couple of the returning Highlanders from assisting McDreamy!
It was soon fait accompli and the British succeeded in their objective and held the Rebels position!

Okay at this point the British had won the game by the scenario victory conditions but as the night was young and there were still kilted fighters entering the play area and eager 'to have at the British' we played on! It was not pretty the Highlanders were soundly beaten!

Some Pictures

Alan McDreamy rallies his stout men to face the oncoming Redcoats!

The Redcoats in impressive formation and ably led (from the rear) by Lieutenant Maurice approach the Rebel Stronghold!

The Jacobites last stand in the 'Redoubt'...McDreamy and McHairy fight to the last!

Well not quite the last, once McDreamy is struck don by several Heroic British Privates, three actually! Mc hairy flees from the position! Game over...

Positions when we decided to play on...

McHairy tries to recapture the 'redoubt' single-handedly and fails!

The widely spread returning Highlanders are easily repelled by the British...

...but not before taking a couple of casualties...all in all a good day to be British!

This was like all our Song of Drums and Shakos games fast paced and full of action. We have played this scenario before with the defenders being successful however this time the Dice Gods were against the Jacobites their reinforcements came on in small numbers (the best they managed once was three out of the available five per turn) and they entered widely spread out! So our Jacobite games tally stands at One Win for each side out of our Two Games!

I still have a couple of reports to write up for our Blucher Waterloo and an Iron Cross WW II games, I’ll get them up as soon as I can! Oh and we're up for some ACW action on our 5th of July get together!