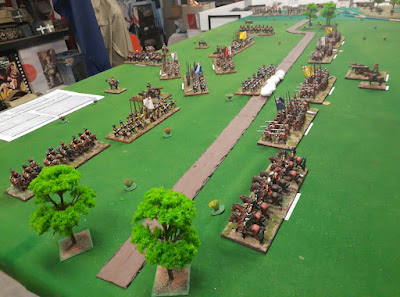
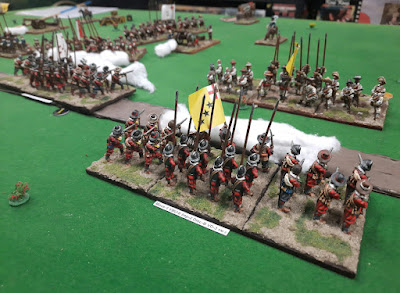
2nd of May Dave hosted a CoC PTO game for us, turning over to Dave...
The first US offensive in the Pacific was in August 1942 in the Solomon Islands and the initial landings were on Tulagi, the administrative centre of the island chain. Tulagi is a small island north of Guadalcanal, nestled below the larger Florida Island. Unlike the landings on Guadalcanal, which met no initial resistance, Tulagi was contested strongly by Special Naval Landing Force (SNLF) troops of the IJN. The USMC landing force under Merrit Edson consisted of Carlson's Raider Battalion and 5th Battalion of 2nd Marine Regiment.
This Chain of Command (CoC) game focussed on a platoon of 5/2 landing on Beach Blue on the mid-southern edge of the island and probing inland, heading towards ridge in the centre of Tulagi in their drive to capture the NW end of the NW-SE oriented island. As a probe scenario, the USMC needed to exit one team from the far end of the board for victory.
The extra points available to the sides were spent by the SNLF on entrenchments and barbed wire. The USMC 5/2 added a .30 cal LMG and 60cm medium mortar teams. Both sides rolled high on morale to start on 11. The patrol phase developed into the SNLF moving as far forward as possible with three Jump Off Points (JOPs) evenly across the board in the jungle and the 5/2 deploying three JOPs, two on the left flank either side of the cemetery and the other on the far right flank on the edge of the golf course. The nature of the jungle cover meant that JOPs could be deployed at only 6" back from patrol markers so the opposing JOPs were relatively close compared with open terrain.
The USMC landing didn't open well with confusion allowing only one squad and the Sarge landing on the left flank and moving to the edge of the jungle from the cemetery. The SNLF began rapidly deploying units from the JOPs and an attack was immediately mounted on their right flank against the recently landed USMC squad. The units didn't get to hand-to-hand but settled into a prolonged firefight at close range.
Some of the less than well coordinated USMC landings may be attributed to Major Clarence E Pitts taking personal command of the landings. The SNLF rapidly established their whole platoon well forward and began to infiltrate towards the beach before the full USMC platoon was ashore. Most of the USMC strength consisting the three rifle quads and one BAR squad were deployed on the left flank around the cemetery as it seemed like a good idea at the time. Another firefight developed at medium range near the centre between several squads. To ensure the right flank JOP would not be overrun, the mortar and LMG teams were deployed from there to the nearby golf course. This turned out to be a problem later due to the intervening jungle between them and the rest of the platoon on the right flank, so they were not mutually supporting.
The firefight in the centre was going against the 5/2, due to some units being in lighter cover in the cemetery compared with SNLF, and some lousy shooting manifested by lousy rolling. The firefight at close range on the 5/2 left and SNLF right was swinging towards the USMC due to the high number of SMGs in the squad and most of its members growing up on Jimmy Cagney movies in the 1930s "Take that you doity rats...dakadaka...daka". A counter-battery duel developed on the SE side between the SNLF type 89 grenade launcher squad and the USMC mortar and LMG teams from the edge of the golf course.
In the centre the 5/2 BAR team moved obliquely onto an exposed small hill in what seemed like a sensible flanking move by Corporal 'Machine Gun' Kelly. However the firepower of SNLF quads soon reduced the squad to just Kelly and two comrades who yelled 'Semper Fi you SoBs!' and headed inland into the jungle with shots whizzing at their heels. A fierce hand-to-hand struggle depleted another USMC squad, who retreated towards the cemetery. On the NW edge, Mr Thomsons inventions deadly effectiveness at short range had wiped out most of the opposing SNLF and the jarheads began to advance. SNLF Lt Imashita and his trusty flag bearer were not too far behind this squad, and suddenly felt exposed as an enemy squad approached from their right and Cpl Kelly chomping his cigar from the left, so they hotfooted it inland up the ridge.
The USMC had taken very heavy losses in the centre and the remaining squads began moving towards the breakthrough on the left, concentrating almost the entire platoon infantry strength along the left flank. Just them Clarence E Pitts rolled the statistically improbable five 6s initiating a random event. This was an errant indirect fire barrage, courtesy of a USN destroyer sailing close to shore, onto the left flank affecting only one SNLF squad but all of the USMC infantry. Amazingly, minimal casualties were suffered by all thanks to USN gunnery.
The USMC got lucky with many 6s on command dice, resulting in extra moves, and the advance on the left surged forward. As the USMC centre was now open the SNLF sensed a way to split the landing force, the aim of every Japanese island defence by driving straight for the beach across the golf course. Nor being distracted by the imperialist game of golf, they swung right towards the left flanks of the hapless LMG and mortar teams who were engaged in the firefight with the SNLF grenade launchers and infantry up the hill. The USMC support weapon teams were easily overrun and the SE end of Beach Blue was in SNLF hands. Meanwhile on the NW end inland up the hill, Lt Imashita had managed to outrun Machine Gun Kelly and join up with one of his squads to direct fire into the flanks of the USMC advancing inland.
The USMC had suffered so many casualties on both flanks, but particularly the support teams on the gold course, that their morale was lowered considerably, and they lost a command dice. The advance began to falter but one mauled squad reached the far side of the board up the hill and victory was achieved. But at what cost? Pyrrhic indeed. For a probe to assess enemy strength for a following multi-company assault, it stirred up a hornets nest and lost most of the platoon. The SNLF held most of Beach Blue making follow on landings difficult. The USN destroyer captain received the Navy Cross, Maj Pitts was given commendations, posted to the Rangers training for Europe and then posted to the UK near the town of Studley Constable in Norfolk. Lt Imashita received a personal commendation from Admiral Yamamoto but him and all of his men were overwhelmed by US firepower in the next two days.
Overall this showed how precarious these beach landings could be if the defender skilfully defended forward with aggressive moves to the beach to divide the landing force, something that was not achieved in reality in the Pacific.
First contact, SNLF troops bravely attack the invaders for the Emperor!
They also deploy on the flank of the first USMC troops...
US automatic fire starts to take its toll on the island's defenders!
Marine BAR teams deploy to cover the advance on the Yanks left flank, they suffered heavy loses but did their job!
The beachhead!
Yank view of the very nice terrain!
The Marines hammer the Japs, but the resilient SNLF troops just soak up the losses and return fire! This is not good for the SNLF but they buy time with lives while they attempt to redeploy!
View from the Jap perspective as more and more Marines well equiped with automatic weapons appear on the edge of the jungle!
The Marines deploy all their resources save their MG and Mortar team on their right flank, The Jap Commander is concerned!
But the Japanese surprise the USMC attackers and attack themselves they quickly capture an American Jump of Point! After initial firefights the battle now starts to become mobile!
SNLF Lt Imashita and his standard bearer put some distance between themselves and Marine Sergeant Machine Gun Kelly who can be made out in the background, note the Lieutenant's report back to his superiors described this movement as a ‘redeployment to more favourable ground' rather than a case of fleeing for their lives!
Despite their success in the centre and on their left the Japanese right flank crumbles, in a firefight against the well armed USMC the SNLF struggled and then succumbed!
The Marines 30 Cal MG Team keep up fire despite a hail of knee mortar bombs landing all around and ON them!
Then 5 sixes were rolled by the USMC player an EVENT, first time we have had this in CoC...
...turned out to be a barrage which targeted mainly their own troops! Turned out to be a fizzer with little effect...good overall picture sows the USMC about o capture a Japanese Jump of Point and turn their right flank!
Japanese rampant behind the USMC lines...bravely the Marines commander pushes on for their objective rather than be distracted!
The SNLF overruns the Marines Mortar support...
...and the a second Marine Jump off Point, the Yanks morale is teetering...
US Morale is further tested as the Japs take out the 30 Cal MG Team but still they hang in!
Japs occupy the beach after destroying the Marine support elements!
Yanks successful, a Marine squad prepares to exit the tabletop!
Catch ya next time!


