Showing posts with label Sudan. Show all posts

Thursday, 7 November 2024

Strangers in the Night, well Daytime! - A Men Who Would Be Kings Rules AAR

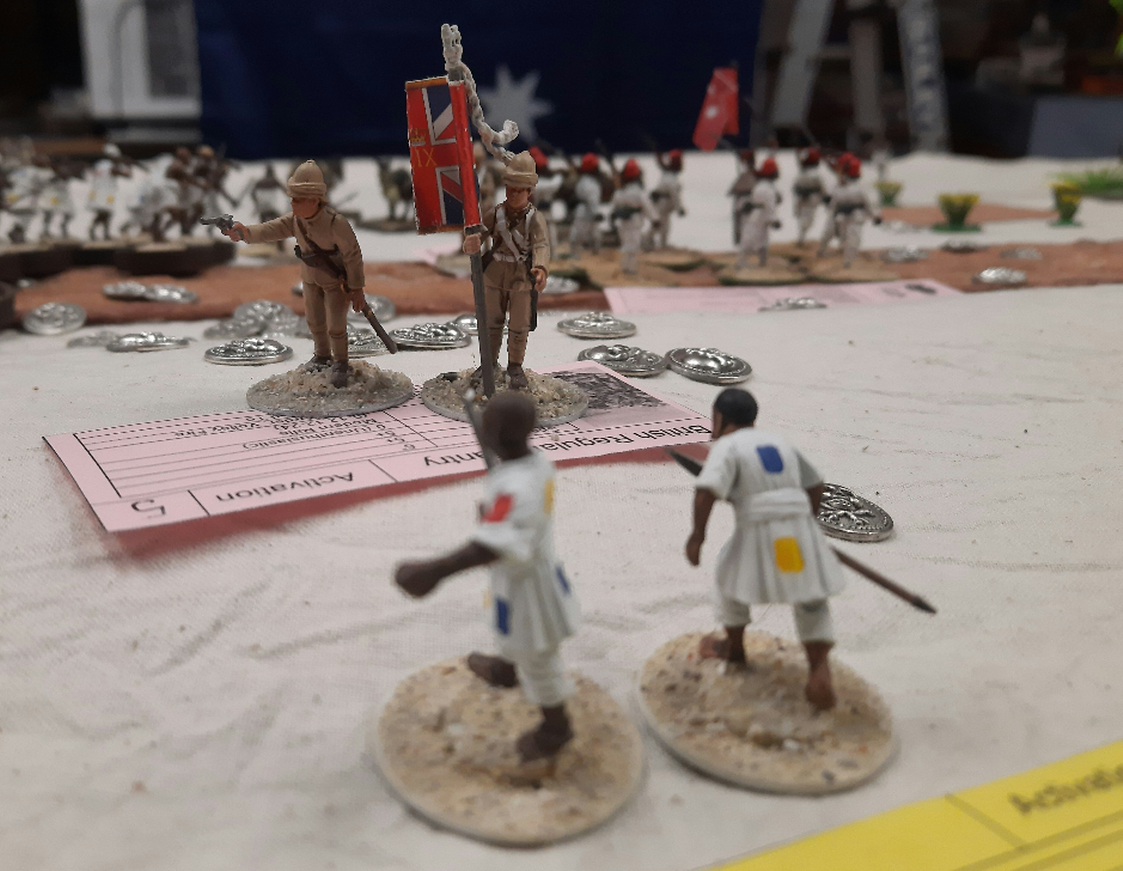
Last Monday TSOG decided it was time we had a little The Men Who Would Be Kings action plus my newly painted British Hussars were eager for some biffo! We played Scenario 1, Just Passing By from the rules as it usually creates a bit of a mobile action rather than one side charging (Mahdi) versus one side firing (British) haha. George and I played the British and Al the Mahdi.

British Force
Colonel Barnstead in Command
1 x Regular Line Infantry Unit
1 x Regular Highland Infantry Unit
1 x regular Hussar Unit
2 x Irregular Egyptian Infantry Units (poorly armed)

Mahdi Force
Osmon Dirrka in Charge
1 x Irregular Camel Unit
1 x Irregular Infantry Unit
2 x Fierce Tribal Foot Units
2 x Veteran Tribal Foot Units

The Game

Both sides lined up for the action and the Mahdi were off to a good start over the first three turns due to Moves being free for Tribal Units plus Good Activation Rolls they advanced at a pace, the poor British however lurched forward their plan to use their regular infantry as a wall to stop the advancing Mahdi exiting the table while the Hussars and Egyptians exited the table for them was not looking good!

Turns four to six saw the first shots fired and sabres rattled! The British Hussars hoping to complete a glorious charge took on some Tribal foots types! Channelling the 21st Lancers they charged a mass of 'Fierce' Mahdi. The result was both sides took five casualties and both retired pinned. Meanwhile the Mahdi Camelry smashed an Egyptian Unit following up their initial attack with a second inflicting seven casualties taking while taking just one! The British firing at the approaching Mahdi hoard meanwhile was not very effective.

Turns seven to nine things heated up. The rest of the British Hussars were wiped out carrying out another glorious charge, the mighty Madhi Camelry were not so effective on their second attack and were beaten back and hammered by musketry, they were not destroyed but they were out of the fight and lastly the British firepower started to slow the Mahdi foot a couple of Units taking casualties and getting pinned.

Turns ten to twelve decided the game. The Mahdi managed to exit an over half strength Unit from the Table , a grand double turn melee saw the Highlanders wiped out to a man but at heavy cost to the Mahdi and the other British Line Unit was reduced to a handful of men and nearly driven from the table. While also this biffo was taking place there was a desultory firefight between the Mahdi Riflemen and the second Egyptian Unit which amounted to nothing.

We stopped the game after 12 turns with both sides battered and punch drunk to work out who had won...

Some Pictures (we all love pictures)

The Mahdi advance!

As do the British albeit much more slowly...

The forces approach, for a moment it looked like a great cavalry skirmish may occur but the British horsemen noticed Mahdi foot in the open!

The Hussars charge the Mahdi, they selected the wrong Unit, they came into close combat with a group of fierce warriors and were soundly beaten...

The Mahdi Camelry made short work of one of the Egyptian Infantry Units!

The Mahdi horde advances!

Both sides mounted Units had charged and charged again, they were spent so it was time for the foot soldiers to step up!

The Mahdi destroy the Highlanders, the infamous men in skirts fought like girls!

The British Hussars charge into eternity...Hussah!

A Unit of Mahdi exit the Battlefield...Yeah shouts Osmon Dirrka!

A final lunge was launched to push the British from the field of battle...

It failed miserably the Mahdi inflicted no damage on the British and were wiped out trying!

The Battlefield at games end, not many fighters left!

The Result

British 3 VPs one each for destroying Mahdi Units
The Mahdi 4VPs 2 from destroying British Units and two from exiting a Unit
A Mahdi Victory!

We used our modified Pin rules and only gave the two Senior Leaders traits neither of which had a bearing on play. As usual The Men Who Would Be Kings Rules gave us a splendid game and in a timely fashion as we say each time we play them we will revisit them again!

Monday, 27 November 2023

TSOG Revisit the Sudan Circa 188something!

Last Monday we were caught short for a game so I quickly pulled out TMWWBK rules and a bucket full of Sudan figures!

We selected Scenario C called 'To the Last Bullet' and went with 25 points vs 19, the British would be on the defensive.

The British
1 x Fierce Highland Unit
4 x Egyptian Units

The Mahdi
1 x Camelry Unit
1 x Poor Artillery Unit
6 x Tribal Infantry Units

Okay briefly the game went like this, the Mahdi swept forward and swamped the Egyptians then hurled themselves at the Highlanders defending the fortified village and after taking enormous casualties overwhelmed the 'men in skirts'!

The reason for such a short AAR is we stuffed up rather royally with the rules and 'Moving at the Double' was moving at the double instead of using the variable D6 roll, enough said Dave and I now hang our heads in shame winning in such an ungentlemanly fashion! Next time we play a set of rules we will reread them instead of going off the top of our heads. This said the British and Egyptians did very well in the circumstances!

Some pictures then we'll move on...

The Impressive Imperial Force started a prompt withdraw on turn 1!

Thanks to their super human movement abilities the Mahdi were quickly amongst the Egyptians...here a band of warriors race past Colonel Goodhope as he covered the rear of his retiring troops (mainly because of poor activation rolls!)

Overall view of the battlefield...

The Egyptians looked splendid...

Until they were engaged at close quarters by the rampaging Mahdi!

The Highlanders got to cover in the village/farm and prepared to receive their foes...

Mahdi charged the 'men in skirts' repeatedly taking heavy losses but wearing them down!

It was the Mahdi Camelry's first outing!

Colonel Goodhope was tardy getting back to the fortified farm (read more poor activation rolls!), note the casualty markers pilling up in front of the Highlanders!

A final surge...

...and the Highlanders were overcome!

At least the game looked spectacular!

PS some would say the British succumbed on the night to a dirty low handed Mahdi trickery!

Friday, 18 November 2022

Mahdi Here? Go Away With You! - A Men Who Would Be Kings Rules AAR

This fortnight we visited the Dark Continent and a period of enlightenment as Her Most Glorious Majesty Queen Victoria's army attempted to bring civilisation to the locals (?!?)...yup time for another the Men Who Would Be Kings rules game!

Dave and George commanded the Mahdi force and (poor) Maurice the Egyptian Army.

The Scenario
We choose Scenario G; It's Awfully Quiet Out There!

The Attackers
Mahdi
Oman Dirka '7' Yellow-Bellied
1 x Mahdi Tribal Foot – Fierce
4 x Mahdi Tribal Foot
2x Mahdi Irregular Foot – Poor Shots & Limited Ammo/Fierce
1 x Field Gun – Poorly Drilled & Limited Ammo

The Defenders
Egyptian
Colonel LongJohns '5' Shirker
1 x Regular Infantry – Unenthusiastic
1 x Egyptian Irregular Infantry
2 x  Egyptian Irregular Infantry Poor Shots
1 x Egyptian Machine Gun - Poorly Drilled

Please note from our previous experience we now play The Men who Would Be Kings with the below House Rules;
1. All Pinned Units retire half a move when initially Pinned and act as Gone to Ground while Pinned (note ALL Units GTG and for the whole duration of being Pinned).
2. If a Unit with multiple Pins fails to Rally reduce the Total Number of Pins by 1 for each failed Rally attempt (Units will always retain ONE Pin until Rallied).

The Game

The Mahdists had a cunning plan, whilst their firing units the Irregular Foot and Field Gun entered the table top for one side to pin the defenders down with a hail of shot all their Tribal Units entered from the other with the deadly intent of just rushing forward. The Defenders plan was to hold on at all costs.

Turn 1 and the onrush started whilst two Egyptian Units deployed at the rear of the Column the British formed up into close order on a slight rise by the road and the Gatling Gun opened fire felling the first of the attackers.

Turns 2 to 4 saw the Mahdi plan unfold their fire knocked out half the Gatling crew and a couple of Egyptian infantry whilst their Tribal Foot closed in some stumbling on the rocky open ground (i.e. failing their activations!). During this time the poor fire power of the Egyptians showed as they scored only a few hits whilst their British Brethren in Close Order cut a swathe into the charging Mahdi who much to their Colonel LongJohn's dismay passed their Pin Tests!

Turns 5- 10 with the range closed the Natives proved their worth in hand to hand combat. The defenders did score some small successes including the decimated British Unit who were forced from the high ground counter attacking successfully pushing the Mahdi back and not only retaking the rise but almost eliminating their foes! Elsewhere though it was a blood bath with three defending Units destroyed. 

Night fell ending with the British holding (just) their position and the Mahdists retiring into the desolate scrub from whence they appeared. A third of the attackers became casualties and two thirds of the defenders fell, it was a true blood bath and the sands truly turned red!

Both sides claimed victory but looking at the victory conditions it was a decisive victory to the Mahdi!

Some Pictures

The Egyptian Column notices movement in the distance the troops are called to arms!

A close up of the Column, this is the Egyptian figures first game!

The Mahdi Riflemen quickly approached and started a steady and deadly fire...well not really deadly but they did cause enough casualties to make the Tribal Warriors task a bit easier!

The defenders deploy!

An overview of the battlefield as the Mahdi encircle their foes!

Oman Dirka leads his right wing as they charge the Egyptians!

The Mahdi right wing looking ominous advances!

The first hand to hand clash, Tribal Warriors overwhelm the remnants of the Gatling Gun Crew...

The Mahdi plan continues to unfold, the Riflemen and Gunners target the rear of the Egyptian Column...

The Mahdi rejoice as the defeat the British Infidels on the high ground!

The British Regulars are pushed off the high ground taking heavy losses...

...and then recapture it in turn inflicting heavy loses on the Mahdi...

The rear of the Egyptian Column is wiped out, what was three Egyptian Units is now a sea of 'death markers'...

With an aura of invincibility the remnants of the British Unit hold firm beating back their attackers...

Natives roaming the battlefield seeking to finish off the defenders...

The surviving defenders, one intact Egyptian Unit  personally led by Colonel LongJohns and in the background the two remaining figures of the British Unit standing firm on 'the high ground'...

The overall battlefield after the action concluded, not the most exciting terrain but functional...

The Result and Fallout

So a Mahdist victory and an ominous debut for my Egyptian figures!
Madhi VPs 9
British VPs 3 (including a 1 bonus for holding the high ground in the centre of the table!)

A great game but from the start it looked that it would be a hard one for the British (Defenders) I wonder how many time these TMWWBKs Scenarios were tested. We like these Rules but after each game discuss the Pin Rules and after this play there will be a positive modifier of one for Units taking Pin and Rally Tests in physical Cover (so not just GTG). As usual the game played fast, was fun and despite the odds the Defenders clung on disparately! I plan to replay this scenario with the same forces using the Triumph and Tragedy Rules Colonial Rules one day and see how they compare.

Catch you all soon!

Thursday, 4 February 2021

Sudan 1885ish AAR The Men who Wold Be Kings Rules

Monday night we revisited The Men Who Would be Kings Rules this time the Sudan 1885 was the setting!

We chose Scenario H, A Sigh of Relief from the rules and regarding terrain we set up some 'hills', rough ground and brush simulating what we see in the pictures from the period. The Mahdist would be on the attack and both sides would get 25 point forces, we did not give each Units Leader a Trait but instead they were given a Commander in Chief who had a Leader Trait that they had to use once per turn on a Unit within 4" of them.

Mahdists
Commander Osman Dirka, Brave Leader Trait
5 x Tribal Infantry at 15 points
2 x Well Armed Sharpshooting Tribal Infantry at 8 points 

British Initial Force (On Table)
A Heliograph Team was the objective
1 x Regular Infantry, Highlanders at 6 points
1 x Poorly Drilled Gatling Gun at 4 points

British Relief Force (Reinforcements)
Commander Captain Darling, Destined for Greatness Leader Trait (naturally!)
3 x Unenthusiastic Regular Infantry at 15 points

The Scenario played so quickly we actually played the it twice swapping some players over!

Game 1 AAR

The British defenders set up with the Gatling Gun Team covering around half the battlefield and the Highlanders in close order covering roughly the other half. The Mahdists choose to attack from the short edge of the table facing the Gatling, a good move as the Highlanders in close order weren't as manoeuvrable as the Gatling!

The Mahdists plan was simple, CHARGE! Their Units moved really fast (save for there Sharpshooters who continually failed their activation roles!) and closed on the British quickly! Naturally while the Highlanders struggled to redeploy the Gatling Gun Team failed their first two activations so managed to get only one shot off before they were overrun! Things were looking bad for the British!

With the Gatling Gun gone and the Highlanders pushed back the Mahdists swarmed about the Heliograph Team...

The British relief forces had arrived at this point, and even at long range their firepower began to tell! Their volleys quickly Pinned the Mahdists driving them back from the fraught Heliograph Team! 

Captain Darling, wearing his customary blue tunic directed fire personally and drove the Mahdists left wing back with heavy losses!

Meanwhile the depleted Highlanders counter charged the last of the Mahdists threatening the Heliograph and despite losses drove them back heroically! Victoria Cross stuff in my book!
This along with the long range volleys of the rest of the British reinforcements ended any threat from the Mahdists left wing, the battle was over...queue Land of Hope and Glory (I know 17 years too early!)

Okay with that game taking less than an hour and a half the players swapped sides and we played this sucker again!

Game 2 AAR

This game the British deployed their Gatling Gun facing one short table side and the Highlanders in skirmish order facing one of the long sides. So the obvious the direction of attack for the Mahdists out of the Gatling Guns line of sight! On they came with the same plan, CHARGE! To make things worse for the British this game the Mahdists activations were more successful and they advanced VERY quickly!

The Highlanders defended the Heliograph Team ferociously while yet again the Gatling Gun proved ineffective being overrun in short order, this picture shows the Highlanders after defeating the first Fuzzy Wuzzy charge to hit them!

The overall view at the above point in time, the first British reinforcements can be seen at the top of the picture while the Heliograph and Highlanders are in the centre surrounded by swarms of Mahdists!

The Heliograph in trouble (in fact it was overrun next turn) as Captain Fergus the sole survivor of the Highland escort can be seen falling back before a sea of Mahdists defiantly blazing away with his revolver!

After capturing the Heliograph the Mahdists surged forward but here (like in the first game) British firepower told inflicting numerous casualties.

Despite the slaughter in their ranks a couple of Mahdists units hit the British 'Thin Khaki Line' taking them on in close combat but were repelled. Of note was the fact that Captain Fergus survived his face off with the Mahdi Horde, another VC in the offing me thinks!

Another British Victory, queue up Land of Hope and Glory yet again!

Our thoughts on the evening;
These are a very good set of rules for our Monday evenings, the rules are easy to learn, the games play smoothly, they capture the feel on the Colonial period and come to a conclusion quickly. Having only one Leader per side with a Trait which could apply to any one force unit a turn worked very well and while we get used to the rules saved checking multiple traits for each Unit, we will eventually change to this (but still maintain an overall Commander still! It will be interesting when this leader gets a 'bad' trait and will be forced to use it haha!). The rules gave a good historical outcome based on our reading of the Sudan campaign, i.e. blokes armed with pointy sticks are bound to lose against blokes with guns! 
BUT (Yes there had to be a but!)
We had two issues, firstly the Scenario didn't seem very well balanced. This is only the second scenario we have played from the rule book. We played twice in the night and couldn't see any chance for the Mahdists at 1:1 to beat the British despite the latter's tardy arrival schedule, we decided we would replay this again one day but change the force balance, a base of 24 points for the attacker and 18 points for the defender still keeping 6 to 10 of those on table at the start.
Secondly the Rally rule irked us. A Unit gets pinned approaching its foe if it fails to rally they stand in front of the foe next turn and get blasted (possibly charged) or the Rally next turn and get blasted again! This can become a cycle of despair for the Unit initially Pinned. After a long discussion next time we use these rules we'll make the following changes and test them;
1) if a unit is Pinned it Goes to Ground (even if not normally able to do this) and beside the usual effects of this we are adding 'if targeted by fire at short range 2 hits are required to score a kill'.
2) if a Pinned Unit rallies successfully they can carry out one of the following actions in addition to Rallying; a) Fire at half strength rounded down, b) move at up to half their normal Movement allowance or c) maintain Go to Ground status

Another good night was had, next time we'll be visiting WW II with Great Escape Games Iron Cross rules.