With the great success of our ACW Test game using the From Shakos to Coal Scuttles Rules last Monday we played a two player game fielding two 12 Unit equally balanced forces in a meeting engagement! The objective of the game was to be in possession of the two bridges on the tabletop at the end of the game or break the enemy! We included the Exhaustion Rule this time to cover the 'breaking the enemy' victory condition and boy was this rule was telling in the exciting climax of the battle!
Confederate Gunners at work targeting Yankees...
The Forces
The Yankees;
1 x Command base Brigadier Copley
2 x Veteran (Elite in rules) Regiments - 3 bases each
5 x Trained Regiments - 4 bases each
1 x Raw Regiment - 6 bases
1 x Cavalry Regiment - 4 bases
2 x Artillery Batteries Early Rifles - 1 base each
The Rebels;
1 x Command base Brigadier Neudegg
3 x Veteran (elite in rules) Regiments - 3 bases each
4 x Trained Regiments - 4 bases each
1 x Raw Regiment - 5 bases
2 x Cavalry Regiments - 4 bases each
2 x Artillery Batteries Smooth Bores - 1 base each
The Battlefield
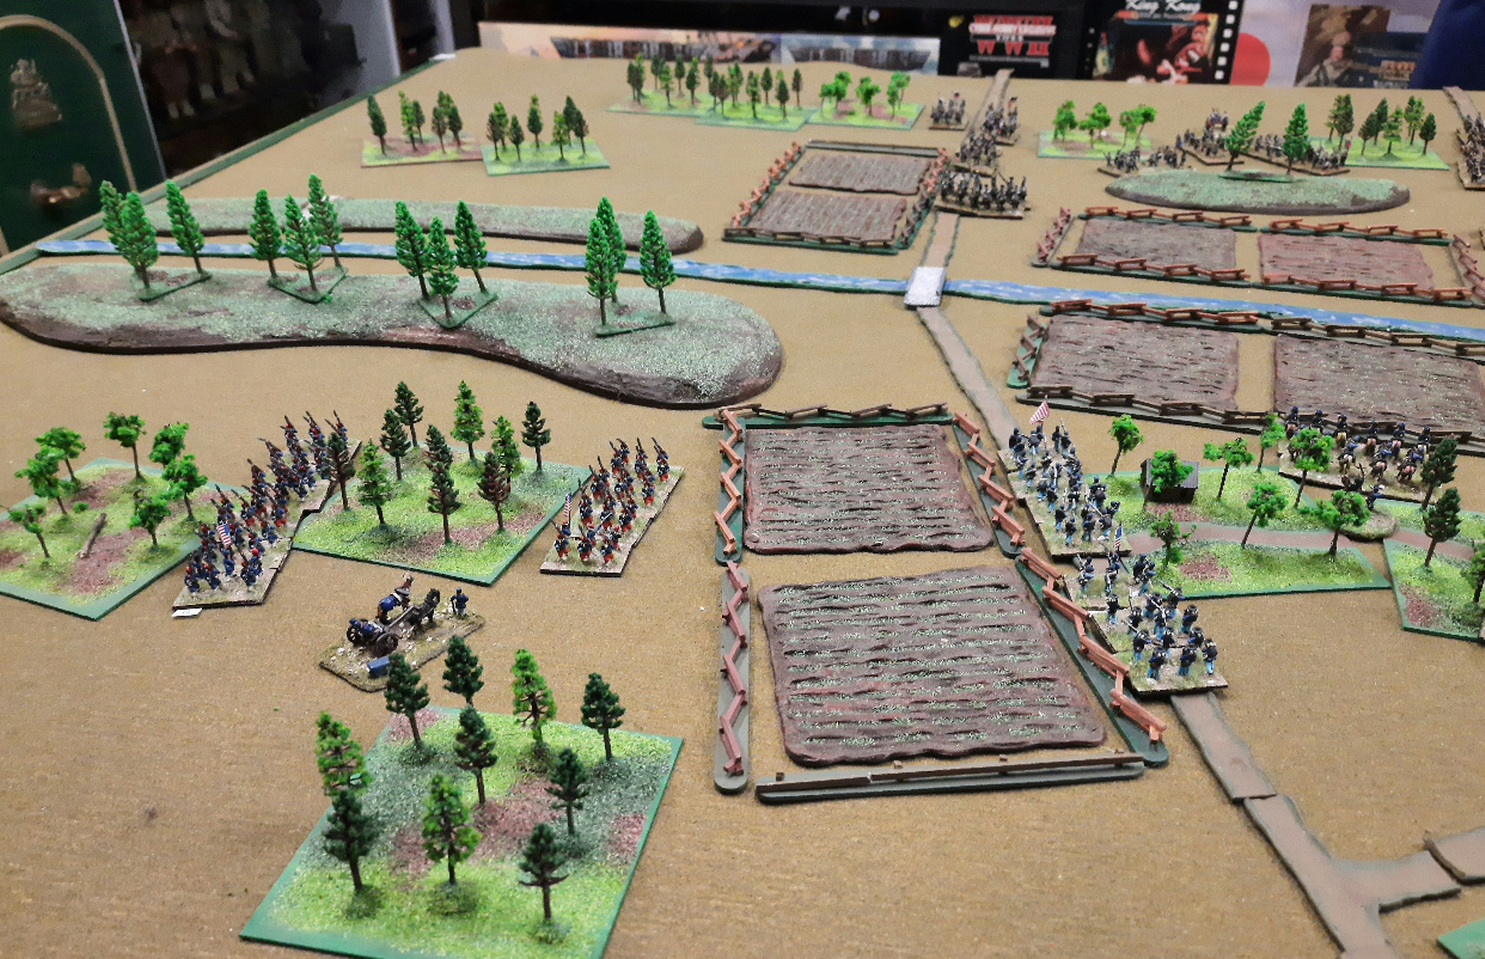
The Confederates started at the top of the below map and the Federals at the bottom.
The Rebels concentrated in the centre of the battlefield while the Yankees advanced on a broad front!
.
The AAR
While a great battle raged the Leaders of both sides recognised the importance of two bridges over a stream that should be occupied to allow the easy transit of artillery and wagons in that area. Each side assigned troops to occupy them!
CSA Brigadier Neudegg was confident he could accomplish his task easily advancing on a narrow front his horsemen leading the way whilst the Union Commander, Brigadier Copley advanced his forces on a wide front with strong flanks hoping to envelope any opposition he may encounter while carrying out his mission. Importantly just as the battle commenced the Confederate Commander was incapacitated leaving the Southerners with no one in overall command giving the Yankees an edge!
The Southern horseman arrived at both bridges before anyone else, one Regiment dismounting while the other remained mounted and ready to charge! Union infantry engaged both of them and under fire the cavalry retired from the crucial bridges.
Rebel infantry replaced the horsemen and a race to occupy the best positions along the stream began! Once in place the Regiments of both sides deployed into line and engaged their opposition! A frightful firefight commenced, the infantry exchanged volley after volley resulting in significant casualties! Several units suffered badly wavering and then falling back. The battle was in the balance as the exchange continued.
Then a great Hoorah emanated from the Union right flank a brave Regiment charged defeating the Rebels they faced and with artillery support they started rolling up driving in the Rebels line! The deadlock was broken s was the Confederate morale! The Southerners fled followed by the enthusiastic cheers of their Union foes...Hoorah!
Some Pictures...
The Confederates advance, their two Cavalry Regiments can be seen scooting ahead of the infantry toward the bridges!
The Federal Right moves forward...
......as does their left!
Brigadier Neudegg leads from the front during the approach and was injured, he was 'hors de combat' for the rest of the game, his Command Dice was lost!
The Yankee centre advances.
View from the Confederate side as their Cavalry dismounts at their objective, the right hand bridge...
The same dismounted horsemen were driven back by two Regiments of Union infantry!
At the other bridge more Union infantry fire drove the Southern Riders back!
Rebel Infantry replaced their mounted brethren and crossed the left hand bridge putting pressure on the Union line.
Meanwhile the Union right flank attack started to pose the Rebs some issues!
A Southern Regiment also secured a stone wall near the bridge! Just beating a Union force there!
The Union upped the ante in this section of the field when one of their flanking Regiments started to envelope the Confederate position.
Flanked and under artillery fire the Rebels were driven back across the bridge and forced from the stone wall position, the Confederate left was literally in great disarray!
The Confederate right despite being pushed back from the bridge looked in better shape and were deploying into line to face the Federals!
A Confederate Regiment took position on high ground on the extreme right of the line and their volleys pushed back the Rebs facing them.
The Yankees left was preparing to launch an attack with a fresh Zouave Regiment when events on the other flank of the battlefield decided the action, the Confederate troops exhausted began to withdraw...
The end of game positions the broken Rebels are toward the top of the picture!
A very close battle! Both sides were destined to break on Turn 8 due to their high levels of Disarray so whoever gained the Initiative for the turn was in big trouble. Dave and his Confederates drew the short straw and went first and at the end of the player turn the Rebels reached their Exhaustion Point! The game played well and very quickly, once the basic rules were mastered we only had to check them occasionally! Our ''ACW period adjustments' worked well so once we get a full team of four players at a session we'll be playing a super 24 Units a side battle...I can't wait!
Just a point on the Exhaustion Rules, it reads as follows...
...with so many Units on the table we think the base level of 12 is too low unless we played an extraordinary battle on the night. Based on our experience we think with armies of 12 Units you should try 18 as a base and work from there, anyway that's what we'll do next time! This game both sides high level of disarray by Turn 8 saw them both set to roll over twenty dice each for their Exhaustion roll!