Showing posts with label Sixty-One Sixty-Five. Show all posts

Friday, 28 March 2025

ACW AAR 61 to 65 Rules Fence-Line Defence Variation

Well Hello! We've been offline for a while we had a pause in our gaming during the last part of 2024 but resumed in February 2025! We are way behind in listing our AARs for this year (and last year) but will try to catch up!

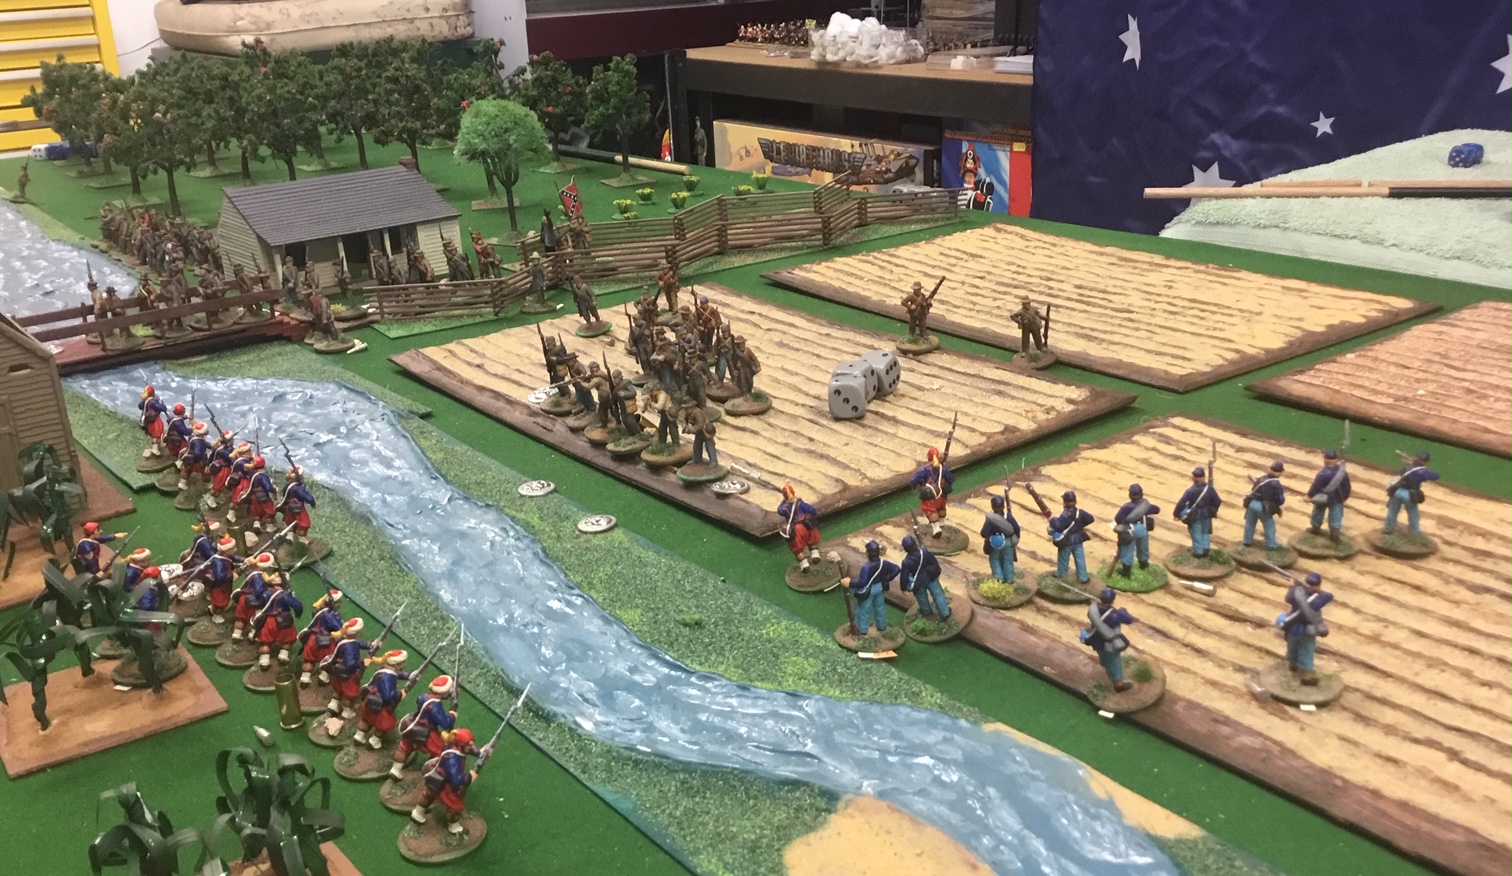
Confederate Infantry watch a fellow Rebel Unit advance on the Yankee Zouaves!

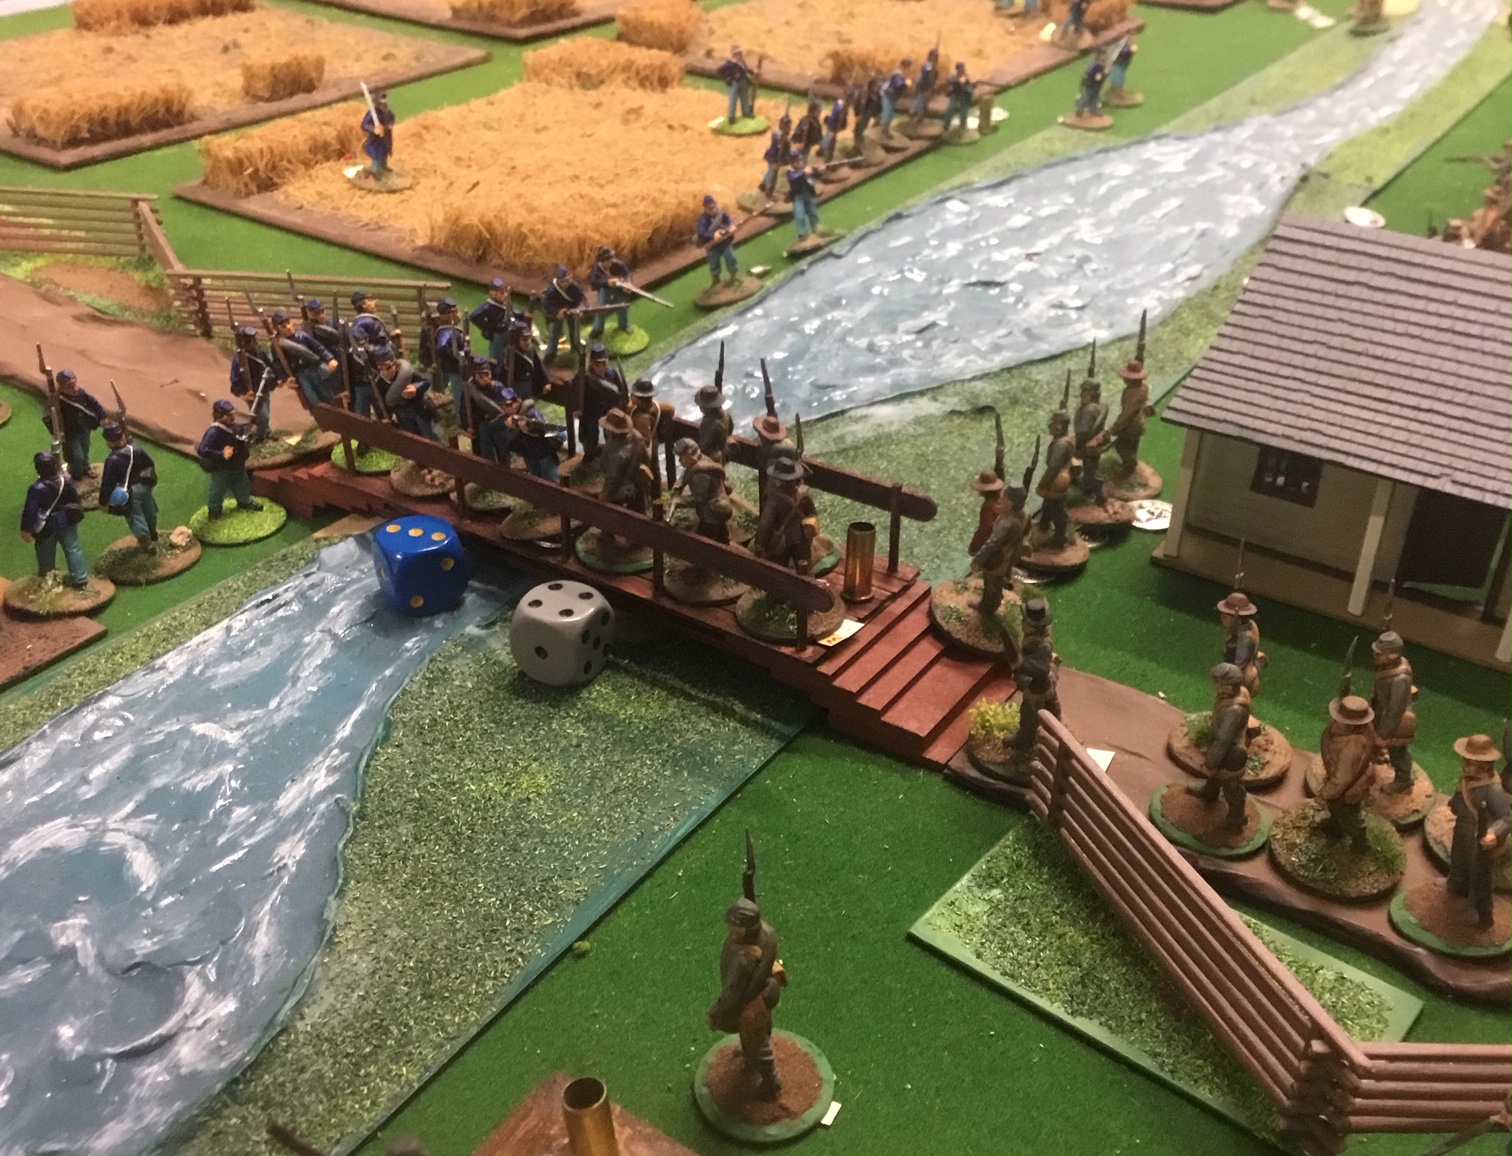
Last Monday we played a game of 61 to 65 and used a variation of the Stream Crossing Fence-Line Scenario in which we gave the Yankees two Medium width fords in the Stream rather than one large 1 Long width one (Medium/Long are movement distances in the rules and with 28mm size figures they are 12cm and 18cm each, anyone using Imperial measurements divide those by 2.54 for inches 😁 ).

So Maurice took on the Northern troops and George the Southerners I umpired.

The Game!

Maurice's Yankees crossed the stream pretty quickly with good activation rolls meanwhile the Southerners occupied the fence-line and the woods on their left, interestingly they left the woods on their right unguarded (?). 

The Union Zouaves moved to the woods on the right and faced up against the Confederates there. A firefight ensued in the woods while another Rebel unit with skirmisher support crossed the centre fence-line and joined the combat around the woods. The additional Rebels were pushed back to the fence with casualties and the firefight continued in the woods.

The Union Infantry leaving a unit by the ford they pushed the rest of their men hard through the woods to the right of the Rebels defence line which was unoccupied, this advance was screened by skirmishers. The Confederates moved a unit to cover their right and advanced another across the fence-line to attack the advancing Northerners as they moved into the woods. This attack was pushed back with losses and victory was set as the Yankees assembled to carry out their the left hook around the Southerners right!

Caught out the Confederates now had a single unit of infantry on their right flank facing three units of Yankees with skirmisher support! The expected ensued and the Rebel unit was overwhelmed and this broke the morale of the Southerners! The grey clad army fled the field of battle leaving it in the hands of the blue bellies!

Some Pictures (sorry being busy drinking beer and eating nibbles I didn't catch all the action!)

Our battlefield, the Confederates in the foreground and the Federals are deployed behind the stream in the distance!

The Rebs quickly man the fence-line and await the blue bellies!

The Yankee Zouaves quickly advance into the woods on the Confederate left and immediately get caught in a firefight!

Meanwhile the Yankee Infantry quickly advance intent on turning the Rebels right!

Overview mid game, the battle in the woods on the Confederate left is well underway as the main battle develops on their right where one unit will face three 😮!

The final charge, a tsunami of blue sweeps around the Confederates right flank breaking them!

Afterwards Stuff

A great game, the Rebels lost it placing 3 out of five of their units along the fence-line and only redeploying them to the flanks too late to check the Yankee flank moves! We will revisit the ACW soon but next time with either Longstreet of FS2CS rules! Hopefully I'll try to catch up on all the outstanding AARs we have soon!

Wednesday, 7 July 2021

61 - 65 Rules AAR #8 - Looking for Hats Scenario 1863!

July 4th long weekend in the USA so we thought we’d play an American themed game, out came the 61-65 Rulebook and a bunch of 28mm ACW Miniatures! We played the 1863 scenario Looking for Shoes (renamed Looking for Hats in honour of the Susquehanna Hat Company, a flimsy link will soon follow 😃!), we based our game in the lead up to Gettysburg as Early’s Division of the Army of North Virginia advanced towards Wrightsville on the Susquehanna River late June 1863.

Federal gunners directed by Lieutenant Harrison labour to reload their might napoleon cannon!

Forces (as per Rulebook scenario, Looking for Shoes)

CSA, Elements of Rhodes Georgian Brigade Cpt Jebodiah Galloway & Lt Neudegg
8 x Units (7 + 2), 3 Veterans and 5 Volunteers plus 8 Leaders

USA, Various Local Militia and Federal Army Units Cpt Ulysses S. Darling & Lt Harrison
6 x Units at full strength (8 + 2) 1 Veteran and 5 Volunteers plus 6 Leaders
1 x Gun (4 crew).

The Situation
June 28 and Rhodes Brigade spearheads the Confederate run to capture the mile long bridge at Wrightsville that spanned the mighty Susquehanna River, the mighty mile long bridge at Wrightsville leading to the far north of the Union lay ripe for the taking!
Captain Jebodiah Galloway led his Georgians along Carlisle Road with a plan to encircle any of the Federal Militia he may engage that had been reported in the area. He was sure he'd be across the Susquehanna before nightfall leading the rest of Rhodes Brigade to victory! He boldly boasted to his men, "Tarnation if I wont be donning a new bonnet from the Susquehanna Hat Company while chowing down on my grits tomorrah morning Boys!"
Meanwhile recently promoted Captain Ulysses S. Darling had just been put in command of a rag tag group of Units and had been told to delay the Confederate advance on Wrightsville to give engineers time to blow the central section from bridge to block any movements by the Rebels north of the Susquehanna River. He planned a mobile defence based around the Napoleon cannon he had been supplied.

The AAR

Sticking to their plan the Southerners advanced on a wide front either side of the Carlisle Road looking to envelop the Yankees, in turn the Federal forces deployed around the buildings in the centre and behind a fence line on their right.

The battlefield at the end of turn one the Federals are in the foreground and the Southerners can be seen advancing from the far edge...

First blood was drawn by the Federals but the Confederates advanced steadily forward! They secured several buildings and pushed the Northerners from all but one they had occupied.

Both sides advancing into contact Federals to the left and Confederates to the right...

Captain Jebodiah Galloway urges his me to victory!

The Union Commander then deployed his gun in a position that dominated the the Rebels centre and left while his veterans advanced down the Carlisle Road and 2 Units of Zouaves swung to engage the Rebels right wing. The guns first round caused Confederate casualties and a rethink of their plan!

Zouaves advance!

The Federals Gun is deployed and belches flame and smoke (imagine that in the picture) the first round takes out a couple of Southerners (indicated by the skull and crossbones silver disks)...

The Confederates quickly react to the big gun and cunningly place skirmishers to cover the flank and skilfully redeploy their other troops!

The Southerners now moved to advanced half their force on their extreme left covered by skirmishers while their right struggled to hold off the rampant Zouaves!

The Union Zouaves are proving to be a pesky nuisance to the Rebel right flank! Both sides take losses but in this position the Yankees have the numbers.

Confederates mass toward their far left (confusingly to the right in the picture!)

The Union gunners kept up a deadly fire using grape and to clear the annoying Confederate skirmishers from their field of fire!

But the Union weren't having everything their own way a group of Southern skirmishers had turn their left threatening Captain Darling and the other Officers, a whole unit was diverted to face them!

Losses started to mount on both sides and by turn five the tide began to turn in favour of the Federals! To counter the Northerners ascendancy on their right and in the centre the Rebels began to advance their left out of the Napoleon's field of fire. Meanwhile the Union Gun was proving pivotal, the crewman laboured hard and on their own had inflicted almost a quarter of the Rebels casualties!

A ferocious duel broke out along the Carlisle Road Georgian infantry led by skirmishers took on Union veterans supported by fire from a nearby barn!

The Rebel left advanced!

At this juncture a well timed charge by the Zouaves and an accurate aimed volley from the Federal Veterans on the Carlisle Road pushed the Southerners to their limit and they broke withdrawing from the battlefield!

The Zouaves about to charge to glory in the lower right they can be seen facing a worn down Confederate Unit which they broke!

An accurate volley from Federal Veterans along the Carlisle Road cleared it of Southerners! This broke the will of the Confederates, they quickly withdrew!

The Susquehanna Hat Company was saved as was the integrity of the whole of the Union, Captain Darling and Lieutenant Harrison were applauded...anyway Rhodes men had more important fish to fry further south around the town of Gettysburg!

It was a great night and until turn six both sides were in with a chance to win. Importantly for them the Confederates wore down the Federal skirmishers giving them an edge but the Union forces placement of the gun hampered their foes while their bold advance on the right sealed the Rebels fate! These rules even though not perfect are ideal for our Monday night sessions, they are a relatively simple and well set out, they feature lots of action especially once the forces from both sides close and importantly they have a good ACW feel. Still despite having played these rules many times we still came up with a few questions which I’ve sent off to be cleared up! Something different comes up each time we play.

Thanks to Al, Dave and George! Next ACW game outrageous fake facial hair, cigars and Bourbon will be compulsory!

Wednesday, 8 July 2020

61-65 Rules AAR 7 - 1863 ACW Skirmish

Photograph Headline taken from The Richmond Gazette;
Our 'Boys' rout Unionist as they Advance on Wrightsville to cross the mighty Susquehanna River!

For our first Monday night group get together since the relaxed Covid19 restrictions came into force we played a 61-65 skirmish game...

Late June 1863 the Southern Boys of Major General Early’s Division of the Army of Northern Virginia advanced through York towards Wrightsville with the intention of securing the bridge located there to enable a crossing of the mighty Susquehanna River! Hastily organised Federal Forces were organised to face the Confederate invaders and clashes occurred!

At one small but steeply banked stream north east of York soldiers from both the North and the South searched for a suitable place to cross. With the hot afternoon sun beating down on the men clad in blue and grey a small footbridge with nearby fords was discovered and spot quickly became the focal point of their attention. It was not long before shouting and the crack of gunfire broke the serenity of that fateful summers’ day...

A deja veux moment...yep this is a replay of my solo lock down game from a few weeks ago but with more than one person! I took up command of the Southerners with Maurice advising  me and Dave and Fred (previously known as George) took control of the Northerners!


The scenario details are in the last post so straight into the AAR!


- The Confederate plan was to turn the Union right and descend on the bridge from 2 directions, 6 of their units were deployed to their centre and right and 2 units were placed on the left. The Union plan was to advance on a broad front and 2 of their 8 units were to launch a right hook to turn the Southerners flank and divert their forces from the bridge.

The battlefield, the Union was to enter from the left of the picture and the Confederates from the right. The Confederates won the initiative!


- Turns 1, 2 and 3 saw both sides plod forward through the fields and orchards while the fleet footed skirmishers raced forward and commenced harassing fire on their opponents, the Southerners got the better of these initial shootouts!


Turn 2 saw Southern skirmishers on the bridge facing off against a force of gaily clad Zouaves!


The Confederate skirmishers fire was hot and several Zouaves were shaken, these can be identified as they face to the rear of the unit they are in.


The Confederate Leader in the centre urged 'his boys' on during the initial turns!


- Turn 4 saw the Union centre halted in front of the bridge and deploying to the left of it along the stream. Their skirmishers occupied the barn and their troops to the right of the bridge advanced slowly. The Confederates too moved up to the stream while their skirmishers continued to harry the Yankees, their flanking units found it difficult going in the orchard!


The centre of the battlefield at the end of turn  from the Union view...


The Union left one Unit lined up on the stream bank while their support Unit can be seen struggling through the corn! On the opposite side of the stream 3 Confederate Units can be seen deployed in line.


Overall view at the end of Turn 4, Southerners can be seen crossing the stream in the foreground while at the top of the picture Union skirmishers can be seen on the Confederate left.


- Turn 5 and the Confederate skirmishers were driven from the bridge while Yankee skirmishers stalled the Confederates crossing the stream on their left. In the centre the first major casualties were inflicted as well drilled Rebels firing in rotation caused 75% casualties one Yankee unit breaking it! The Union's flanking attack continued to develop.


Yankees crossing the stream as fast as they their legs could carry them!


Union Skirmishers inflict losses on the Rebel flank move and hold them at the ford...

Crashing volleys were unleashed on the Yankees across the stream by Rebels, silver disks mark where men 'fell'...

The Union Commander with his central position threatened by Southern fire moved into the cornfield, I know Unit Standards would rarely be part of a Company level skirmish but they look so good on the table they just have to be included!


Overall view at the end of Turn 5 note the Yankee Unit that was just to the left of the bridge deployed along the stream is now 'gone' blown into oblivion by Rebel fire. Also the Zouaves by the bridge moved to their right leaving the crossing unguarded...


- Turns 6 and 7 saw both sides flank attacks finally begin to advance across the stream and in the centre in a coup d'etat a Southern Unit deployed back into column and rushed across the bridge! In the continuing firefight across the stream the Confederates were still getting the better of it. The Union losses were mounting at an alarming rate, they were more than twice that of the Confederates!

In the foreground Rebels can be seen manoeuvring into position on the Union side of the stream!

Union Sergeant Albert Spears waving the Company Guidon rallies his men and spurs them into action!


The Confederate right was across the river and faced only by a few skirmishers skulking in the corn! More Yankees lurked behind them though!


Despite the Union right hook gaining momentum and putting pressure on the Rebels they faced the Confederate Command held firm reinforcing their successes at the bridge and on their right leaving a screen to face the threat.

- Turn 8 and the Southerners charge across the bridge failed to get started due to command issues. The Yankee right hook tried but were unable to engage the Rebels they faced while some Zouaves on the Union left charged the Confederate flanking force in an unsuccessful attempt to stop their momentum! Along the rest of the line the desultory fire continued to cause casualties!


At the Bridge a full strength rebel unit faced an unsteady Yankee one! This could be where the battle was decided but the Southerners failed all 3 of their action attempts...the attack stalled!

On the Union left Zouaves got into close combat with the Confederates and they were soundly defeated! They retired back into the cornfields...

A final lunge by the Yankee flank attack just couldn't reach the Southerners line!


 - With the first actions in turn 9 the Confederates resorted to volley fire along the line as they only needed to hit a single Yankee to clinch a win! On their third attempt they were successful hitting a Union Private near the barn! A Southern Victory. YeeHaw!

The great skedaddle begins! With their morale broken the Union centre begins to retire!


A final cheer from the Southern Commander as he sees the Yankees break!

Final positions Confederate left/Union right...

Final positions Confederate right/Union left...


A great victory for the Confederacy as they secured the vital footbridge!


Victory Points;
The USA required 28 and the Confederates required 30
4 VP's were awarded for taking out the enemy Commander
2 VP's were awarded for each enemy Leader casualty
1 VP was awarded for each enemy 'grunt' knocked out
5 VP were awarded to the side in possession of the bridge


CSA; 30 points (25 infantry casualties inflicted and the 5 Point Bridge possession bonus)
USA;  12 points (12 infantry casualties inflicted)


The debrief was interesting and each sides tactics were dissected, the rules again got the thumbs up and as usual gave us a tense game with a result in a timely manner. In the end the Union Commanders vowed revenge next time we roll out the 61-65 rules!

Sunday, 19 April 2020

61-65 Rules - 1863 ACW Skirmish Scenario & AAR 6

Late June 1863 the Southern Boys of Major General Early’s Division of the Army of Northern Virginia advanced through York towards Wrightsville with the intention of securing the bridge located there to enable a crossing of the mighty Susquehanna River! Hastily organised Federal Forces were organised to face the Confederate invaders and clashes occurred!

At one small but steeply banked stream north east of York soldiers from both the North and the South searched for a suitable place to cross. With the hot afternoon sun beating down on the men clad in blue and grey a small footbridge with nearby fords was discovered and spot quickly became the focal point of their attention. It was not long before shouting and the crack of gunfire broke the serenity of that fateful summers’ day... 

The climax of the action to secure the crucial bridge near York is reached, Yankees and Rebs charge and counter charge...

Scenario Forces;
Both sides have an 1863 'Company' as outlined on pages 28 and 29 of the 61-65 rule book.

Federal Force
A Captain, a 1st Lieutenant, a 2nd Lieutenant, a 1st Sergeant and 4 Sergeants
8 men squads; 2 Veterans, 5 Volunteer and 1 Volunteer Militia 

Confederate Force
A Captain, a 1st Lieutenant, a 2nd Lieutenant, a 1st Sergeant and 4 Sergeants
7 men squads; 3 Veterans and 5 Volunteer.

Set Up/Special Rules;
The 6’ by 4’ table was divided in half long-wise with a stream that can only be crossed by the central footbridge and 2 fords either side of it near the table edges, fields, both fallow and with crops and a orchid are astride the stream with clear banks and a farm and barn are near the bridge.

Both sides enter the table from anywhere along their allocated 6’ side, decide randomly. 

Decide which side goes first in Turn One randomly.

Buildings can only be occupied by skirmish pairs, up to 4 pairs can be in a building an a maximum of one can fire per building side (up to 45 degree LOS from wall corners), re sides without windows the skirmishers will create 'loopholes' automatically.

Victory Conditions;
To break the opposition side;
Federals break once 30 casualty points are accrued
Confederates break once 28 casualty points are accrued
Occupation the footbridge increases that sides casualty point total by 5 while decreasing the oppositions by 5, if both sides have figures on the footbridge the side with most controls it.
Note - control of the footbridge is included to ensure both sides get to grips quickly!

The AAR;


The Yankees got the initiative and both sides entered the bulk of their forces centrally and during Turns One and Two made for the footbridge...virtually all the terrain was hard going slowing both sides down, the orchid and cornfield did offer light protection for troops in them...


Forward for the Union!

Come on Boy, for the Confederacy Hurrah!

A few Yankees advanced through the cornfields, it was hard going!


Turn 3 and first blood was drawn, a Rebel Skirmisher was felled by a Yankee Minie ball  as he approached the stream...this did nothing to deter the main Confederate attack though and they got to the crucial footbridge before the Bluebellies...

Rebel Skirmishers reach the footbridge...


Elsewhere a firefight across the stream began as both sides moved up and deployed...


Turn Four saw the battle start to move to the flanks where the fords were located while around the bridge the carnage began as both sides traded volleys!

The Yankees right flank crossed the stream in strength...

...whereas on the other side of the battlefield the Rebels were deploying more slowly and only managed to get skirmishers across the stream...the small bullet indicates that unit has had its actions for the current turn and the empty cartridge means their weapons are unloaded...

Both sides lining up and taking aim! On the right of the picture a unit of Rebs can be seen scooting toward the nearby ford in support of the skirmishing line that had moved ahead of it!

Turn Five and losses started to tell against the Southerners, of great importance they lost several more skirmishers and the Yankees got troops onto the footbridge!

The first Federals advance onto the bridge and push back their Confederate counterparts...

Overall situation in the centre of the action at the end of Turn Five...

Turn Six and the Yankees were concentrating effective fire on the Rebs and looked to be in a good position to turn the Southerners left flank while holding the Confederates trying to turn their own left flank. With the situation looking dire the Confederates chose to try and win in the centre and stormed the footbridge!

Union troops threaten the Confederates left...

 The reason the Yankees left flank was so successful was the poor Rebel Leadership i.e. shite dice rolling! Both the Rebel units failed to get even a single action!

The Confederate attempt to turn the Northerners line was stymied!

Meanwhile the Rebs advance in the centre the battle was still there to be won despite the poor performance on their flanks...


Overall situation at the end of Turn six Yankees to the left and Rebels to the right...


Turn Seven and both sides suffered from command issues and the battle for the bridge stalled but on the flanks the Union fire inflicted heavy casualties and three Rebel units broke fleeing to the rear suddenly there were wide gaps in the Southerners line!

With the initiative on their side the Rebs decided to charge the Yankees centre first thing Turn Seven but the dice had other ideas three action failures! But luckily for them the Union Command was just as bad and both units facing the Rebs on the bridge failed their activations as well!

The firefight across the stream continues!

But the Yankees had the better of it...the Zouaves took aim at the depleted Rebels facing them...

... and moments later the Rebel line is shattered!


Turn Eight and it was all over! With their first actions the Yankees charged the Southerners on the bridge and after two rounds of combat broke them. As the Rebel centre fled their force morale collapsed! The grey clad boys from the South hastily retired leaving the cheering Yankees in control of the vital footbridge!

The first round of combat as the Yankees charged onto the footbridge was a tie so both sides lost a figure and a second round of combat ensued...

...this round the Yankees won decisively...

...and the Rebel unit was routed! More poor rolling for them!

"Hurrah! Take that Johnny Reb!"

Overall view of the battlefield at the end of the game...


This was a solo play through of another game that we'll play as a group once we recommence TSOG catch ups! The turnovers of play order that come from 'unlucky' action rolls being random does help with solo play and several times during the game my plans were thrown into disorder thanks to this mechanic!

The scenario played well and as usual these rules gave a good game. Up until the end of turn Six either side could have won but by the end of Turn Seven it was destined to be a Union victory, the dice Gods can be cruel and today the Southerners got the short end of the stick! Of note tactically the Rebs were at a disadvantage after Turn Five when they had lost over half their skirmishers, these guys are very important and this gave the Yankees an edge! 

FYI - this scenario should be easy to adapt to other rule sets, I even adapt it to other eras!

Oh and Keep well!