Late June 1863 the Southern Boys of Major General Early’s Division of the Army of Northern Virginia advanced through York towards Wrightsville with the intention of securing the bridge located there to enable a crossing of the mighty Susquehanna River! Hastily organised Federal Forces were organised to face the Confederate invaders and clashes occurred!
At one small but steeply banked stream north east of York soldiers from both the North and the South searched for a suitable place to cross. With the hot afternoon sun beating down on the men clad in blue and grey a small footbridge with nearby fords was discovered and spot quickly became the focal point of their attention. It was not long before shouting and the crack of gunfire broke the serenity of that fateful summers’ day...

Scenario Forces;
Both
sides have an 1863 'Company' as outlined on pages 28 and 29 of the 61-65 rule book.
Federal Force
A
Captain, a 1st Lieutenant, a 2nd Lieutenant, a 1st Sergeant and 4 Sergeants
8 men
squads; 2 Veterans, 5 Volunteer and 1 Volunteer Militia
Confederate Force
A
Captain, a 1st Lieutenant, a 2nd Lieutenant, a 1st Sergeant and 4 Sergeants
7 men
squads; 3 Veterans and 5 Volunteer.
Set Up/Special Rules;
The 6’ by 4’ table was divided in half long-wise with a stream that can only be
crossed by the central footbridge and 2 fords either side of it near the table edges, fields, both fallow and with crops and a
orchid are astride the stream with clear banks and a farm and barn are near the
bridge.
Both sides enter the table from anywhere along their
allocated 6’ side, decide randomly.
Decide which side goes first in Turn One randomly.
Decide which side goes first in Turn One randomly.
Buildings can only be occupied by skirmish pairs, up to 4 pairs can be in a building an a maximum of one can fire per building side (up to 45 degree LOS from wall corners), re sides without windows the skirmishers will create 'loopholes' automatically.
Victory Conditions;
To break
the opposition side;
Federals
break once 30 casualty points are accrued
Confederates
break once 28 casualty points are accrued
Occupation
the footbridge increases that sides casualty point total by 5 while decreasing
the oppositions by 5, if both sides have figures on the footbridge the
side with most controls it.
Note -
control of the footbridge is included to ensure both sides get to grips quickly!
The AAR;
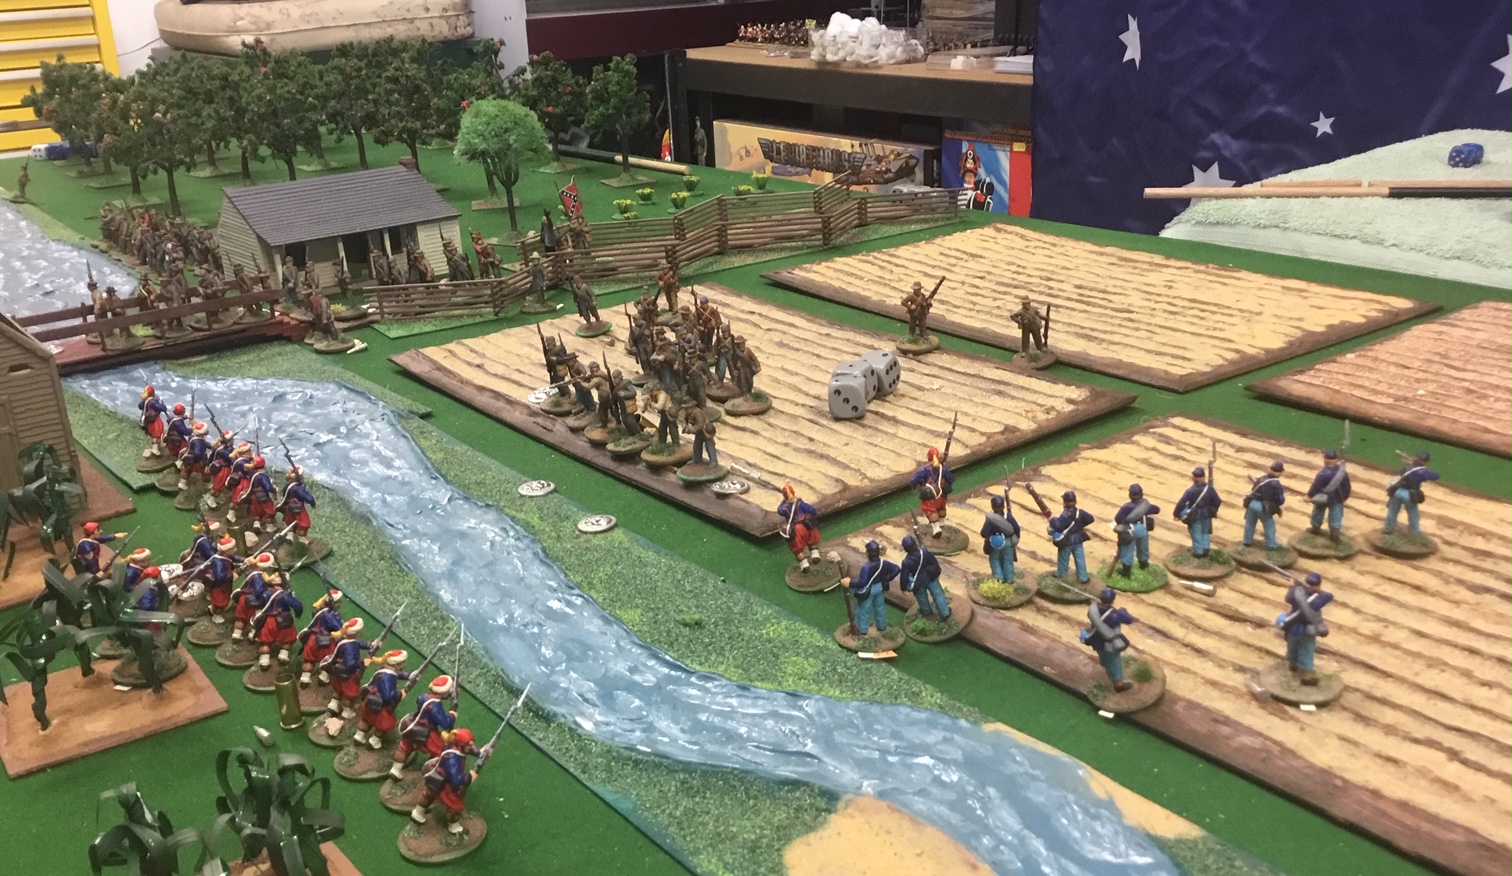
The Yankees got the initiative and both sides entered the bulk of their forces centrally and during Turns One and Two made for the footbridge...virtually all the terrain was hard going slowing both sides down, the orchid and cornfield did offer light protection for troops in them...
Forward for the Union!

Come on Boy, for the Confederacy Hurrah!

A few Yankees advanced through the cornfields, it was hard going!

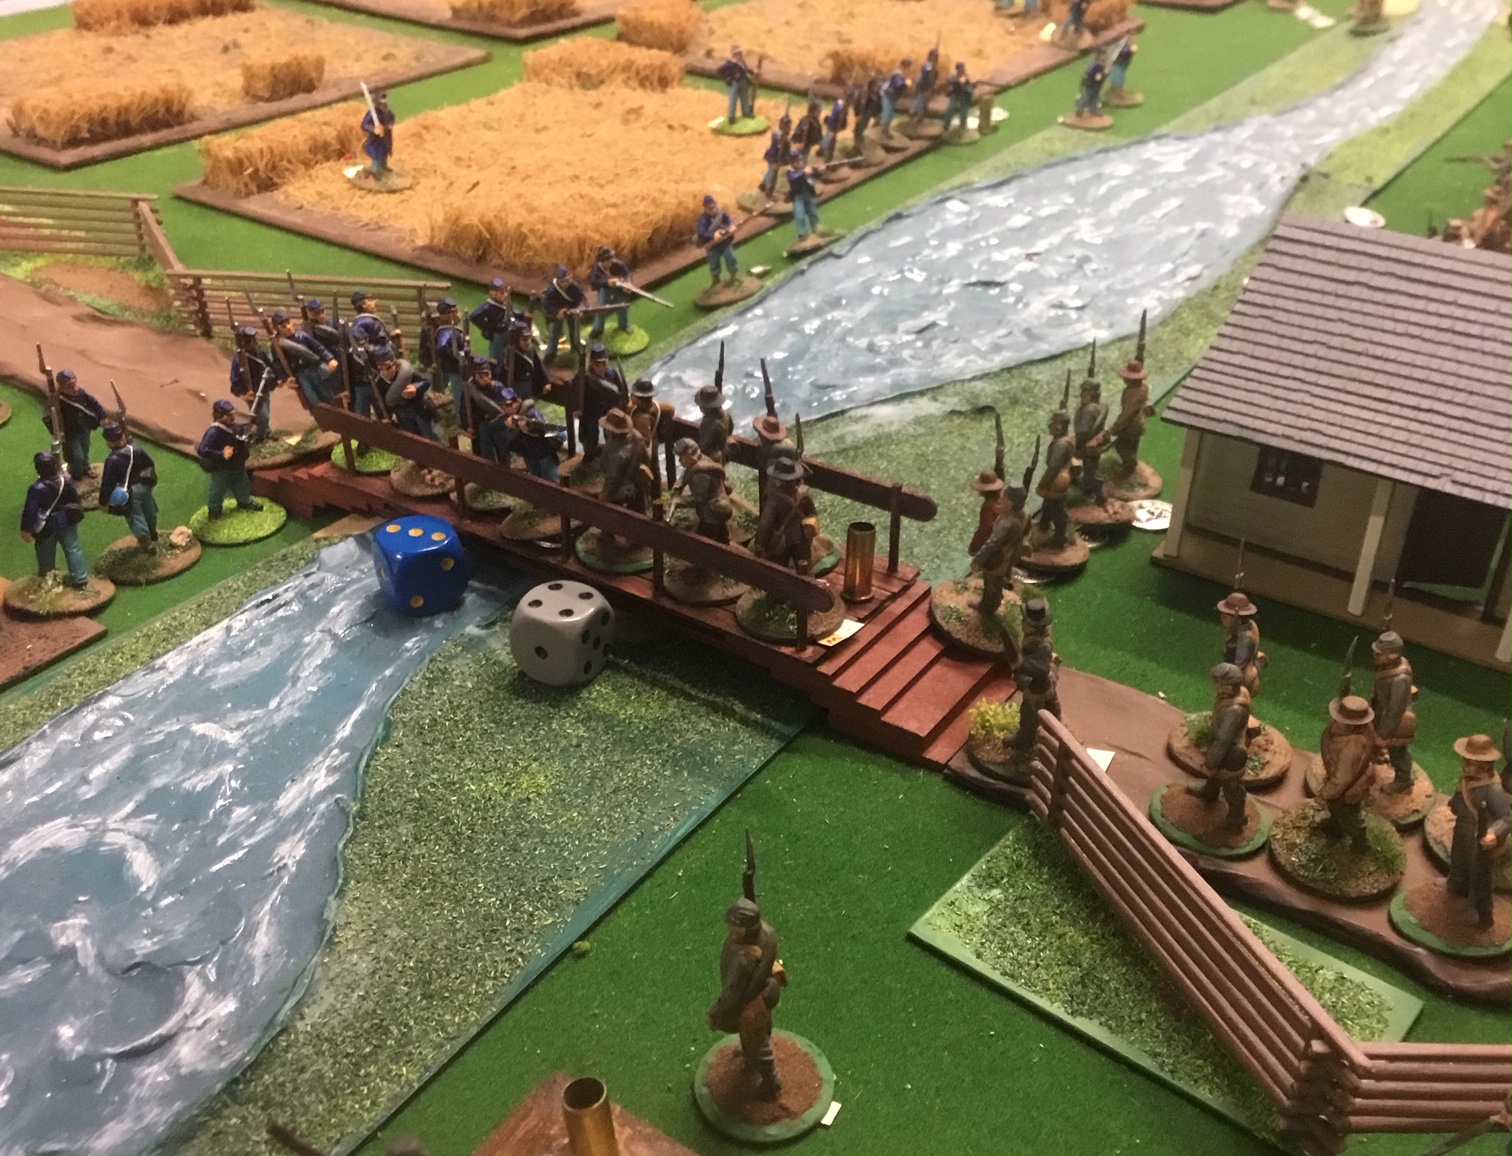
Turn 3 and first blood was drawn, a Rebel Skirmisher was felled by a Yankee Minie ball as he approached the stream...this did nothing to deter the main Confederate attack though and they got to the crucial footbridge before the Bluebellies...
Rebel Skirmishers reach the footbridge...

Elsewhere a firefight across the stream began as both sides moved up and deployed...


Turn Four saw the battle start to move to the flanks where the fords were located while around the bridge the carnage began as both sides traded volleys!
The Yankees right flank crossed the stream in strength...

...whereas on the other side of the battlefield the Rebels were deploying more slowly and only managed to get skirmishers across the stream...the small bullet indicates that unit has had its actions for the current turn and the empty cartridge means their weapons are unloaded...

Both sides lining up and taking aim! On the right of the picture a unit of Rebs can be seen scooting toward the nearby ford in support of the skirmishing line that had moved ahead of it!

Turn Five and losses started to tell against the Southerners, of great importance they lost several more skirmishers and the Yankees got troops onto the footbridge!
The first Federals advance onto the bridge and push back their Confederate counterparts...

Overall situation in the centre of the action at the end of Turn Five...

Turn Six and the Yankees were concentrating effective fire on the Rebs and looked to be in a good position to turn the Southerners left flank while holding the Confederates trying to turn their own left flank. With the situation looking dire the Confederates chose to try and win in the centre and stormed the footbridge!
Union troops threaten the Confederates left...
The reason the Yankees left flank was so successful was the poor Rebel Leadership i.e. shite dice rolling! Both the Rebel units failed to get even a single action!

The Confederate attempt to turn the Northerners line was stymied!

Meanwhile the Rebs advance in the centre the battle was still there to be won despite the poor performance on their flanks...

Overall situation at the end of Turn six Yankees to the left and Rebels to the right...

Turn Seven and both sides suffered from command issues and the battle for the bridge stalled but on the flanks the Union fire inflicted heavy casualties and three Rebel units broke fleeing to the rear suddenly there were wide gaps in the Southerners line!
With the initiative on their side the Rebs decided to charge the Yankees centre first thing Turn Seven but the dice had other ideas three action failures! But luckily for them the Union Command was just as bad and both units facing the Rebs on the bridge failed their activations as well!

The firefight across the stream continues!

But the Yankees had the better of it...the Zouaves took aim at the depleted Rebels facing them...

... and moments later the Rebel line is shattered!

Turn Eight and it was all over! With their first actions the Yankees charged the Southerners on the bridge and after two rounds of combat broke them. As the Rebel centre fled their force morale collapsed! The grey clad boys from the South hastily retired leaving the cheering Yankees in control of the vital footbridge!
The first round of combat as the Yankees charged onto the footbridge was a tie so both sides lost a figure and a second round of combat ensued...
...this round the Yankees won decisively...

...and the Rebel unit was routed! More poor rolling for them!

"Hurrah! Take that Johnny Reb!"

Overall view of the battlefield at the end of the game...

This was a solo play through of another game that we'll play as a group once we recommence TSOG catch ups! The turnovers of play order that come from 'unlucky' action rolls being random does help with solo play and several times during the game my plans were thrown into disorder thanks to this mechanic!
The scenario played well and as usual these rules gave a good game. Up until the end of turn Six either side could have won but by the end of Turn Seven it was destined to be a Union victory, the dice Gods can be cruel and today the Southerners got the short end of the stick! Of note tactically the Rebs were at a disadvantage after Turn Five when they had lost over half their skirmishers, these guys are very important and this gave the Yankees an edge!
FYI - this scenario should be easy to adapt to other rule sets, I even adapt it to other eras!
Oh and Keep well!
FYI - this scenario should be easy to adapt to other rule sets, I even adapt it to other eras!
Oh and Keep well!
Excellent looking game, figures and terrain Captain.Random actions in a game does make the solitaire play much more interesting.
ReplyDeleteHi Ben!
DeleteHope you're well.
Thanks, these are good rules and the action rolls definitely help with solo play.
Great game as usual, Captain! Keep playing
ReplyDeleteSergio
Thanks Sergio, these rules are one of my favourites for a good game.
DeleteBeautiful table and troops!
ReplyDeleteThanks for commenting Gonsalvo!
Delete