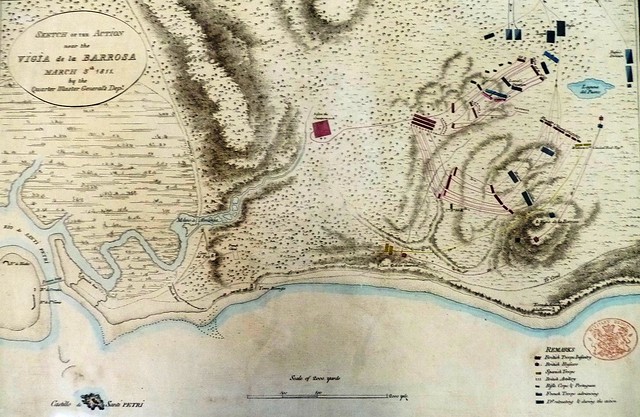
Battle of Sank Michael 1809 Austrians Vs French
(Lasalle in 15mm)This was a good opportunity to bring out the newly painted Austrian Grenz and Landwehr. This was the prime reason for selecting such a tough scenario.
From wikipedia and the scenario written by Peter Anderson in his excellent book "Blunders on the Danube" (http://blundersonthedanube.blogspot.com/), supplemented by a Command and Colors scenario and googlemaps, I tweaked the battle with a specific aim in mind.
So, how to make a scenario work ? If you intend to play this game as a commander, then don't read any further, for the point is to have both commanders operating under a fog of war, uncertain of what is actually going to happen and to make decisions based on perception, rather than stated objectives. If you want to run this scenario as an umpire then cool, please read on, but I think it is a one play exercise. Once played, it has done its job. More about this at the end.
Alan took on the difficult job of playing the Austrians while Pete( Darling) and Dave (Von Neudog) played the French, having had wind of what they should be doing having had a trial run of the scenario the fortnight before.
Historically, on 25 May 1809 Jellacic, the Austrian commander was leading a division down the Leising valley towards Sankt Michael intending to cross the River Mur and proceed to join Archduke John, in Graz, some 50km distant down stream. Prince Eugene, with a French Army at his disposal, was camped some 30km away at Judenburg to the east and got wind of this. He detached Greiner's Corps (2 divisions under Seras and Durutte) to cut them off. A corp vs a (weak) division.
The Austrians arrived at Sankt Michael first, early in the morning and confronted the lead elements of Seras' division on the plateau to the west of the town. Jellacic, thinking he was facing only light opposition, fought for the plateau in order that his baggage train could get across the River Mur. There were actually two key bridges, one over the fast flowing Leising River and the main bridge over the Mur. Both rivers are unfordable.
FRENCH
General
de Corps - Paul
Grenier
General
de Division
Jean
Mathieu Seras Commander
10BW
9th Chasseur
a Cheval Reliable Experienced Small Pursuit
4 pndr Horse
battery Light 4 Bases
Colonel
Jean-Baptiste Bruny Sub
Commander 4BW
1/62nd Line
Bn Reserve (Count Desaix Brigade) Reliable Experienced Small
2/62nd Line
Bn Reserve (Count Desaix Brigade) Reliable Experienced Small
General De
Brigade Roussel Sub
Commander 6BW
1/1 Legere Bn
Valiant Experienced Small SK1
1/53rd Line
Bn Reliable Experienced Small
2/53rd Line
Bn Reliable Experienced Small
3/53rd Line
Bn Reliable Experienced Small
4/53rd Line
Bn Reliable Experienced Small
General De
Brigade Louis Gareau Sub
Commander 6BW
1/35th Line
Bn Reliable Experienced Small
1/42nd Line
Bn Reliable Experienced Small
1/106th Line
Bn Reliable Experienced Small
2/106 Line Bn Reliable
Experienced Small
3/106th Line
Bn Reliable Experienced Small
4/106th Line
Bn Reliable Experienced Small
In Support (Models not needed)
General
de Division
Joseph
Durutte
(about 4 hours behind you)
6 pndr foot battery
9th Chasseur
a Cheval Reliable Experienced Small Pursuit
6 pndr foot battery
Brigade Francois
Valentin
Brigade Francois
Valentin
1/22nd
Legere Bn
2/22nd
Legere Bn
1/23rd
Legere Bn
2/23rd
Legere Bn
3/23rd
Legere Bn
4/23rd
Legere Bn
Brigade Joseph
Marie, Count Dessaix
3/62nd Line
Bn
4/62nd Line
Bn
1/102nd Line
Bn
2/102nd Line
Bn
3/102nd Line
Bn
(1/62nd and
2/62nd detached South of Mur)
AUSTRIAN
General
de Division
Field
Marschall-Leutnant Franz Jellacic Commander
10BW
Salzburg
Chevaulegers Reliable Experienced Small Lancers Pursuit
3 pndr foot
battery Light 2 Bases
Salzburg Landwehr
Shaky Amateur Small
Brigade General
Major Konstantin Ettingshausen Sub
Commander 6BW
1/32nd
Esterhazy Line Bn Reliable Experienced Small
2/32nd
Esterhazy Line Bn Reliable Experienced Small
3/32nd Esterhazy
Line Bn Reliable Experienced Small
1/45th De
Vaux Line Bn Reliable Experienced Small
2/45th De
Vaux Line Bn Reliable Experienced Small
Brigade General
Major Ignaz Legisfeld Sub
Commander 6BW
1/5th Grenz
Bn Reliable Experienced Small SK3 maybe Irreg
2/5th Grenz
Bn Reliable Experienced Small SK3 maybe Irreg
1/55th Line
Bn Reuss Greiz + 1/3rd Archduke Charles (½) Reliable
Experienced Large
As you can see, the most optimistic of Austrian Commanders would soon realise they are doomed. So it is important not to disclose the full OOB to either side, nor even the most rudimentary objectives. The mission briefings are included at the end of this post.
The Austrians start with a Legisfeld's brigade on the Leising Road, while the French have a single light (legere) battalion sprinting from the western board edge. French reserves (Rousell's Brigade) enter in turn 3, while the second Austrian Brigade (Ettingshausen) enter from turn 2.
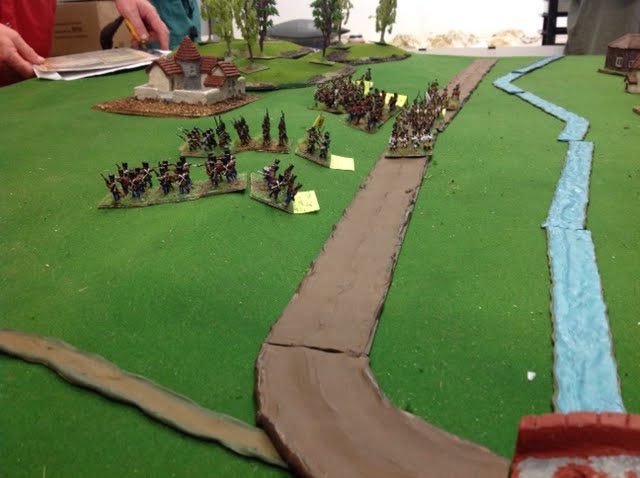
At the start of play, the Austrian Brigade under Legisfeld is moving south, the town is on the right of the pic, seen above. The Leising river is on the right, the big wooded hill (Fresenberg) at the rear, with a small farm (Sankt Walpurga) on the left. The Grenz battalions are moving onto the plateau having spotted a single Legere battalion moving in march column towards the Leising Bridge, which is just visible at the lower right. The second Austrian Brigade (Ettingshausen) appears in the next turn coming down the same road.

A few turns later and Legisfeld's brigade has turned to meet the French coming from the left, but with only two Grenz battalions, a landwehr battalion and a large infantry battalion (1/55th), they have their work cut out. The Austrian 1/55th has moved to guard the Leising Bridge, firing a nice volley and the French Legere Bn (still in march column) is being threatened by the Salzburg Chevaulegers on their left flank. Their days are numbered. The River Mur is obvious across the bottom of the pic while the Mur Bridge is just out of shot to the lower right.
This is the decision point for both commanders. What to do? Jelacic thinks he is only facing light troops and the plateau is going to be critical to him getting over the Mur with his baggage train. The French have huge numbers on their side and are desperate to get into the fight and seal off the Austrian escape. The plateau is only being defended by the Landwehr and two Grenz battalions (one of which has moved into the Walpurga farm). Jelacic's second brigade has entered the game at the top right. A single french light artillery battery (4 bases) is being rushed up, while the Austrian 2 base battery could support the thin brown and grey line on the plateau.
 The doomed 1/1st legere
A few turns later and the French have moved into attack columns and gone all fancy pants "en chequer", The French Chasseurs a Cheval sprint for the Leising bridge bottom left, the Landwehr and Grenz deliver a volley to try and stop the horde. The second French Brigade has entered play on the far left. The Austrians are unaware a whole new division waits behind that lot.
Alan (Austrian) has decided that the evacuation of the troops across the bridges should take priority. he sacrifices the Landwehr and the Grenz to move quickly down the road with his core troops, deciding the plateau is a lost cause. Smart play.

A few turns later, the Landwehr have crumbled under succesive assaults, the 1/55th Austrian Bn and Chevaulegers have turned to face the French to hold the approaches to the bridge, and being charged by the French Chassuers a Cheval, they form square. Walpurga farm is being overun as the French get onto Fresenberg Hill (essentially, the second French Brigade was committed to this). Ettingshausen's Austrian brigade has got two battalions over the Leising Bridge and another two might also escape. In the foreground, unknown to either side, Dessaix has detached two battalions from a supporting brigade to threaten the Mur bridge from the south.

The Austrian 1/55th (two disruptions and no longer in square) still holds firm against a successive charge from the French cavalry, but is facing the prospect of canister from the french artillery lower left. The Austrian Chevaulegers have bolted to the west, behind the french guns out of picture. Why ? not sure ! The French are enveloping the Austrian right and an Austrian battalion has had to divert from crossing the bridge to shore up the line.

The French fully engaging the Austrian rearguard, 1/55th in the foreground, Grenz being pursued in the distance, Chasseurs a Cheval still charging, French breaking through middle right of pic.

But, two Austrian battalions are almost across the Mur Bridge and a third has got over the Leising Bridge, thus holding valuable ground and securing an escape route. The rest of the Austrians will not be so lucky.
On the actual day, Jelacic thought to preserve his baggage train and arraigned his whole division across the plateau, holding off Seras until mid afternoon. Then Durutte's Division arrived and the French made a massive combined 2 division assault, essentially wiping the single weaker Austrian Division out. Since Jelacic's instructions were to join Archduke John at Graz, he utterly failed, as one Austrian historian stated, Jelacic was "a remarkably unlucky and inept general". On this day, Alan played to his instincts and almost got a whole brigade out of the trap.
I set victory conditions that rewarded the Austrians for getting over the Leising Bridge and rewarded the French for wiping out the Austrians/engaging them to the west of the bridges/getting over Fresenberg Hill to prevent a norther escape/ and generally being aggressive. I don't think Alan could have done much more, Peter and Dave had a clue about what the French should be doing, so engaged quickly, while Alan was roleplaying an Austrian General caught in a trap.
If the Austrians play this again, they should obviously bolt for the bridge, do not hesitate, do not engage with anything except the bare minimum, send the Chevaulegers across the bridge to guard the southern bank just in case, put the Grenz in the woods on Fresenberg Hill and deploy them as irregulars (an option given) and keep the northern escape route open. Sacrifice the poor landwehr. It would take huge resolve to do this while nursing the thought you are only fighting some light french troops.
Thanks to the players, Alan for taking on the huge challenge, Peter and Dave for driving the French so hard forward. Even the sacrifice of the 1/1e French Legere held up the Austrians for that critical few turns. This was a totally unbalanced scenario, but to achieve total victory the French must go for it unhesitatingly. For the Austrians to win, they should do their best to refuse battle. Hence it can only really be played once !
Out of interest, I have included the respective briefings. My apologies, but I only have a hand drawn scenario map but you can get the gist looking at the pictures of the table. I enjoyed using google earth 3D and getting an idea of just what this terrain is like. The Leising Bridge is difficult to find, but is mentioned by a few sources.
Austrian Briefing:
Archduke John has
instructed that you take your division and join him at Graz after
concerns the Austrian Army was too dispersed. On 19 May 1809 you
evacuated Salzburg to commence the march to Graz, where Archduke John
has retreated, being pursued by Prince Eugene following the Battle of
Piave River. Your division will add reinforcements to Archduke John's
army. You have detached most of your cavalry, most of your artillery
and much of the landwehr battalions prior to leaving Salzburg,
believing them to be less important in the alpine regions.
You arrived at Mautern
and plan to follow the Leising Valley to Sankt Michael, where you
will turn east to follow the Mur River down to Graz, some 50km away.
At 0900 on 25th May your forces are marching southward,
along the Leising River, and have just reached Sankt Michael. You are
aware that Eugene, with a considerable sized force is somewhere to
the south west and is headed for Bruck an der Mur, some 40km from
Graz, on the river valley you will march along.
At 0930, Legisfeld's
Light Brigade (Grenz) are reporting the presence of a Legere (light)
French battalion moving towards the plateau overlooking Sank Michael
where the bridges over the rivers Leising and the Mur must be crossed
for you to continue your march. Your baggage train is strung out
along the Leising valley road. There is a slight risk you will be
cornered in Sankt Michael, but there are two avenues of escape should
the French force attack in strength, across the Mur to continue your
journey, or a retreat back up the Leising valley. At the present time
it seems possible to hold off the French from the plateau and allow
the baggage train to continue through Sankt Michael.
The proficient Grenz
battalions can be irregular troops and are ideally suited to
operations in the wooded Fresenberg Hill. They may move without
penalty, may fire through woods and may recover DISR even if they
move (but must be >4BW from enemy) if they are irregular, but may
not revert to being regular if this option is taken. They may not
form square if irregular and suffer a -1 penalty when shooting in the
open.
French Briefing:
You, General of
Division, Jean Seras, are part of Prince Eugene's army, hot on the
heels of Archduke John's force who were harried at the Battle of the
River Piave after retreating from Villach, they are heading towards
Graz. Your pursuit has taken you to Judenberg, in the valley of the
river Mur, some 25km southwest of Sankt Michael and still 80km from
your destination.
Eugene has received
word that a division of Austrians, under Jellacic, is attempting to
rejoin Archduke John's force. This force is to the northwest, coming
down from Salzburg and retreating under Napoleon's northern offensive
in Bavaria. Prince Eugene detaches General Paul Greiner's corps, two
divisions under yourself and your colleague Durutte, in order to
isolate this Austrian division.
You force march your
troops which start to arrive at Sankt Michael on the morning of 25th
May. At 0900 the 1/1st Legere battalion is approaching
the plateau that overlooks the village and commands the approaches to
two critical bridges. Jellacic's division is seen moving down the Leising
valley and must cross these two bridges in order to move to Graz. You
must quickly force the issue and prevent the Austrians from escaping.