Showing posts with label Malaya Campaign. Show all posts

Sunday, 8 May 2022

Chain of Command - Malaya 1942 Mini Campaign - Game 3 AAR

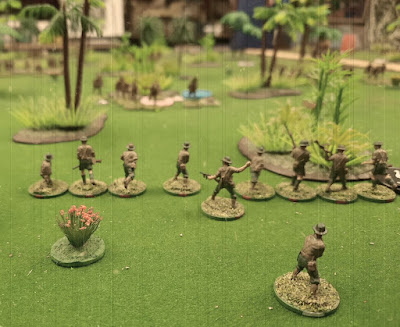
Aussie Infantry support a mighty Lanchester Armoured Car manned by the SSVF...

Game three of our Malaya 1942 Campaign is done and dusted! As the Japs were stymied last time it is a replay of that scenario but slightly further down the road, so again we are playing a Probe game.

Updated Leader names...
Aussie Platoon HQ, Lieutenant Graham Witherspoon, Sergeant Barry Griswald
Section 1, Sergeant McCarthy
Section 2, Sergeant Thompson
Section 3, Sergeant Bruce Ingliss

Japanese Platoon HQ, Rikugun Mitsubishi, Gunso Toyota
Section 1, Gucho Daihatsu
Section 2, Gucho Suzuki
Section 3, Gucho Isuzu
Mortar Section, Gunso Shitmee
Sniper, Jōtōhei Sanyo

Revised Australian End of Game 2 Process
Aussie after Game Stuff
Section 1: 4 Casualties
Section 3: Sergeant Wounded 5 Casualties
Total 9 Casualties
6 Return due to Force Morale Difference
1 returns next Game
1 returns next Game from Game 1
1 misses next Game
1 Killed
Total reduction of 1 figure for the next game!

Game 3 'Probe' Scenario

Aussie Forces
Core Platoon (less five casualties)
Lanchester Armoured car

Jap Forces
Core Platoon (New)
MMG Team
Sniper Team

The Battlefield

Lots of jungle on this battlefield, beside the main road heading north to south there are two areas of wild bamboo to the west of it and one area of open ground to its east...
Force actions/movements are shown, the Australians in Blue and the Japanese in Yellow...

Map Legend

The AAR

The jungle road and its surrounds where still and quiet as Lieutenant Witherspoon consulted his section leaders as he expected another Japanese attack. He proceeded to address them detailing his plans. Half way through his briefing a shrill whistle pierced the serene jungle and all hell broke loose, the wildlife scattered and the air was filled with shooting and shouts in Japanese! Sergeant Griswald coolly commented to his Lieutenant, "Briefing over then Sir?
The Japanese Officer, Rikugun Mitsubishi had launched an attack on the Aussie position to the east of the road to Singapore with his full strength, after being beaten previously honour demanded he defeat these Australians!
Two Jap sections deployed either side of a clearing in the jungle and advanced on the two Australian sections that had arrived to face them. A desultory firefight broke out a long range with little effect!
But Mitsubishi upped the ante setting ordering his mortar section into support and deploying Type 92 machinegun. His Number Two Gunso Toyota also arrived at this point with the last of the platoon's sections. He led an attempt to infiltrate the Australian left! Sergeant McCarthy's men on the extreme right of the Australian position noticed this and sent word to their CO!
Outnumbered the Australians held back awaiting more troops as the terrain was not favouring them in this engagement. They fell back out of the Japs line of sight, it was a waiting game for them!
The Japanese machinegun fire and mortar barrage hit McCarthy's men hard causing casualties and suppressing them while Gucho Daihatsu led his brave soldiers around their flank.
Desperate to retrieve the situation on their right the Australians launched a counter attack on the Japs right to distract them! The attacked was led by Witherspoon himself included Sergeant Ingliss's understrength section, the platoon's mortar team and a formidable Lanchester Armoured Car! This attack put great pressure on the Japs right and despite taking casualties Gucho Suzuki's men held firm under fire though!
At the height of the fire fight Japanese Sniper, Jōtōhei Sanyo coolly took a bead on an Australian he believed was in command of their flank attack, he took a deep breath steadied his weapon and gently squeezed the trigger...the shot missed, he cursed and then he lost sight of his enemy in the jungle! He settled to wait for another chance!
Irrespective of the pressure the Australian attack was having Rikugun Mitsubishi persisted with his own advance. On the Jap left covered effectively while the mortars and an MG Gucho Daihatsu and his men appeared to be on the verge of turning the enemy's flank! Lieutenant Witherspoon seeing his attack stalled and Japanese moving around McCarthy's position he decided the situation was lost and holding this position would only result in heavy losses he gave the order to withdraw, his men disengaged and withdrew southward.
Rikugun Mitsubishi cursed he was victorious but the Australians had again slipped away he ordered and immediate pursuit...BANZAI!

Some Pictures of the Action

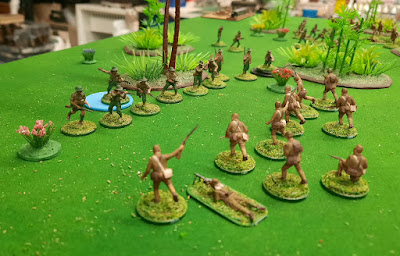
Gucho Suzuki's section deploys during the opening phase on the Japanese right... 

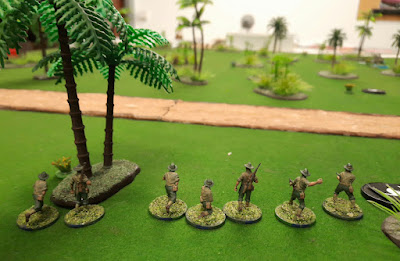
McCarthy's men are the first Aussies into the action east of the Singapore Road they immediately went into Overwatch!

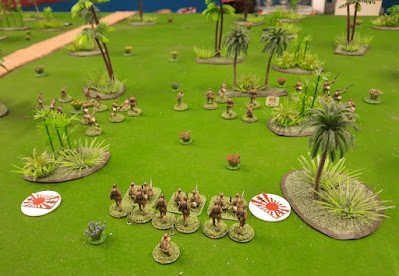
First movements from both sides, two Aussie sections deploy on the left of the picture whilst to the right Japanese can be seen, of note the Aussies have deployed out of sight of the Japs but in doing so have left two of their JOPs unguarded! 

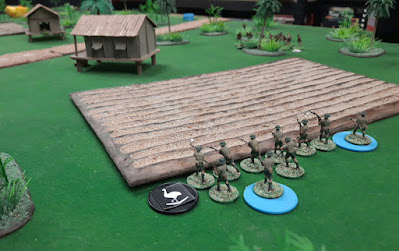
The reserve Aussie section (understrength) arrive on the battlefield to engage the Jap right...

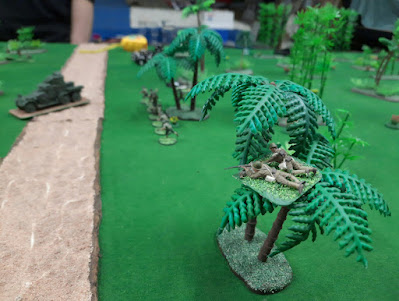
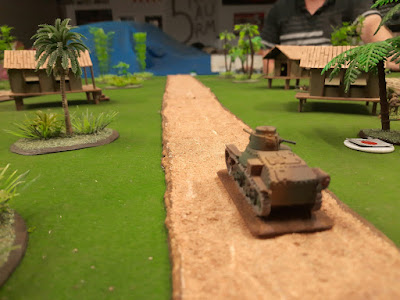
Aussie support arrives, a Lanchester of the SSVF!
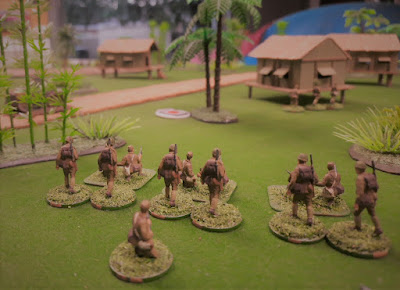
In the picture to its right is Thompson's section they saw little action in this fight.

The Lanchester takes on 'defenceless' Jap infantry!
What's the Japanese for "Bugger Me!"?

And because its such a cool vehicle (OTP Model) here's the Lanchester again!

McCarthy's men were hit by MG & mortar fire reducing their effectiveness, in the background the cunning Japanese can be seen advancing take advantage of this!

Jap Sniper, Jōtōhei Sanyo takes a shot at the Aussies, clever figure placement by the Japanese player!
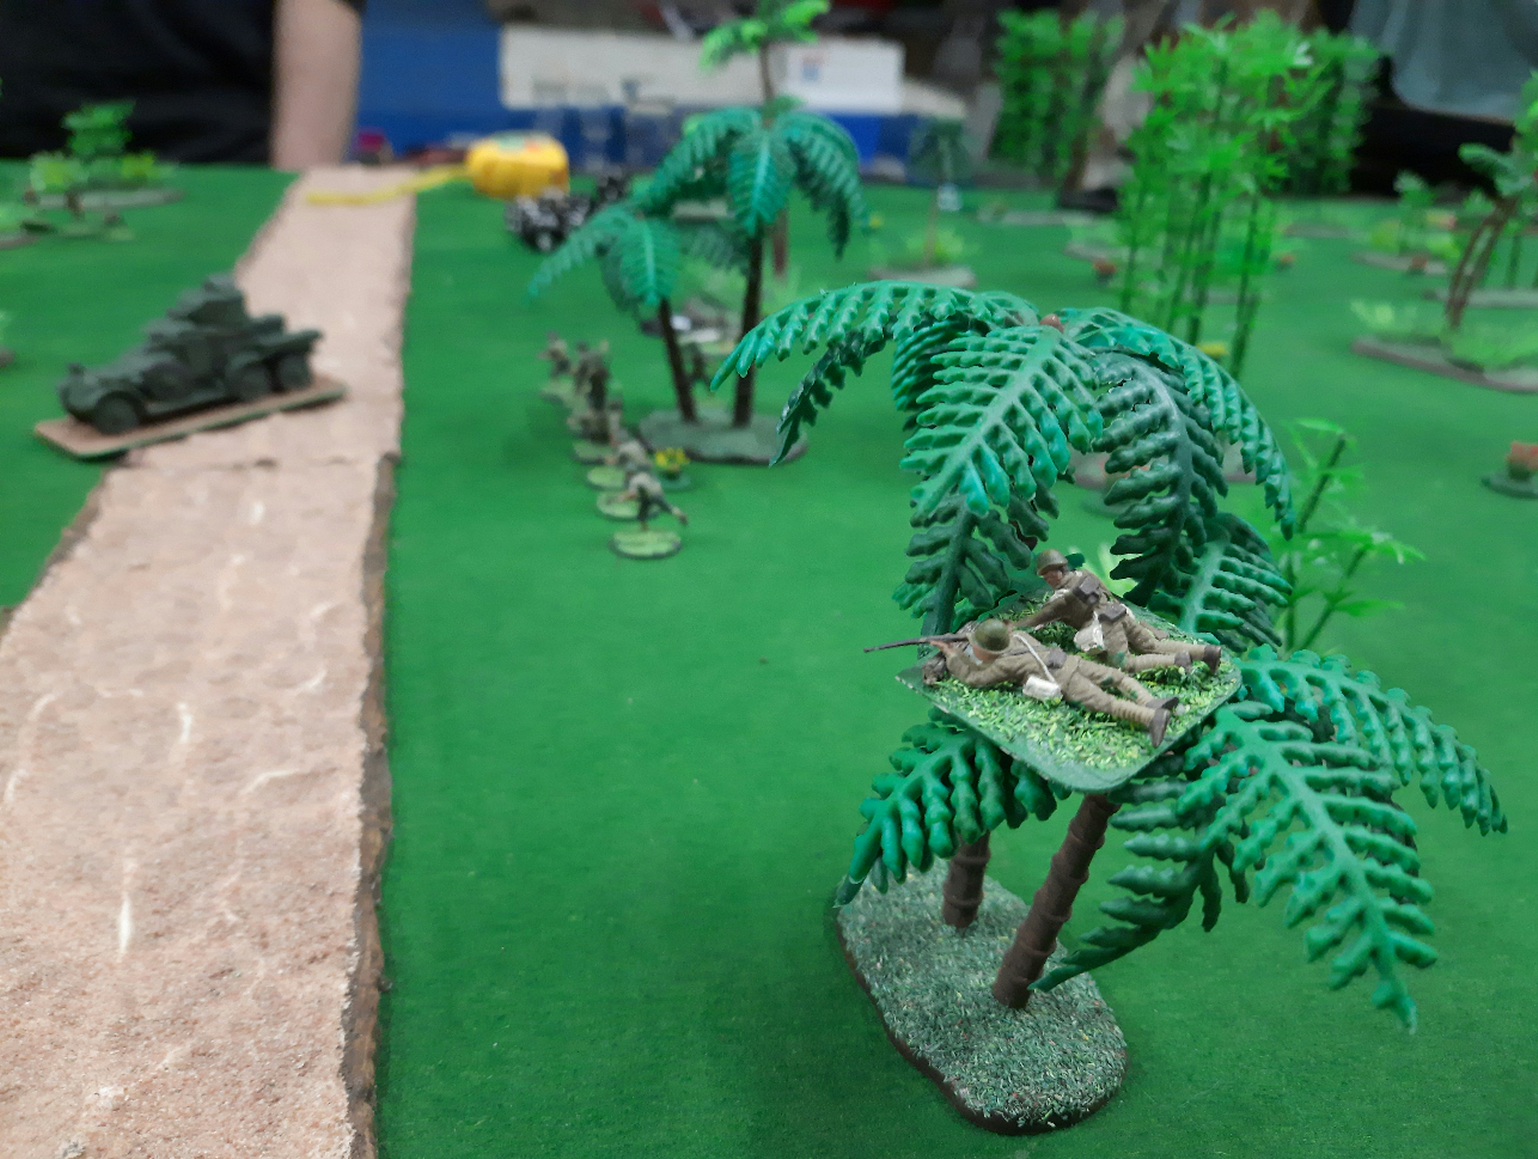
Gucho Daihatsu's troops make a dash for victory but a total victory is thwarted by the Australian Forces who withdraw!

Battlefield positions at games end from the southern (Australian) perspective.


Result Stuff
A Japanese Victory! An Australian Losing Draw!
Again the game ran smoothly, we had to look up the rules once checking on visibility from a buttoned vehicle! Again had time after the game to complete the Sharp End 'end of game' processes on the night!
We had to re-calculate the Aussie strength before starting because unlike Game 1 at the end of Game 2 the winning side had a six point Force Morale advantage so this greatly helped the Aussies who after the recount were only five men down a big difference to original nine (page 18 of the Sharp End)!
This game due to the lay of the land saw a lot less casualties on both sides five for the Japs and two for the Aussies and the 'end of game' process was decidedly in favour of the Aussies, Lieutenant Witherspoon looks like battalion Command material, whereas Rikugun Mitsubishi needs to take some charisma lessons!
Also this game included our first roll of four 6's! A Random Event! The Aussies rolled it and it resulted in another Jap section being automatically deployed where the Japanese player wanted!!!
Overall after this game Campaign wise the Japs are still on track for an overall win, pressure is on the Aussies! Next game will be in two or three sessions time.

Aussie after Game Stuff
Section 1: 2 Casualties
Total 2 Casualties
1 returns next Game
2 return from game 1
1 Killed
Total reduction +1 figure for the next game! An increase in strength Yeah!
For Campaign resolution:
CO Opinion Running Total = +4
+1 for Losing Draw Roll
OR Opinion Running Total = +3
+2 for Light losses than Japanese

Jap after Game Stuff
Sekushon 2: 5 Casualties
Total 5 Casualties!
2 returns next Game
1 misses the next Game then returns
2 Killed
Replacement Roll gives 3 extra men
Total reduction 0 figures for the next game! So full strength again!
For Campaign resolution:
CO Opinion Running Total = +1
+1 for Victory Roll
OR Opinion = -3
-1 for More losses than enemy Roll!
-2 for Heavy Losses Roll

Wednesday, 9 March 2022

Chain of Command - Malaya 1942 Mini Campaign - Game 2 AAR

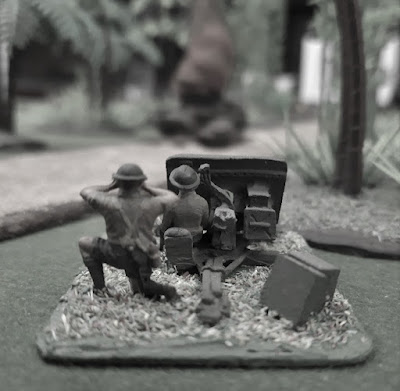
Staged photograph taken after the action of Sergeant Peters with his 2 pounder ATG, in the background Gunso Tomato's burning Ha Go Tank can just be made out...

Game two of our Malaya 1942 Campaign completed! This session Al was 'on the ground' and joined the Aussie side 'for the duration'!

Core Platoon leader details, we have some of the names for our leaders now so here they are as they'll come up on AAR's!
Aussie Platoon HQ, Second Lieutenant Graham Witherspoon, Senior Sergeant Barry Griswald
Section 1, Sergeant McCarthy
Section 2, Sergeant Thompson
Section 3, Sergeant Bruce Ingliss

Japanese Platoon HQ, Rikugun Mitsubishi, Gunso Toyota
Section 1, Gucho TBC
Section 2, Gucho TBC
Section 3, Gucho TBC 
Mortar Section, Gunso Shitmee

Game 2 'Probe' Scenario

Aussie Forces
Core Platoon (less four casualties)
2 pounder ATG
Medic

Jap Forces
Core Platoon (less two casualties)
Ha Go Type 95 Tank
Pre-Game Barrage

The Battlefield

Lots of jungle here, beside the main road heading south there are two areas of open ground and one area of wild bamboo...

The AAR

Flushed with success the Japanese continued to push south in their conquest of Malaya! Their lead troops again encountered the troublesome Australians, they planned to probe their defences astride the main road to Jahor Bahru and then sweep them away! The Japanese CO, Rikugun Mitsubishi decided to refuse his left and push forward to the West of the road with his entire force, his opposite Second Lieutenant Witherspoon again hoped to carry out a fighting withdrawal! 
The Japs were quick to deploy almost their entire force and began to advance under the cover of a preparatory barrage which Mitsubishi hoped this would hamper the Australian movements! Almost immediately this plan went awry, despite the heavy Jap barrage the Aussies were quick to react and Platoon Sergeant Griswald quickly set up a defensive line with McCarthy and Thompson's sections supported by the Platoon mortar team! 
Mitsubishi was not deterred by these damned Australians quickly blocking his advance and he urged his men forward hoping their offensive spirit and aggressive nature would overwhelm them! His attack was also supported by Gunso Tomato in his Ha Go Type 95 tank which moved flat southward along the main road covering the left flank! Still Mitsubishi's plans were confounded, Witherspoon had Sergeant Peters set up his 2-pounder to cover the road and the Ha Go was a target Peters couldn't resist! The gunners tracked the tank as it advanced and let a round fly, moments later there followed a tremendous explosion! The anti tank gun's projectile ripped into the Ha Go and it exploded! Peters and his gun crew cheered! One round one tank!
Rikugun Mitsubishi sighed at seeing this, he was dismayed to see his armour support taken out of action but undeterred he pressed his men forward!
The lead Jap section now came under defensive fire from the Aussies but pushed on with their mortars in support. The Aussies CO, Witherspoon was confident and at this point decided to change plans, he would not withdraw but hold the Jap advance and counterattack to the east of the main road! He ordered Bruce Ingliss's section to deploy opposite the Jap left and threaten their deployment zone (read JOP!) located there.
The battle was in the balance! Then the scales tipped!
The Japs supporting barrage ended and their two sections who were just about to crash into the Aussie positions paused momentarily as effective Aussie fire checked their forward momentum. The Jap Platoon's mortar section was also distracted at this point as they were required to lay down smoke to cover the attack's lead unit! This gave the Aussies time to regain their composure whilst to the west of the road Ingliss's men rushed toward the Jap's exposed left flank!
Resuming their advance the Japanese closed in to contact the Aussies despite withering defensive fire and a deadly melee ensued, just what Witherspoon did not want to happen! But the Jap attack was over almost as soon as it started! Despite their own belief in their superiority both the Japanese sections were decimated, one NCO was dead and over 80% of the attackers had become casualties or were dispersed! The Japs morale plunged!
Mitsubishi cursed under his breath he no longer had the strength to advance so he reluctantly ordered his Platoon to regroup! The Japanese 'withdrew' to their start lines, the Platoon's mortar section could be considered its only effective fighting element every other section had been hammered, just over twenty men including Mitsubishi himself remained out of 55 who had advanced! Witherspoon's Australians had effectively repulsed the attackers, they had scored a decisive victory over the so far unstoppable Japanese, the price of this success was high though two of his sections had been reduced to half strength and and Sergeant Thompson had been wounded. A total of nine Diggers were dead, wounded or missing! It was time to consolidate their position and put the billy on!

Some pictures of the Action

Game on!
The Japanese deploy! Their initial roll allowed three sections and their 2IC to hit the ground running!

Gunso Tomato was ordered to cover the left flank of the Japanese attack, he motored down the main road in his Ha Go Type 95!

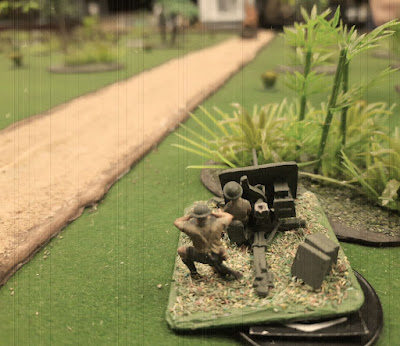
Sergeant Peters under direct orders from Witherspoon was to del with any Japanese armour, it took only a single shot to take out the lone tank that dared to advance!

Section one of the Japanese Platoon pushed forward to pin the Australians so the other sections could attack them from their flanks! They came under concentrated fire for their trouble!

Overall view of the Japanese advance to the west of the main road...

Sergeant Thompson's section deployed along the edge of an opening in the jungle to await their foes!

Sergeant McCarthy's section was on the far left of the Australian line, in the foreground of the picture you can see Senior Sergeant Barry 'Bazza' Griswald, his leadership was crucial in the game!

With their charging sections stalled by low movement rolls the mortar section helps the beleaguered first section which was taking concentrated fire from two Australian sections laying down some smoke. The Aussies used the 'five rounds rapid' option repeatedly and the bonus dice were very valuable!

The Japanese third section attempting to move right around the Australians left flank, McCarthy's section can be seen in the background to the right of the smoke...

The remains of Gunso Tomato's Ha Go Type 95 tank! Just to its left is a Japanese JOP that thanks to this loss was now exposed, the Australians recognised this and deployed Ingliss's section to capture it, the Japanese responded and used their available CoC Die to move it!

Sergeant Ingliss attempt at a coup de main fell into thin air, these Japanese were cunning!

Japanese to the left Australians to the right the battle was in the balance at this point!

The Australians of McCarthy's and Thompson's sections prepare to receive the Japanese attack, due to poor movement rolls both the attacking Japanese sections that could have reached the Australians hardly moved, in fact the one toward the top right of this picture advanced just three inches which was enough for them to move out of the Jungle and stop in the open right in front of a full strength Australian section...uh oh!

The grand Japanese charge was launched...


The aftermath, McCarthy's section repelled the Japanese third section, there were 4 Aussie casualties to 9 Japanese!

The Japanese third section after being defeated in close combat retreated 18 inches and doubled their shock! The pink disk indicates a wound, the red disk indicted the Section is Broken and the pile of blue disks represents their shock! It was commented that they could see Singapore if they stood on their heap of shock counters!!!!

The tabletop of the night!

Result Stuff
An Australian Victory!
Again the game ran smoothly, we had to look up the resupply and smoke rules this time though! We had time after the game to complete the Sharp End 'end of game' processes on the night!
A loss to the Japanese this early in the Campaign was a surprise, their dice rolling wasn't that bad except in the actual melees. So even though it may look bad for the Japanese at this point as this battle turned into a bloodbath perhaps its not, they inflicted heavy losses on the man power limited Australians and just called up a fresh Platoon for the next game...for the Australians the losses looked justifiable but were they? It was an expensive victory as next game their Platoon is going to be considerably weaker starting 9 figures down virtually a whole section!
This is our first CoC Campaign and it is already looking very interesting. Next game will be in two or three sessions time.

Aussie after Game Stuff
Section 1: 4 Casualties
Section 3: Sergeant Wounded 5 Casualties
Total 9 Casualties
2 return next Game
2 return next Game from Game 1
3 miss next Game
4 Killed
Total reduction 9 figures for the next game!
For Campaign resolution:
CO Opinion Running Total = +3
+2 for Victory Roll
OR Opinion Running Total = +1
+1 for Fewer losses than Japanese

Jap after Game Stuff
Sekushon 1: Gucho Wounded 6 Casualties
Sekushon 2: Gucho Killed total 13 Casualties
Sekushon 3: Gucho Wounded 9 Casualties
Total 28 Casualties!
New Platoon selected for next game, Rikugun Mitsubishi takes Command by Imperial Decree!
For Campaign resolution:
CO Opinion Running Total = 0
-2 for Defeat Roll
OR Opinion = 0
New Unit!

Wednesday, 23 February 2022

Chain of Command - Malaya 1942 Mini Campaign - Game 1 AAR

We started the Malaya 1942 CoC Campaign featured in the Lardies 2015 Christmas magazine Monday night. I'm going to be the 'neutral' Umpire for these games. So far Dave is locked for the Japanese side and George for the Australians, Al and Maurice haven't selected a side yet. Having two players sharing command per nationality means we can most probably still play on even without a full house! The forces are my 1/72 Airfix plastic men with support figures and vehicles from various makers!

During the game Gunso Shitmee urged his support men on as the Infantry advanced into the 'huts of death'...

Game 1 'Winning the Encounter Battle' Patrol Scenario

Aussie Forces
Core Platoon
Extra Infantry Section
Medic

Jap Forces
Core platoon
Ha Go Type 95 Tank

The AAR

The Japanese plan was to hold on their left and deploy strong forces to their right and sweep the Australian Dogs they suspected were in the village aside. Initially they deployed a section to each side of the road occupying a hut with one and lining the edge of the village clearing with the other, the platoon 2IC leading the latter. In reply the Aussies set up a section along the bund of the rice paddy on their right flank supported by a mortar team and a firefight started straight away which lasted the entire game! The Aussies won this shootout in the long run when the Japs after taking four casualties retired into the Jungle! A single Aussie was hit.
On the other side of the 'road' the Jap right was strong, two infantry sections and the platoon support faced off against two Aussie sections! The Japs of the lead section advanced swiftly through the village occupying all the huts. These men then became a target of some very effective Aussie fire directed by their platoon Sergeant, Barry Griswald a hardened career soldier. Griswald eventually brought the fire of all three of his platoon's sections on the Japanese advancing through the village. The Jap hit from the front and flank were decimated! In no time half of the Japs in the village became casualties! Despite the withering fire and their leader being wounded the leading Jap section showed great resilience, not only did they maintained their forward position they returned fire!
While the two flanks duked it out a battle within a battle began, Gunso Tomato drove his Type 95 Ha Go tank down the road hoping to panic the Imperialist Vermin! This bravado ended up with his vehicle becoming engaged in a duel with Diggers Bluey and Curly who were armed with a trusty Boys Anti-Tank Rifle! This confrontation resulted in a draw; a Boys round hitting the tank causing the crew to panic whilst Bluely was knocked unconscious by a ricochet, a spent Jap bullet hitting him in the head, Curly said later it was the safest place for Bluey to take a blow!
At this point with his plan fulfilled the Australian CO Second Lieutenant Witherspoon  decided to withdraw keeping his force intact to fight another day, he had inflicted 14 casualties whilst only taking a three, unfortunately for him a flurry of Jap mortar rounds hit his men as they retired doubling the Aussies losses!

Some pictures of the Action

The lead Jap section deployed into the village, a roar rang out from the men as they appeared to be on the verge of capturing the village!

Witherspoon's 'extra' section deployed along the bund of a paddy field of the Aussie's right, here they stayed for the game successfully pushing back the Japs they faced!

Overview of the battlefield after a couple of rounds of play, the Aussies to the left and the Japs to the right...

Gunso Tomato's Ha Go tank arrived at the battlefield and barrelled down the 'deserted' road!

The Japanese right advances!

The Jap right flank from above, two sections supported the lead one advancing through the village...

An overview of the battlefield just before the Aussie withdrawal, they had inflicted 14 casualties whilst taking only seven, it could have been worse for the Japs as two casualties were converted to wounds on their NCOs!

Result Stuff
A Japanese Victory and an Australian Losing draw!
A good night was had by all and even though we hadn't played CoC for quite a while we went thorough the evening only rarely referring to the rules!

Aussie after Game Stuff
Section 1: 4 Casualties
Section 2: 2 Casualties
ATR Team: 1 Casualty
3 return next Game
2 miss next Game
2 Killed
Total reduction 4 figures for the next game!
For Campaign resolution:
CO Opinion = +1
1 D6 = 5 was rolled due to Losing Draw
OR Opinion = 0
1 D6 = for fewer dead 2 was rolled no change

Jap after Game Stuff
Sekushon 1: Gucho Wounded 4 Casualties
Sekushon 2: Gucho Wounded 7 Casualties
Sekushon 3: 3 Casualties
7 return next Game
4 miss next Game
3 Killed
Replacements: 5 (rolled a 2, leader = 0, casualties = 7)
Total reduction 2 figures for next game!
For Campaign resolution:
CO Opinion = +2
1 D6 = for victory 5 was rolled Opinion +2
OR Opinion = -2
1 D6 = for  higher Casualties 4 was rolled -1
1 D6 = Very heavy casualties 1 was rolled -1

Sunday, 14 June 2020

CoC Malaya PSC Forces & Terrain - Welcome to the Jungle to Play the Next Level!

Well during the lull in face to face gaming due to 'Covid19' I am getting lots of gaming odds and ends sorted.

Before the world went crazy I had started getting prepared for some CoC PTO games, Dave had bought some 1/72 US Marines and I had my old 1/72 Airfix Japanese then I got side tracked after reading the Malaya 1942 PSC in one of the Lardies Christmas Specials (2015 I think)! Off I went getting all the figures, vehicles and terrain that could be required. I used as much stuff on hand as I could as this theatre was being put together on a budget.

First up the Aussies, they would need a core infantry platoon and extras. I had my old 1970 Airfix Aussies on hand and included lots of British 8th Army a couple of New Zealand infantry figures in to boost their numbers (these are also from my 70's stash!). This gave me 5 sections of Diggers in total. Two Inch Mortars were made using the the useless Aussies set wounded figure and the crawling dude with a bit of brass tubing. Vickers MGs were sourced from the Airfix 8th Army Set as was a mine detecting guy and a figure that was converted to a Flamethrower (even though one wasn't required for Malaya it could be used in other PTO games)! ATR bases were made utilising the Bren Gunner figure. Sniper, and FOO bases were made and the other pretty odd figure in the Airfix set, the guys toting a crate were painted up on singe bases to be used in MG and ATG crews. All the figures were painted in jungle greens even though I know the men of the 8th Division were dressed in Khaki as they were destined for North Africa (this was another expedient for general PTO gaming). Some vehicles could also be called on by the Aussies so I spent up on a Lanchester A/C, three Bren carriers and two 2lber ATGs. I also have a couple of trucks from the 1970s that can be included!

Next up the Japanese, again I had a kernel on hand three packs of Airfix Infantry and a Type 97 tank from my youth. To these I bought three Type 95 tanks and the Italeri Type 92 Gun and AT Set. This gave me enough stuff to build the base platoon and extra infantry section, two sniper bases, an ATR team and some engineering types (including a dreaded Flamethrower). The 'Knee Mortar' teams were made like the Aussie ones with generic figures that looked vaguely like they could be mortar crew and a barrel on the base! I have on loan a couple of MG teams from Dave to round out the Jap support! A guy bearing the Rising Sun was painted up as well just to cruise along with the Platoon Leader as it looks cool and is sort of expected! Painting the Japs was pretty easy but the Airfix figures lack a lot of detail so they didn't come up quite as well as the Aussies (the Italeri figures in contrast had super detail!).

Lastly I finish up making a heap of Jungle terrain bases these will be needed extensively during the Campaign Scenarios. I think I have enough! The jungle terrain will be a trade off between looks and 'playability' I don't want to cover all the ground as our tiny soldiers need to fit in somewhere so there needs to be enough to delineate the jungle area without interfering with game play. Also cost is a factor here, even though Chinese 'slave labour' trees etc are cheap buying lots does add up!

Okay here's some pictures of the results of my work...


The jungle base production line...

A lot of jungle bases completed...

Scratch building the Aussie and Jap Flamethrower guys...a couple of WIP pictures of the Japanese Airfix figure updates, I didn't take any of the Aussie before painting...


The painted up Flamethrower figures...

The Aussie motor pool and ATG types available...none of the vehicles have been weathered as I am looking for transfers err decals suitable to use on most of them!

The mighty Lanchester A/C is one of those cool interwar armoured cars and looks really cool! It is a Resin UV print from OTP and it is a great model! The detail is fantastic and there is not a print layer to be seen! 


The Aussie MG, ATR, Mortar, Sniper and FOO bases...

Odd Aussies...

The 2lbers were from Grubbys Tanks and are very nice metal 'kits'...the crewman are from my 1/72 figures...

 A basic Aussie section...

All the Aussies! 

The Japanese Armour and Guns. The Type 97 is the Airfix one and still bears its 1979 paint job. The Type 95s are from Grubbys Tanks, I think they may be a bit under scale and came with a lot of air bubbles! The guns are Italeri, the ATG is an adaptation of the Type 92 Infantry Gun...

The Jap support, MG team, Sniper team, Knee Mortar team, the Flamethrower dude, a Spotter and a couple of AT guys...

The basic Japanese section...

All the Japs together...

Everything set to go!

All these parts came together with another CoC rules test game before we start the campaign proper last Monday on the Queens Birthday Public Holiday, I'll add a post to cover that game soon!