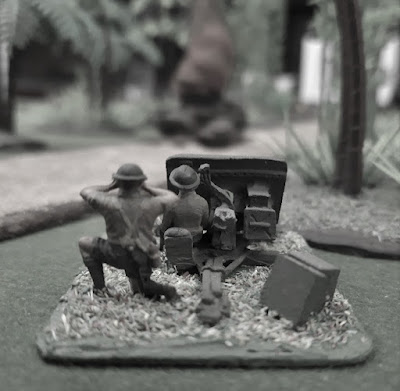
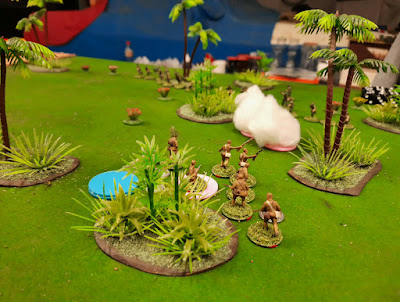
Staged photograph taken after the action of Sergeant Peters with his 2 pounder ATG, in the background Gunso Tomato's burning Ha Go Tank can just be made out...
Core Platoon leader details, we have some of the names for our leaders now so here they are as they'll come up on AAR's!
Aussie Platoon HQ, Second Lieutenant Graham Witherspoon, Senior Sergeant Barry Griswald
Section 1, Sergeant McCarthy
Section 2, Sergeant Thompson
Japanese Platoon HQ, Rikugun Mitsubishi, Gunso Toyota
Mortar Section, Gunso Shitmee
Game 2 'Probe' Scenario
Aussie Forces
Core Platoon (less four casualties)
2 pounder ATG
Medic
Jap Forces
Core Platoon (less two casualties)
Ha Go Type 95 Tank
Pre-Game Barrage
The Battlefield
Lots of jungle here, beside the main road heading south there are two areas of open ground and one area of wild bamboo...

The AAR
Flushed with success the Japanese continued to push south in their conquest of Malaya! Their lead troops again encountered the troublesome Australians, they planned to probe their defences astride the main road to Jahor Bahru and then sweep them away! The Japanese CO, Rikugun Mitsubishi decided to refuse his left and push forward to the West of the road with his entire force, his opposite Second Lieutenant Witherspoon again hoped to carry out a fighting withdrawal!
The Japs were quick to deploy almost their entire force and began to advance under the cover of a preparatory barrage which Mitsubishi hoped this would hamper the Australian movements! Almost immediately this plan went awry, despite the heavy Jap barrage the Aussies were quick to react and Platoon Sergeant Griswald quickly set up a defensive line with McCarthy and Thompson's sections supported by the Platoon mortar team!
Mitsubishi was not deterred by these damned Australians quickly blocking his advance and he urged his men forward hoping their offensive spirit and aggressive nature would overwhelm them! His attack was also supported by Gunso Tomato in his Ha Go Type 95 tank which moved flat southward along the main road covering the left flank! Still Mitsubishi's plans were confounded, Witherspoon had Sergeant Peters set up his 2-pounder to cover the road and the Ha Go was a target Peters couldn't resist! The gunners tracked the tank as it advanced and let a round fly, moments later there followed a tremendous explosion! The anti tank gun's projectile ripped into the Ha Go and it exploded! Peters and his gun crew cheered! One round one tank!
Rikugun Mitsubishi sighed at seeing this, he was dismayed to see his armour support taken out of action but undeterred he pressed his men forward!
The lead Jap section now came under defensive fire from the Aussies but pushed on with their mortars in support. The Aussies CO, Witherspoon was confident and at this point decided to change plans, he would not withdraw but hold the Jap advance and counterattack to the east of the main road! He ordered Bruce Ingliss's section to deploy opposite the Jap left and threaten their deployment zone (read JOP!) located there.
The battle was in the balance! Then the scales tipped!
The Japs supporting barrage ended and their two sections who were just about to crash into the Aussie positions paused momentarily as effective Aussie fire checked their forward momentum. The Jap Platoon's mortar section was also distracted at this point as they were required to lay down smoke to cover the attack's lead unit! This gave the Aussies time to regain their composure whilst to the west of the road Ingliss's men rushed toward the Jap's exposed left flank!
Resuming their advance the Japanese closed in to contact the Aussies despite withering defensive fire and a deadly melee ensued, just what Witherspoon did not want to happen! But the Jap attack was over almost as soon as it started! Despite their own belief in their superiority both the Japanese sections were decimated, one NCO was dead and over 80% of the attackers had become casualties or were dispersed! The Japs morale plunged!
Mitsubishi cursed under his breath he no longer had the strength to advance so he reluctantly ordered his Platoon to regroup! The Japanese 'withdrew' to their start lines, the Platoon's mortar section could be considered its only effective fighting element every other section had been hammered, just over twenty men including Mitsubishi himself remained out of 55 who had advanced! Witherspoon's Australians had effectively repulsed the attackers, they had scored a decisive victory over the so far unstoppable Japanese, the price of this success was high though two of his sections had been reduced to half strength and and Sergeant Thompson had been wounded. A total of nine Diggers were dead, wounded or missing! It was time to consolidate their position and put the billy on!
Some pictures of the Action
Game on!
The Japanese deploy! Their initial roll allowed three sections and their 2IC to hit the ground running!
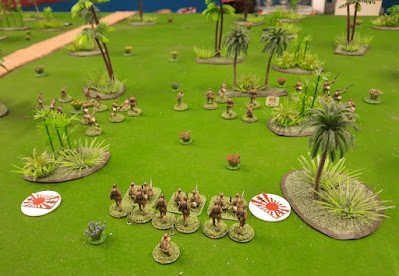
Gunso Tomato was ordered to cover the left flank of the Japanese attack, he motored down the main road in his Ha Go Type 95!

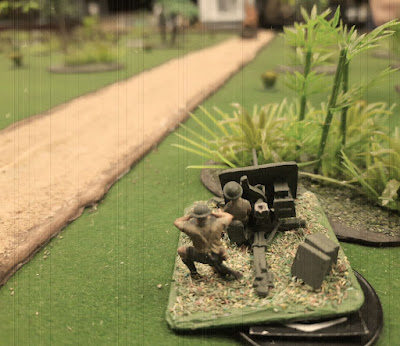
Sergeant Peters under direct orders from Witherspoon was to del with any Japanese armour, it took only a single shot to take out the lone tank that dared to advance!
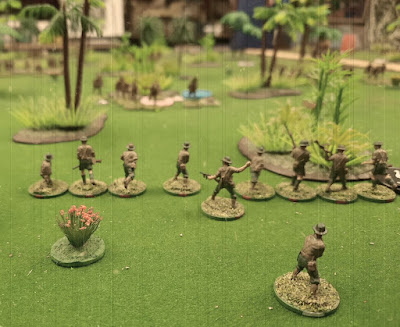
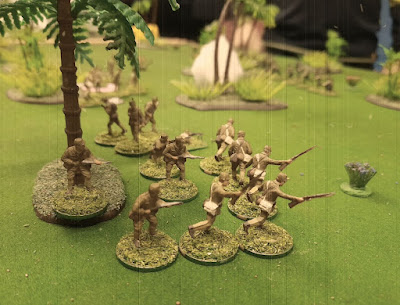
Section one of the Japanese Platoon pushed forward to pin the Australians so the other sections could attack them from their flanks! They came under concentrated fire for their trouble!

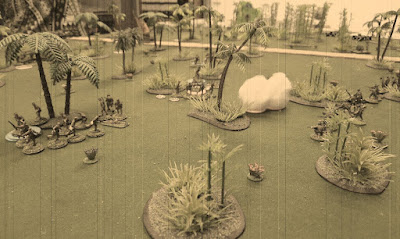
Overall view of the Japanese advance to the west of the main road...

Sergeant Thompson's section deployed along the edge of an opening in the jungle to await their foes!

Sergeant McCarthy's section was on the far left of the Australian line, in the foreground of the picture you can see Senior Sergeant Barry 'Bazza' Griswald, his leadership was crucial in the game!
With their charging sections stalled by low movement rolls the mortar section helps the beleaguered first section which was taking concentrated fire from two Australian sections laying down some smoke. The Aussies used the 'five rounds rapid' option repeatedly and the bonus dice were very valuable!
The Japanese third section attempting to move right around the Australians left flank, McCarthy's section can be seen in the background to the right of the smoke...
The remains of Gunso Tomato's Ha Go Type 95 tank! Just to its left is a Japanese JOP that thanks to this loss was now exposed, the Australians recognised this and deployed Ingliss's section to capture it, the Japanese responded and used their available CoC Die to move it!

Sergeant Ingliss attempt at a coup de main fell into thin air, these Japanese were cunning!

Japanese to the left Australians to the right the battle was in the balance at this point!
The Australians of McCarthy's and Thompson's sections prepare to receive the Japanese attack, due to poor movement rolls both the attacking Japanese sections that could have reached the Australians hardly moved, in fact the one toward the top right of this picture advanced just three inches which was enough for them to move out of the Jungle and stop in the open right in front of a full strength Australian section...uh oh!

The grand Japanese charge was launched...


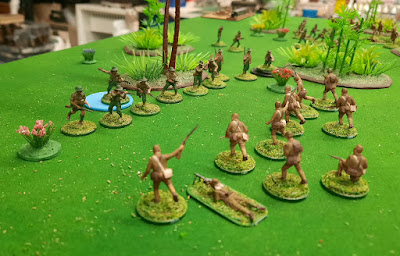
The aftermath, McCarthy's section repelled the Japanese third section, there were 4 Aussie casualties to 9 Japanese!

The Japanese third section after being defeated in close combat retreated 18 inches and doubled their shock! The pink disk indicates a wound, the red disk indicted the Section is Broken and the pile of blue disks represents their shock! It was commented that they could see Singapore if they stood on their heap of shock counters!!!!

The tabletop of the night!

Result Stuff
An Australian Victory!
Again the game ran smoothly, we had to look up the resupply and smoke rules this time though! We had time after the game to complete the Sharp End 'end of game' processes on the night!
A loss to the Japanese this early in the Campaign was a surprise, their dice rolling wasn't that bad except in the actual melees. So even though it may look bad for the Japanese at this point as this battle turned into a bloodbath perhaps its not, they inflicted heavy losses on the man power limited Australians and just called up a fresh Platoon for the next game...for the Australians the losses looked justifiable but were they? It was an expensive victory as next game their Platoon is going to be considerably weaker starting 9 figures down virtually a whole section!
This is our first CoC Campaign and it is already looking very interesting. Next game will be in two or three sessions time.
Aussie after Game Stuff
Section 1: 4 Casualties
Section 3: Sergeant Wounded 5 Casualties
Total 9 Casualties
2 return next Game
2 return next Game from Game 1
3 miss next Game
4 Killed
Total reduction 9 figures for the next game!
For Campaign resolution:
CO Opinion Running Total = +3
+2 for Victory Roll
OR Opinion Running Total = +1
+1 for Fewer losses than Japanese
Jap after Game Stuff
Sekushon 1: Gucho Wounded 6 Casualties
Sekushon 2: Gucho Killed total 13 Casualties
Sekushon 3: Gucho Wounded 9 Casualties
Total 28 Casualties!
New Platoon selected for next game, Rikugun Mitsubishi takes Command by Imperial Decree!
For Campaign resolution:
CO Opinion Running Total = 0
-2 for Defeat Roll
OR Opinion = 0
New Unit!
Great looking game!
ReplyDeleteInteresting for a campaign as you say. The Japanese getting a new platoon while the Australians are down 9 men.
Hopefully you will have time to paint a ring on the 2 pounder's barrel to show their kill :)
Hey Ben thanks for the reply!
DeleteGood news for the Aussies page 18 of at the Sharp End Rules states after a game concludes;
‘The winner and loser now compare their Force Morale ratings. If the winner has a higher force morale rating than the loser then the difference in ratings represents how many men “killed” the winner may immediately return to duty. This reflects his owning the battlefield and being better able to retrieve his wounded whereas those of his defeated enemy are lost.’
At the end of this game the Aussie morale was 8 and the Japs was 2 this could make a significant difference, I’ll discuss it with the players next session but our 8th Division Boys may be in a better position than first thought..take that Emperor Hirohito!
😊