Wednesday 19 September 2018

AAR 1 - ACW Skirmish - Sixty-One Sixty-Five Rules

Confederate infantry defending a fence line in a skirmish while foraging near the Potomac June 1861...


Time for some ACW Skirmish action so Dave and I hit the gaming table with the Sixty-One Sixty-Five rules!


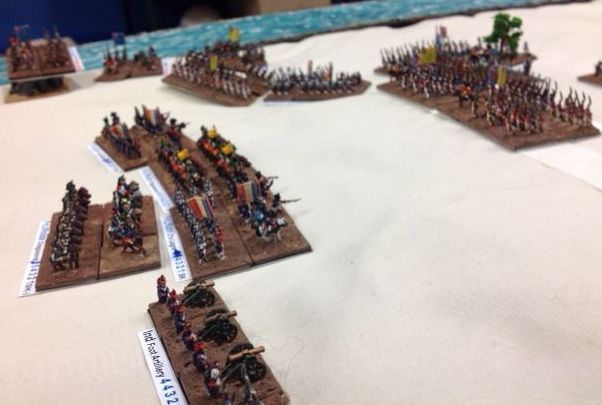
We played Scenario One from the Rules, the table started like this...


The AAR

I'll let the pictures do the talking!


The Confederates were outnumbered but they had a fence line near there set up just asking to be defended so they moved toward it but suffered some shocking activation roles slowing their advance! 

 The Federal troops seeing Rebels in the distance crossed the stream before them as quickly as possible they were out to teach these Secessionists a lesson!

A couple of section of Yankees crossed at a small ford on their right flank (we added this ford into the setup to test the command control rules!)

 Third turn in and the first of the Southerners reached the fence and opened fire!

The Yankee view of the first shots...they are deploying into lines and with skirmishers...

 By turn five things were getting hot around the fence line, due to their slow advance the Confederates had got their only just before the Northerners... 

The command control rules work! Some advice don't get out of command range! In the game the Yankee flanking sections were pretty slow to advance due to the lack of leadership activation bonus's and the woods, the second section were so far behind they diverted toward the centre!

The fighting raged around the fence! The Yankee Zouaves on the right pushed the Rebels back from it elsewhere the Federals were in the open and enemy fire was causing casualties! 


Then came the crucial moment the Yankee section plodding through the woods emerged taking the Confederates in the flank just as several sections charged their front! The Rebels were pushed back...

Overall view after the Yankee section flank attack. You can see the Rebels had all but been driven back from the fence and their left had been 'turned'..

The Northern masses pushing forward their Captain and 'Colour Party' safely in the rear.
I know colours would rarely be in such skirmishes but they look so cool and the rules include a couple of benefits when you including a standard and a musician in the OOB... 

 The overall view at the end of the action...


The objective of the scenario was to break the opposition which meant inflicting 33% casualties on them (but this includes a sliding scale i.e. an infantryman is 1 casualty and an officer is 4 casualties!). Anyway in our game neither side was broken...

Casualties
USA 12
CSA 8


We called the game at this point as we both had early starts the next day but were pleased with how the rules played. It was a great night including a lot of hollering and cheering in poor accents...funny most of our troops sound a bit like Foghorn Leghorn whether from the North or the South! I have a couple of questions on the rules I'll send through to Ganesha Games or maybe put on the Song of... Yahoo Group. Once we play another game I'll write up a rules review. We will definitely replay this scenario the whole way through though and soon!

Sunday 2 September 2018

Blucher AAR - The Battle of Alexandria

We were after a a game for this fortnight so I visited the ‘oldmeldrumwargamesgroup’ site and seconded one of Ross’s fine scenarios for Blucher,I picked the Battle of Alexandria. 

From the game, the British Guard in Line await the French Dragoon's second grand charge!

I cobbled together a tabletop, using an off white sheet, my river section to represent the coastline, some felt for a lake, painted masking tape for a dry canal and whipped up a Roman ruin BUA to complete the set up. My figures aren't 1801 period but sufficed for the game!

I updated the scenario with some special Rules with the below after reading others reports on game balance and to encourage both sides to attack

-Sir Ralph Abercrombe at Risk can +1 to units dice rolls in Close Combat
-Only British Guards have Skirmish Trait for British (to aid French balance)
-First Turn of French Close Combat one '5' scores a hit in each attack by a unit (night surprise attack)
-British Flotilla has Firepower of 2 up to a range of 2BW and Firepower of 1 from 2BW to 4BW with unlimited shots (to aid French balance)
-Victory conditions are changed slightly to add an incentive for both sides to 'attack'
British Victory
Minor if French Army Breaks
Major if French Army Break and at normal movement rate (with French removed from the board) their Infantry can reach the heights on the west board edge in the remaining turns at normal movement
French Victory
Minor if British Army Breaks
Major if when the British Army Break the French occupy/have units on either the Roman Ruins or the central hill in the British line (the one with the 3 on it in the set up picture)

The AAR

Overall scene of action with French on the left; the blue arrows show the path of the first two French attacks the red ones show the advance of the French right and lastly the green arrows show the last French advance and the grand ride of Finch's Light Dragoons....  

The French started of action along the coastline and for a brief moment Lanusse’s troop had control of the Roman ruins but men from Stuart’s Brigade secure it and garrisoned the position, the French wisely kept clear of it after that. While that tussle ensured the cunning Frenchies lined up their left wing for a major attack on the British centre. Roise’s Dragoon’s swept up to the British crest line and took on the British Guards who bravely faced them whilst in line. Al and I went with this tactic as even though the Guards had to re-roll their hits as infantry against cavalry they would never give up ground and it allowed them to fire!

The Dragoon’s repeated their charge and were again held off while Lanusse infantry tried to force the British back south of the Roman ruins. The stoic redcoats held and there were heavy losses on both sides. At this point the French right wing took up the cudgels and Reynier’s infantry advanced up to the British, there was a firefight a British charge and some more shooting both sides took losses but neither dealt any decisive blows. After regrouping the French left, Lanusse, Rampon and Riose launched another push up the hill lead by their heroic Dragoons. Redcoats from the Guards and Coote’s Bridages held again both sides took losses. During this action Finch’s Light Dragoons slipped around the French flank along the coastline near the Roman ruins successfully charging the 88e Ligne and dispersing them, the French left was exposed..

At this point we reached the end of turn 29 and the game was over!

Some Pictures!

Lanusse's troops drive Moore's redcoats from the roman ruins! A good start for the french! 

In the background Stuart recaptures the Roman ruins while the French left lines up to change the british foot guards...

The leading Frenchmen from the 4e Legere are pushed back from the wedge they drove in the British line between the Roman ruins and the hill...

The french second charge on the British centre was repelled and Doyle's Bridge advanced, realising they were exposed to the french horse they rapidly pulled back... 

Close up of Doyle's advanced Brigade..

Mid game the French right can be seen in disorder and regrouping (rallying) in the top left, bottom left the French men of Reynier advance to cover them

Finch's Light Dragoons late in the game ride down the 88e Ligne and are poised to roll up the French line!

The battlefield after turn 29 with the British on the left. Finch's horsemen are in the bottom right just above Stuart's troops garrisoning the Roman ruin. As can be seen both sides units are jumbled from continual advancing and retreating. Only on the far left of the British line can three units be seen in any order abutting the corner of the blue felt...err lake.

The result a draw with two British units lost and three French ones destroyed. At the end the French army was fully spent with many units down to their last fatigue point whilst most of the British units had taken heavy casualties as well. Stu’s tactics were good as he attacked and regrouped continually as the French. Al and I on the British side never were in a position to take advantage of the French as they withdrew and rested their units. We should have deployed our cavalry earlier to the coastal area where the French had left a void to be out of range of the British vessels guns. Anyway everyone enjoyed yet another round of Blucher...now which of Ross’s scenarios to pick next! Oh and I must write up the Piave AAR...