Tuesday, 18 December 2018

Longstreet 4 Player Campaign Game 3 - Battle of Pebble Mountain

Game 3 of our four player Longstreet Campaign started with Dave and I winning the scouting role and electing to attack, heck we had defended the last two times and even though the Union army had an advantage in numbers that sort of thing never bothers us boys from the South! The two scenarios combined together for our Battle of Pebble Mountain were the Crossroads and the Clear the Tree Line ones...

Colonel Clampett personally directing the Confederate batteries during the Battle of Pebble Mountain...

Here’s our forces...

Alan - Colonel Firefly from Massachusetts (European Service & Artillery Officer &
Friend in the State House & Scout) 44 Bases
5th Massachusetts Volunteer Infantry S R 4 Bases
9th Massachusetts Infantry S R 6 Bases
14th Massachusetts Infantry S R 3 Bases
21st Massachusetts Infantry E R 6 Bases
6th Irish Regulars E R 8
7th Venerables Infantry E R 7
4th Boston Light Cavalry S V 56 Bases
2nd US Cavalry E R 3 Bases
4th Battery Light Artillery 1 x 6lbr 1 x Howitzer
7th Auxilary Art Coy 2 x Howitzer

Dave - Colonel Leghorn from Alabama (Scout & Cavalry Officer & Indian Wars) 36 Bases
3rd Alabama Infantry E R 5 Bases + Hero
1st Alabama Infantry S V 6 Bases Old Reliables
14th Alabama Infantry S V 4 Bases
2nd Alabama Infantry E R 5 Bases
4th Alabama Infantry E R 7 Bases
1st Alabama Volunteer Cavalry S R 5 Bases
1st Battalion Alabama Artillery 1 x 6lbr 1 x Howitzer
2nd Battalion Alabama Artillery 2 x 6lbr

Peter - Colonel Clampett from Tennessee (Drillmaster & Artillery Officer & Personal Physician) 42 Bases
14th Tennessee Infantry E R 7 Bases + Hero
7th Tennessee Infantry E R 7 Bases
Walkers Legion E R 7 Bases
1st Colm's Tennessee Bn E V 6
2/22 Tennessee Cavalry S R 4 Bases
2nd Tennessee Cavalry E R 4 Bases
Baxters Artillery Company I Batt  2 x 6lbr 1 x Howitzer
Baxters Artillery Company II Batt 1 x Nap 1 x LR

Stu - Colonel Zook from New York (Political Savvy & Indian Wars) 41 Bases
52nd New York Infantry German Ranger or Sigel Rifles S R 2 Bases
53rd New York Infantry D'Epinuil Zouaves S V 6 Bases + Hero 'old Reliables'
57th New York Infantry National Guard Rifles E R 4 + Hero
66th New York Infantry Governors Guard E R 7 Bases
140th Pennsylvania Infantry S V 6 Bases + Hero
141st Pennsylvania Infantry E R 6 Bases
140th Pennsylvania Infantry E R 6 Bases
2nd New York Volunteer Cavalry S R 2 Bases
Battery B 1st New York Light Artillery 1 x 6lbr 1 x Howitzer

Let the fun begin!


Confederate Colonels Clampett and Leghorn massed their guns on a central hill know as Pebble Mountain by the local populace and pushed forward all their cavalry and infantry in two massed attacks, on the Crossroads area a field was the funnel for the attack and on the tree line area a wood covered their advance.

During the initial turns the Yankees dug in for all their worth as the Rebels coordinated their Units.

Clampett’s men secured the unguarded objective on the crossroads but the Yankee commander, Colonel Zook preempted a perceived Rebel Yell charge with their own charge after deadly fire using the Charge Bayonets card. This gave the Confederates a bloody nose but around the fields they continued to push on with three consecutive charges slowly grinding forward and inflicting losses. On the Rebel far left the boys in blue roughly handled Colm's Tennessee Battalion.

Leghorns cavalry charged the Yankee guns with the Colonel himself at their head and they defeated two Union batteries before retiring to allow the Infantry to advance. The Rebel Yell went up and the Southerners slowly pushed Colonel Firefly’s Union units back with successive charges.

On the Crossroads battlefield with the Confederates of Clampett spent the Yankees went over to the attack but the Rebels hung on while on the Treeline battlefield the Southerners drove the Yankees back to the edge of the battlefield dropping just short of capturing their objective!

At this point the during turn 10 the Federal Armies morale broke as their losses plus the Confederate Victory die roll exceeded their Shatter Point. The Rebels carried the day.

Well we hadn’t played Longstreet Street for a while and made a couple of mistakes with the rules but will be ready next time to ensure these do occur again.

Some pictures! Some are a bit dodgy not sure why and also there are no end of game pictures as we moved straight into the Campaign Phase as we were running late!

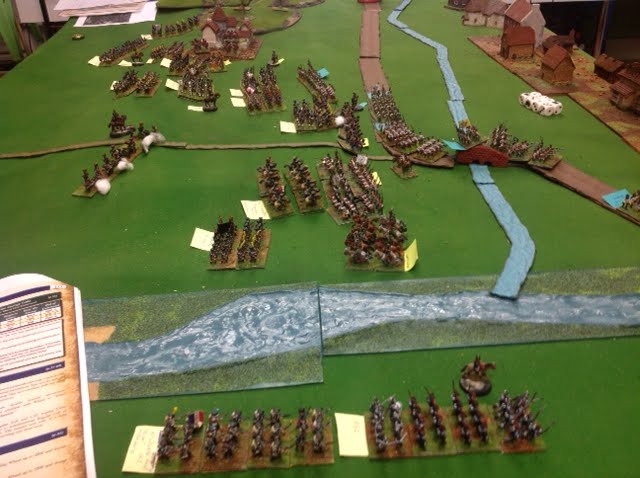
The sides line up, CSA to the left and the USA to the right, interestingly the Yankees did not occupy the objective in the Crossroads Game giving up easily to the CSA...


Early in the game on the Rebel right Colonel Leghorn lead his Cavaliers directly at the Union artillery batteries... 

...and successfully charges them causing the casualties and capturing guns. At that point the Union gunners limbered up and retired into the woods! 

Meanwhile Colonel Clampett's Regiments formed up to attack the Union forces around the crossroads...

But Zook's Yankees pre-emptied Clampett and his men fired and charged pushing the Rebels back with casualties! 

In the woods (trees have been removed to allow play just and outline remains) the Yankees were driven back and the Rebs came within a whisker of capturing their objective from superior numbers! 

After their initial repulse Clampett's boys launch a couple of successful charges but shot their bolt and were left hanging in the face of larger Federal Units... 

Confederate reserves on the right watch the lead Regiments advance into the woods... 

The Confederate left flank attacks continued against superior numbers, racking up Epic Points! 

Picture of the Tree Line area on the penultimate turn, the Union troops retain the objective and their cavalry start a run at turning the Rebel flank! 

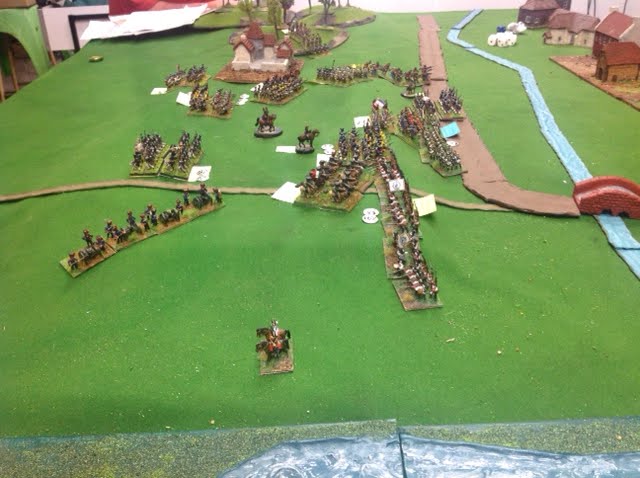
Picture of the Crossroads area on the penultimate turn, the Union troops are trying to turn the reel flank but crucially in the centre the Confederates retain the objective giving them 2 dice when making victory rolls... 

Battle Summary:

Break Point was 38 Bases

Losses:
USA 36 Bases

CSA 33 Bases

Game wise it’s now 3 Confederate wins to 0 Union ones but more importantly the Epic Points are currently standing at...

Epic Points:
Alan 5 Campaign Total 16
Dave 7 Campaign Total 20
Pete 5 Campaign Total 14
Stu 5 Campaign Total 10


Campaign Game 4 is going to look different to anything I've seen before the Union Armies have only a single Artillery base! In general during this campaign so far it's been viewed that artillery is not very effective so a few players are shunning cards for it. It'll be up to the Confederates to change that perception in game 4! As per the last game even more units have been whittled down to only a few bases, four now sitting on just two! I suspect they'll see little action next game!

Game 4 will be the first of the 1863 games so the card decks will be balanced and the army sizes will move slightly in favour of the Union.

Friday, 7 December 2018

Blucher AAR - The Battle of Piave

This Blucher AAR is for a game we played dating back to May this year! it covered the Battle of Piave, 8th May 1809 which was fought during the war of the 5th Coalition. It's another scenario from the 'Oldmedrum Wargames Group', these guys scenarios are amongst the best presented I've seen! They can be found here...


The players were unaware of how this battle ran historically so it would be interesting. Both sides have challenges, the Austrians even though having good defensive terrain are out numbered and the French will be slow to deploy as they have to cross a River which is rising. Interestingly the game played out very differently to the original battle but it certainly was entertaining!

Battlefield Map from the Oldmeldrum Wargames Group site.
The Austrians are defending the towns, stream and dike while the French start on the other side of the Piave river along the lower edge...

The Game...

In the opening moves the French pushed their weak left flank forward aggressively, this would prove costly as the cunning Austrians concentrated on these exposed troops punishing them.

Meanwhile the French centre moved forward slowly and engaged in desultory fire/combat with the best of the Austrian forces.

The French left meanwhile split into two columns. The infantry pushed toward the centre and the town of San Michel while the cavalry, led by Grouchy carried out a grand ride around the Austrians left flank and threatened (and captured) crucial town objectives also riding into the rear of the Austrians defending the centre of the line.

The game ended with a French victory but it was bought at great cost as their left was virtually wiped out. These soldiers sacrifice was not in vain as they kept the Austrians  attention locked in that area allowing for their plan to develop and the French right to run rampant to secure them victory!

Some Pictures...
.
The initial Austrian deployment, the French all come on 'revealed' the 'concealed' Austrians have the advantage of the chance to use reserve Movement to deploy...

The French left surge across the Piave not waiting for the rest of the army...

The Austians around the town of Barco await the French...

The Fench left start the massive task of crossing the Piave, Gouchy's cavalry can already be seen advancing on the town of Cimadolo and the Austrian left flank...

The French left charge the Austrians in and near the town of Barco and get a bloody nose!

The reinforced Austrian right counter charges the French left pushing it back...

Eugene's centre moves slowly forward deploying before the Austrians defending the dyke...

The French left gets hammered and has its back to the Piave, the Austrian cavalry flanks the infantry...

French continue to ford the Piave, the green marker indicates artillery can no longer cross this ford...

The infantry of the French right approach the Austrian defenses...unseen here to the right of the picture Grouchy's cavalry are beginning to fan out behind the Austrian left!

Grouchy's great ride begins!

What is a TSOG Blucher game without a closeup of the Dice Shako! 

Eugene lead the French centre forward against the Austrians defending the dyke pinning them as Grouchy's cavalry ride wantonly behind the Austrian line...

The French left now defeated Austrian hurriedly redeploy to face the French centre and Grouchy...

This picture shows the French cavalry attacking the Austian centre and left while in the foreground the Austrian left accompanied by Archduke John turn to face the rest of the French army...the cavalry base on the town centre left in the picture are French occupying La Mandra

I hope this gives you a good idea of our how game played out, our French replicated history and won, historicallythough the real battle was different with most of the action was in the centre and around the area of the dyke...

I'll write up my last outstanding AAR soon, Scenario 3 from the 61-65 Rule Set!

Wednesday, 5 December 2018

Battle of Sank Michael 1809 Austrians Vs French

(Lasalle in 15mm)

This was a good opportunity to bring out the newly painted Austrian Grenz and Landwehr. This was the prime reason for selecting such a tough scenario.

From wikipedia and the scenario written by Peter Anderson in his excellent book "Blunders on the Danube" (http://blundersonthedanube.blogspot.com/), supplemented by a Command and Colors scenario and googlemaps, I tweaked the battle with a specific aim in mind.

So, how to make a scenario work ? If you intend to play this game as a commander, then don't read any further, for the point is to have both commanders operating under a fog of war, uncertain of what is actually going to happen and to make decisions based on perception, rather than stated objectives. If you want to run this scenario as an umpire then cool, please read on, but I think it is a one play exercise. Once played, it has done its job. More about this at the end.

Alan took on the difficult job of playing the Austrians while Pete( Darling) and Dave (Von Neudog) played the French, having had wind of what they should be doing having had a trial run of the scenario the fortnight before.

Historically, on 25 May 1809 Jellacic, the Austrian commander was leading a division down the Leising valley towards Sankt Michael intending to cross the River Mur and proceed to join Archduke John, in Graz, some 50km distant down stream. Prince Eugene, with a French Army at his disposal, was camped some 30km away at Judenburg to the east and got wind of this. He detached Greiner's Corps (2 divisions under Seras and Durutte) to cut them off. A corp vs a (weak) division.

The Austrians arrived at Sankt Michael first, early in the morning and confronted the lead elements of Seras' division on the plateau to the west of the town. Jellacic, thinking he was facing only light opposition, fought for the plateau in order that his baggage train could get across the River Mur. There were actually two key bridges, one over the fast flowing Leising River and the main bridge over the Mur. Both rivers are unfordable.

FRENCH

General de Corps - Paul Grenier

General de Division
Jean Mathieu Seras Commander 10BW
9th Chasseur a Cheval Reliable Experienced Small Pursuit
4 pndr Horse battery Light 4 Bases

Colonel Jean-Baptiste Bruny Sub Commander 4BW
1/62nd Line Bn Reserve (Count Desaix Brigade) Reliable Experienced Small
2/62nd Line Bn Reserve (Count Desaix Brigade) Reliable Experienced Small

General De Brigade Roussel Sub Commander 6BW
1/1 Legere Bn Valiant Experienced Small SK1
1/53rd Line Bn Reliable Experienced Small
2/53rd Line Bn Reliable Experienced Small
3/53rd Line Bn Reliable Experienced Small
4/53rd Line Bn Reliable Experienced Small

General De Brigade Louis Gareau Sub Commander 6BW
1/35th Line Bn Reliable Experienced Small
1/42nd Line Bn Reliable Experienced Small
1/106th Line Bn Reliable Experienced Small
2/106 Line Bn Reliable Experienced Small
3/106th Line Bn Reliable Experienced Small
4/106th Line Bn Reliable Experienced Small

In Support (Models not needed)
General de Division
Joseph Durutte
(about 4 hours behind you)
6 pndr foot battery
9th Chasseur a Cheval Reliable Experienced Small Pursuit
6 pndr foot battery
Brigade Francois Valentin
1/22nd Legere Bn
2/22nd Legere Bn
1/23rd Legere Bn
2/23rd Legere Bn
3/23rd Legere Bn
4/23rd Legere Bn
Brigade Joseph Marie, Count Dessaix
3/62nd Line Bn
4/62nd Line Bn
1/102nd Line Bn
2/102nd Line Bn
3/102nd Line Bn
(1/62nd and 2/62nd detached South of Mur)


AUSTRIAN

General de Division
Field Marschall-Leutnant Franz Jellacic Commander 10BW
Salzburg Chevaulegers Reliable Experienced Small Lancers Pursuit
3 pndr foot battery Light 2 Bases
Salzburg Landwehr Shaky Amateur Small


Brigade General Major Konstantin Ettingshausen Sub Commander 6BW
1/32nd Esterhazy Line Bn Reliable Experienced Small
2/32nd Esterhazy Line Bn Reliable Experienced Small
3/32nd Esterhazy Line Bn Reliable Experienced Small
1/45th De Vaux Line Bn Reliable Experienced Small
2/45th De Vaux Line Bn Reliable Experienced Small

Brigade General Major Ignaz Legisfeld Sub Commander 6BW
1/5th Grenz Bn Reliable Experienced Small SK3 maybe Irreg
2/5th Grenz Bn Reliable Experienced Small SK3 maybe Irreg

1/55th Line Bn Reuss Greiz + 1/3rd Archduke Charles (½) Reliable Experienced Large

 As you can see, the most optimistic of Austrian Commanders would soon realise they are doomed. So it is important not to disclose the full OOB to either side, nor even the most rudimentary objectives. The mission briefings are included at the end of this post.

The Austrians start with a Legisfeld's brigade on the Leising Road, while the French have a single light (legere) battalion sprinting from the western board edge. French reserves (Rousell's Brigade) enter in turn 3, while the second Austrian Brigade (Ettingshausen) enter from turn 2.


At the start of play, the Austrian Brigade under Legisfeld is moving south, the town is on the right of the pic, seen above. The Leising river is on the right, the big wooded hill (Fresenberg) at the rear, with a small farm (Sankt Walpurga) on the left. The Grenz battalions are moving onto the plateau having spotted a single Legere battalion moving in march column towards the Leising Bridge, which is just visible at the lower right. The second Austrian Brigade (Ettingshausen) appears in the next turn coming down the same road.


A few turns later and Legisfeld's brigade has turned to meet the French coming from the left, but with only two Grenz battalions, a landwehr battalion and a large infantry battalion (1/55th), they have their work cut out. The Austrian 1/55th has moved to guard the Leising Bridge, firing a nice volley and the French Legere Bn (still in march column) is being threatened by the Salzburg Chevaulegers on their left flank. Their days are numbered. The River Mur is obvious across the bottom of the pic while the Mur Bridge is just out of shot to the lower right.

This is the decision point for both commanders. What to do? Jelacic thinks he is only facing light troops and the plateau is going to be critical to him getting over the Mur with his baggage train. The French have huge numbers on their side and are desperate to get into the fight and seal off the Austrian escape. The plateau is only being defended by the Landwehr and two Grenz battalions (one of which has moved into the Walpurga farm). Jelacic's second brigade has entered the game at the top right. A single french light artillery battery (4 bases) is being rushed up, while the Austrian 2 base battery could support the thin brown and grey line on the plateau.

     The doomed 1/1st legere


A few turns later and the French have moved into attack columns and gone all fancy pants "en chequer", The French Chasseurs a Cheval sprint for the Leising bridge bottom left, the Landwehr and Grenz deliver a volley to try and stop the horde. The second French Brigade has entered play on the far left. The Austrians are unaware a whole new division waits behind that lot.

Alan (Austrian) has decided that the evacuation of the troops across the bridges should take priority. he sacrifices the Landwehr and the Grenz to move quickly down the road with his core troops, deciding the plateau is a lost cause. Smart play.


A few turns later, the Landwehr have crumbled under succesive assaults, the 1/55th Austrian Bn and Chevaulegers have turned to face the French to hold the approaches to the bridge, and being charged by the French Chassuers a Cheval, they form square. Walpurga farm is being overun as the French get onto Fresenberg Hill (essentially, the second French Brigade was committed to this). Ettingshausen's Austrian brigade has got two battalions over the Leising Bridge and another two might also escape. In the foreground, unknown to either side, Dessaix has detached two battalions from a supporting brigade to threaten the Mur bridge from the south.


The Austrian 1/55th (two disruptions and no longer in square) still holds firm against a successive charge from the French cavalry, but is facing the prospect of canister from the french artillery lower left. The Austrian Chevaulegers have bolted to the west, behind the french guns out of picture. Why ? not sure ! The French are enveloping the Austrian right and an Austrian battalion has had to divert from crossing the bridge to shore up the line. 


The French fully engaging the Austrian rearguard, 1/55th in the foreground, Grenz being pursued in the distance, Chasseurs a Cheval still charging, French breaking through middle right of pic.


But, two Austrian battalions are almost across the Mur Bridge and a third has got over the Leising Bridge, thus holding valuable ground and securing an escape route. The rest of the Austrians will not be so lucky.

On the actual day, Jelacic thought to preserve his baggage train and arraigned his whole division across the plateau, holding off Seras until mid afternoon. Then Durutte's Division arrived and the French made a massive combined 2 division assault, essentially wiping the single weaker Austrian Division out. Since Jelacic's instructions were to join Archduke John at Graz, he utterly failed, as one Austrian historian stated, Jelacic was "a remarkably unlucky and inept general". On this day, Alan played to his instincts and almost got a whole brigade out of the trap.

I set victory conditions that rewarded the Austrians for getting over the Leising Bridge and rewarded the French for wiping out the Austrians/engaging them to the west of the bridges/getting over Fresenberg Hill to prevent a norther escape/ and generally being aggressive. I don't think Alan could have done much more, Peter and Dave had a clue about what the French should be doing, so engaged quickly, while Alan was roleplaying an Austrian General caught in a trap.

If the Austrians play this again, they should obviously bolt for the bridge, do not hesitate, do not engage with anything except the bare minimum, send the Chevaulegers across the bridge to guard the southern bank just in case, put the Grenz in the woods on Fresenberg Hill and deploy them as irregulars (an option given) and keep the northern escape route open. Sacrifice the poor landwehr. It would take huge resolve to do this while nursing the thought you are only fighting some light french troops.

Thanks to the players, Alan for taking on the huge challenge, Peter and Dave for driving the French so hard forward. Even the sacrifice of the 1/1e French Legere held up the Austrians for that critical few turns. This was a totally unbalanced scenario, but to achieve total victory the French must go for it unhesitatingly. For the Austrians to win, they should do their best to refuse battle. Hence it can only really be played once !

Out of interest, I have included the respective briefings. My apologies, but I only have a hand drawn scenario map but you can get the gist looking at the pictures of the table. I enjoyed using google earth 3D and getting an idea of just what this terrain is like. The Leising Bridge is difficult to find, but is mentioned by a few sources.

Austrian Briefing:

Archduke John has instructed that you take your division and join him at Graz after concerns the Austrian Army was too dispersed. On 19 May 1809 you evacuated Salzburg to commence the march to Graz, where Archduke John has retreated, being pursued by Prince Eugene following the Battle of Piave River. Your division will add reinforcements to Archduke John's army. You have detached most of your cavalry, most of your artillery and much of the landwehr battalions prior to leaving Salzburg, believing them to be less important in the alpine regions.

You arrived at Mautern and plan to follow the Leising Valley to Sankt Michael, where you will turn east to follow the Mur River down to Graz, some 50km away. At 0900 on 25th May your forces are marching southward, along the Leising River, and have just reached Sankt Michael. You are aware that Eugene, with a considerable sized force is somewhere to the south west and is headed for Bruck an der Mur, some 40km from Graz, on the river valley you will march along.

At 0930, Legisfeld's Light Brigade (Grenz) are reporting the presence of a Legere (light) French battalion moving towards the plateau overlooking Sank Michael where the bridges over the rivers Leising and the Mur must be crossed for you to continue your march. Your baggage train is strung out along the Leising valley road. There is a slight risk you will be cornered in Sankt Michael, but there are two avenues of escape should the French force attack in strength, across the Mur to continue your journey, or a retreat back up the Leising valley. At the present time it seems possible to hold off the French from the plateau and allow the baggage train to continue through Sankt Michael.

The proficient Grenz battalions can be irregular troops and are ideally suited to operations in the wooded Fresenberg Hill. They may move without penalty, may fire through woods and may recover DISR even if they move (but must be >4BW from enemy) if they are irregular, but may not revert to being regular if this option is taken. They may not form square if irregular and suffer a -1 penalty when shooting in the open.

French Briefing:

You, General of Division, Jean Seras, are part of Prince Eugene's army, hot on the heels of Archduke John's force who were harried at the Battle of the River Piave after retreating from Villach, they are heading towards Graz. Your pursuit has taken you to Judenberg, in the valley of the river Mur, some 25km southwest of Sankt Michael and still 80km from your destination.

Eugene has received word that a division of Austrians, under Jellacic, is attempting to rejoin Archduke John's force. This force is to the northwest, coming down from Salzburg and retreating under Napoleon's northern offensive in Bavaria. Prince Eugene detaches General Paul Greiner's corps, two divisions under yourself and your colleague Durutte, in order to isolate this Austrian division.

You force march your troops which start to arrive at Sankt Michael on the morning of 25th May. At 0900 the 1/1st Legere battalion is approaching the plateau that overlooks the village and commands the approaches to two critical bridges. Jellacic's division is seen moving down the Leising valley and must cross these two bridges in order to move to Graz. You must quickly force the issue and prevent the Austrians from escaping.

Stu

TGAA - Another Improvised Armoured Car - A Variation on a Theme

Below the NSW Governor, Philip Game along with Army and Police representatives cheer another new Improvised Armoured Car as it rolls out of the workshops of the Randwick Tramways Workshop, note another Crossley can be seen in the factory awaiting conversion!

The Build

The base for this A/C was an old Matchbox Crossley Truck, the Carlsberg one, not my favourite beer so no problem removing that rear tarp section! 😊. The build like the other A/Cs for this campaign was pretty straight forward. I used my usual styrene sheet with odds and ends from the parts box. This time I enclosed the drivers cab in the armoured superstructure. I was going to place the turret further forward but was distracted looking at the existing Crossley A/C and just added it toward the rear, no issue as it's all just made up anyway!. Also there is an 'armour plate' added to cover the front of the radiator, I figured this would only be attached in combat situations for short periods of time! I used colours that were standard for the time in construction so would be handy.

Hers's a couple of work in progress pictures....


The finished vehicle...


Thanks! This A/C will feature in the next TGAA scenario, The Third Beaconsfield Test...

Sunday, 2 December 2018

Scenario Background - The Third Beaconsfield Test AKA The Third Battle of Beaconsfield Park

I've put together the next scenario for the the Great Antipodean Adventure campaign, The Third Beaconsfield Test not sure when it will hit the tabletop but it is ready to go! It pits the Unionists against Coppers and Cricketers, yup Cricketers! Read on!

A period photograph of the members of the Beaconsfield Cricket Club First Eleven as they decamp from the Duck and Dive Public House and engage in some hi jinks on the evening of May 24 1932...

Scenario Background - The Third Beaconsfield Test AKA The Third Battle of Beaconsfield Park

The arrival near Sydney of Stalin’s OGPU agents and Political Officers Aboard an adapted Tupolev TB-3 bomber on May 22 changed the direction of the Great Antipodean Adventure. The Left Leaning antagonists and Unions were now given a focal point which they believed could lead them to ultimate victory against the oppressive Capitalist Regime of Premier Bertram Stevens. Meetings between the Soviet Officials and Australian Leaders were promptly arranged to discuss future joint operations.

Galvanised with Bolshevik rhetoric and Soviet arms each of the Left Factions issued their own Manifestos detailing their future directions for New South Wales. Synopsis’s of these wordy tomes were printed and distributed to the populace to gain support. Virtually every Group updated their Manifestos daily listing more idealistic bombast. Also, insidiously included were new ‘rules’ to help the populace enjoy their new-found freedoms and that coincidentally suited the Faction’s agendas.

When the Amalgamated Engineering Union released apprise 3 of their Manifesto on May 25 1932, they crossed a sacred line that would lead to bloodshed! The flyer issued included a change in Section 112 Paragraph B of their Manifesto on pastimes for the proletariat. It stated that the Capitalist Sport of Cricket, a vile remnant of Australia’s shady Imperialistic past was banned forthwith, henceforth what they saw as a chauvinist sport that pandered to the gentry was never to grace the green fields of the Great Southern Socialist Republic of New South Wales again!

This was a red rag to a bull causing quite a stir amongst Sydneysiders and even alienated many of their own members! Clashes between devotees of the Greatest Game to ever grace an oval and members of the Amalgamated Engineering Union begun that very next day. It became an unnecessary aside and a thorn in the Unions side. Also, the declaration led directly to Third Battle of Beaconsfield Park otherwise known as ‘The Third Beaconsfield Test’.

At daybreak on Saturday May 28, the Beaconsfield Cricket Clubs First Eleven accompanied by many local residents and the Constabulary threw down the gauntlet to the Amalgamated Engineering Union announcing an out of season social game at Beaconsfield Park that very day! At 9:00am Union Officials with Soviet Advisers arrived at the Park and warned everyone that this was not acceptable behaviour and the so-called social game would not be allowed to proceed! They would see to that! The Cricket devotees held firm on their plans, the game would go ahead!

At 10:00am an half an hour before play was to start the Unionist Mobs descended on Beaconsfield Park expecting to break some heads and were surprised to see the BCC’s First Eleven led by the Captain former A.I.F. lieutenant, Bruce Martin was armed to the teeth and supported by enthusiastic Constables!

The First Innings was going to begin early...it would prove to be bloody…

The BCC First Eleven

Captain Batsman Bruce Martin MM with Bar
Vice Captain Allrounder Richie ‘Stonewall’ Lindwall
Wicketkeeper Jack Goodcock
with Umpire Richard Toucher
Opener Bert ‘Big Shorts’ Youngfield
Opener Ian ‘Bluey’ Greenpath
First Drop Batsman Bert Steelmonger
Batsman Neil Harvey-Norman

Fast Bowler Max ‘Rubber Knees’ Trotter
Swing Bowler Ashley Hammer
Fast Bowler Dennis Tulip
Spin Bowler Clarrie Gromit

The set up for the 'period' photograph...