Last Monday we again revisited The
Great Antipodean Adventure campaign and the A World Aflame Osprey rules. In
this game Unionist forces try to relieve a detachment of Federal infantry from
the 30th Battalion of the 18lb cannon that the All Australia Party and the
Anglican League failed to secure during the skirmish on May 20 in Beaconsfield
Park...
An anonymous Unionist ‘Bannerman’ in full flight…

The Background
The Second Battle of Beaconsfield Park
23 May 1930
The skirmish at Beaconsfield Park Sunday
May 20 ended with the All for Australia Party’s men in possession of the
18lb cannon they had sought. Next day still saw the gun in the Park as the 2nd
Sydney Regulars were not able to successfully move it due to vehicle issues.
Late in the afternoon Australian Federal Army troops of the 30th Battalion
arrived and demanded the ‘insurgents’ turn over the weapon. In the face of well
armed and trained infantry Captain Beatty succumbed and turned over his prize and
withdrew his force.
At this point the cannon had already been
hauled to the Queen Street side of the Park well away from the previous day’s
action. Captain Smith ordered his men to set up a defensive perimeter around
the old artillery piece all the while wondering why on earth anyone would try
to use it in action after all it had been sitting in the elements for the best part of 15 years.
The infantry of the 30th Battalion were aided by a section of Engineer Reservists.
Two days later on Wednesday May
23 a limber was too arrived in the evening to recover the big gun so the
men of the 30th prepared to dismantle their defences and head back to the
comfort of the barracks. Their work was interrupted just
after 4:00pm as a local Landlord arrived with the news that a unruly Union
Mob was on their way and they were looking for a fight!
Captain Smith ordered his men to stand to and
prepare for action he then sent a runner for assistance unaware of the Mobs
strength. He secretly hoped the sight of regular infantry would dissuade them
from action.
Only a few hundred yards away fired up
Unionists planned their attack on the Federals and claim the big gun. Their
leaders Comrades Belt and Buckle had served in the Great War and knew the gun
itself was of little value but as their Soviet advisers said a defeat of Government
Soldiers would be a great boost to their cause and add fuel the rebellion. They
planned a pincer attack and had the support of an Armoured Crossley truck so
were confident, Belt and Buckle synchronised their watches and announced to
their members the attack would begin at 4:00pm. One wag replied we’ll have
to finish them quickly before the local Publicans call last drinks! There was a
roar of laughter and the Unionists shuffled off to their assigned positions...
The Forces
Battle: The
Second Battle of Beaconsfield Park
Location: Sydney
NSW
Date: 23rd
May 1932
Commander: Captain
Rupert Smith
Weather: Fine
Still Mid Afternoon Visibility 48”
Notes: Orders
can’t be changed:
‘Ensure
18lb gun doesn’t fall into insurgent control’
Detachment 30th Battalion - Captain Rupert
Smith
|
Unit ID. Name
|
Figures
|
Officer Grade
|
Unit Initiative
|
Morale
|
Volleys
|
Grenades
|
Notes
|
|
|
Command Section
|
2
|
3
|
3
|
5
|
7
|
|
|
|
|
Section 1
|
5
|
3
|
4
|
4
|
11
|
2
|
Heavy weapons
capable
|
|
|
Section 2
|
5
|
3
|
4
|
4
|
11
|
2
|
Heavy weapons
capable
|
|
|
Section 3
|
5
|
3
|
4
|
4
|
7
|
2
|
Heavy weapons
capable
|
|
|
Section 4
|
5
|
3
|
4
|
4
|
9
|
2
|
Heavy weapons
capable
|
|
|
Reservists
|
5
|
3
|
4
|
5
|
7
|
2
|
Engineers -
Heavy weapons
capable
|
|
Battle: The
Second Battle of Beaconsfield Park
Location: Sydney
NSW
Date: 23rd
May 1932
Commanders: Comrade
Ernie Belt
Comrade
Fred Buckle
Weather: Fine
Still Mid Afternoon Visibility 48”
Notes: Orders
can’t be changed:
‘Seize
the gun in the park’
1st Liberty Brigade - Comrade Ernie Belt
Crossley Armoured Truck
Initiative 3+ - Crew 5 2 drivers/3 in rear - Volleys 5
Move 10” +1D6 - Armour 9 - 3 Rifle Volley (1 side only at
a time) up 45 degree from gun port
|
Unit ID. Name
|
Figures
|
Officer Grade
|
Unit Initiative
|
Morale
|
Volleys
|
Notes
|
|
|
Command Section
|
1
|
3
|
3
|
4
|
5
|
|
|
|
Section 1
|
8
|
2
|
4
|
3
|
6
|
Molotov Cocktail on
roll of 4+
|
|
|
Section 2
|
8
|
2
|
4
|
3
|
4
|
Molotov Cocktail on
roll of 4+
|
|
|
Section 3
|
8
|
2
|
4
|
3
|
5
|
Molotov Cocktail on
roll of 4+
|
|
3rd Liberty Brigade - Comrade Fred Buckle
|
Unit ID. Name
|
Figures
|
Officer Grade
|
Unit Initiative
|
Morale
|
Volleys
|
Notes
|
|
|
Command Section
|
1
|
3
|
3
|
4
|
9
|
|
|
|
Section 1
|
8
|
2
|
4
|
3
|
7
|
Molotov Cocktail on
roll of 4+
|
|
|
Section 2
|
8
|
2
|
4
|
3
|
4
|
Molotov Cocktail on
roll of 4+
|
|
|
Section 3
|
8
|
2
|
4
|
4
|
5
|
Molotov Cocktail on
roll of 4+
|
|
|
Section 4
|
8
|
2
|
4
|
4
|
5
|
Molotov Cocktail on
roll of 4+
|
|
Scenarios Rules
To clinch victory the Unionist must secure the 18lb cannon by having at least 4 figures adjacent to it at the end of the game or breaking the Army units, the Federal side must prevent the above.
Each Union Bannerman once during the game may 'rally the lads to the banner' and allow a reroll of a morale die throw.
Due to heavy rain before the action figures may only run for one turn then walk again.
The Army HMG has 12 Volleys.
The Army ATR has 7 Volleys.
Maximum Turns is 12.
The random events were updated from the previous games and listed using a regular card deck to regulate.
The AAR
Once again I'm going to let the pictures tell the tale here with some inspiring captions!
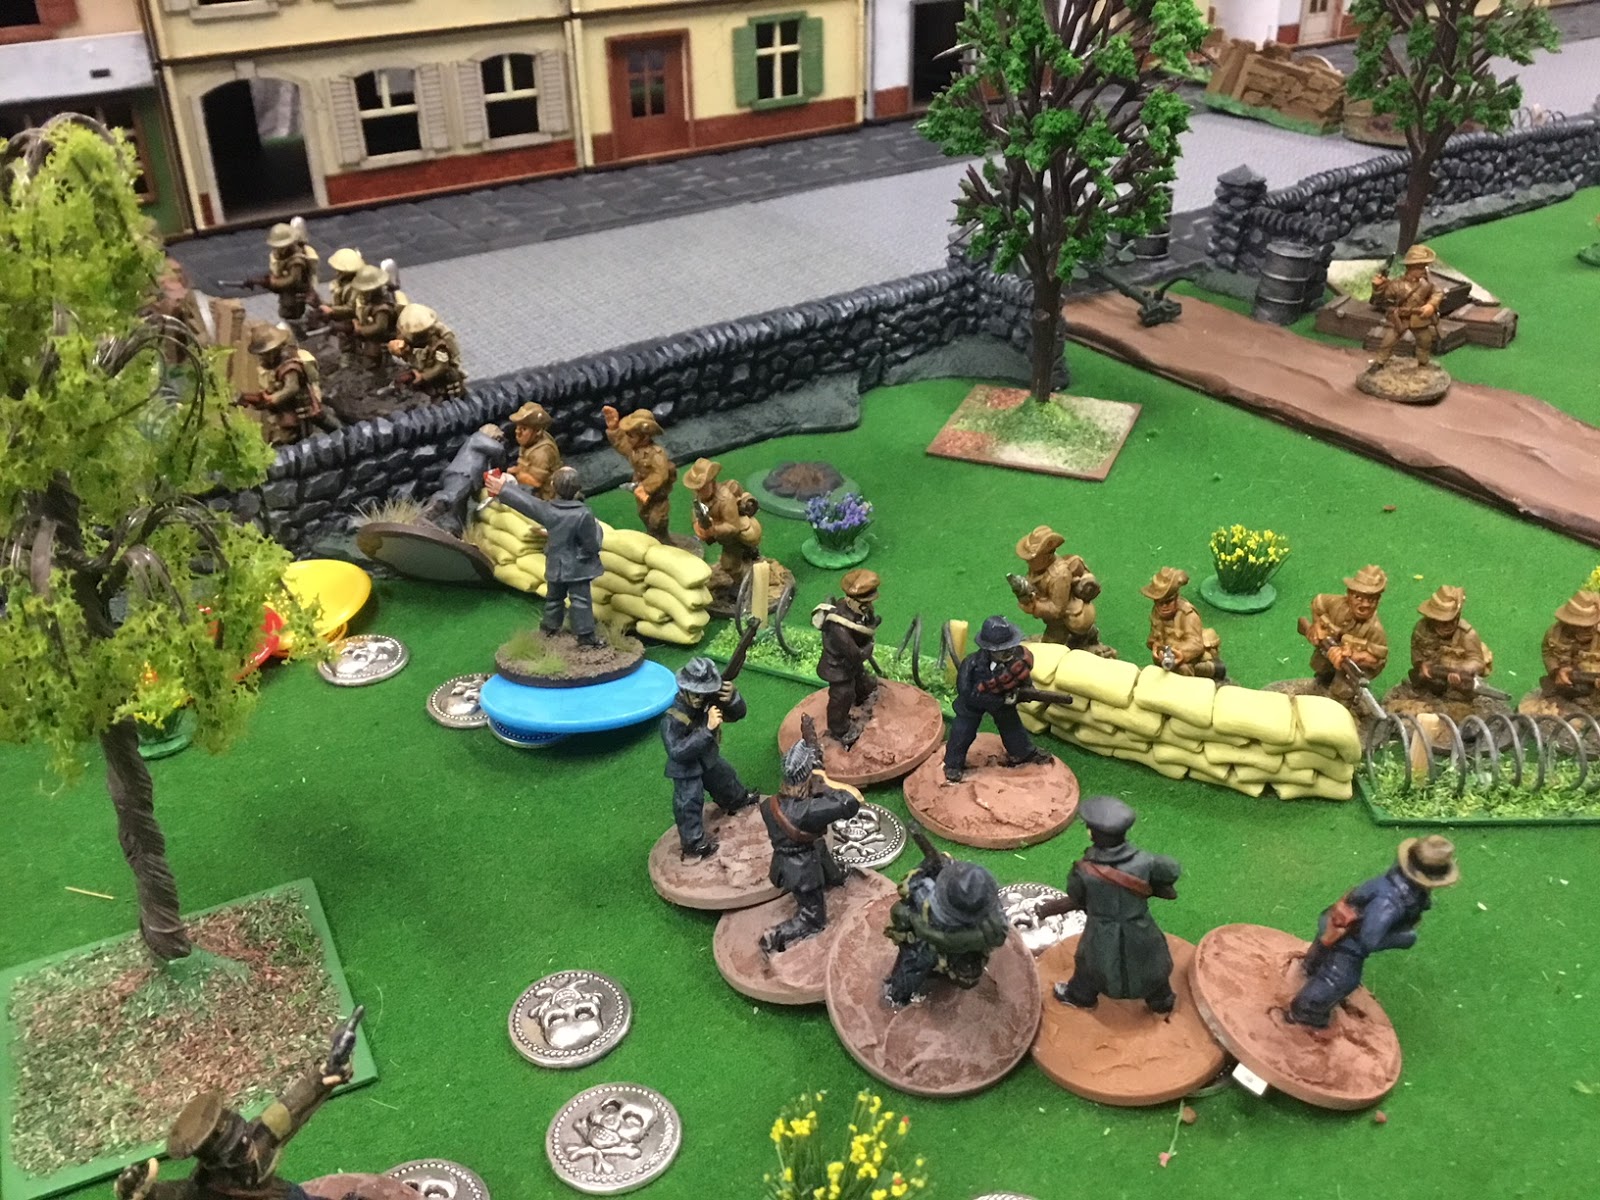
A view of the battlefield, the buildings are on the southern side of Beaconfield Park. The Unionist are advancing feom the west toward the army's entrenchments.

The Mobs from the east run forward for all their worth!

Casualties mounted quickly as the Army's Vickers MG mowed down the Unionist! The silver skull tokens mark the spot where men and women fell!

The advance from the west only faced musketry so closed with less losses...

Overview at the end of Turn Three it was already obvious to all the attack was doomed!

Turn Four and a Mob reached the Army's line but were beaten back!

Turn Five and a last attempt was orgabised to breech the defences!
Meanwhile with all three Mobs attacking from the west broken their Armoured Truck tried to divert the Army's attention from the advance from the west...

...however a hit from the ATR although did not destroy the vehicle caused the occupants to bail out, here they are cowering behind their Cossley and out of the action!

The final action of the battle was a last gasp lunge at the Army emplacements by the only remaining intact Union Mob...they were soundly beaten in the resulting melee...


It was an easy victory to the army! they suffered 2 casualties to the 30 plus the mob endured! The 18lb gun was never in danger of falling into the hands of the masses!
Well this turned into another bloodbath…especially
if you were a member of the Unionist Faction! My prediction from the summary of
the first game of this campaign that the Mobs would need better tactics than
frontal charges to succeed proved prophetic! The Mobs charges against emplaced
regular infantry with a Vickers MG were disastrous and heavy casualties were
taken with only 2 out of 7 sections reaching the emplacements at which point
they were dealt with easily by the Army lads. The armoured Truck was close to
useless armed only with rifles and the ATR dealt with it easily! We discussed
the activation rules in depth after the game and may try something a little
different next time…
A great layout and excellent figures and report.
ReplyDeleteI love the Unionist flag! The Hammer and Sickle under the Southern Cross.
I think Ernie and Fred were using the latest Soviet tactical manual. Frontal assault with lots of infantry. Nothing wrong with the tactics, just need more infantry. :)
Thanks Ben!
DeleteI thought the Australian/Soviet flag mix was a fun touch!
The Unionists will be better prepared next time...
Thanks for the game Darling. Good fun for the defenders but maybe not so much for the attackers running into a hopeless situation. The photos do justice to the scenery, which was so nice to play on.
ReplyDeleteCheers Stu!
DeleteYes 2 to 1 with an an Armoured Truck seemed ok odds but the defenders were too well armed and dug in...
Next time!
😃