Saturday, 18 August 2018

TGAA - The Second Battle for Beaconsfield Park - AAR

Last Monday we again revisited The Great Antipodean Adventure campaign and the A World Aflame Osprey rules. In this game Unionist forces try to relieve a detachment of Federal infantry from the 30th Battalion of the 18lb cannon that the All Australia Party and the Anglican League failed to secure during the skirmish on May 20 in Beaconsfield Park...

An anonymous Unionist ‘Bannerman’ in full flight…
  
The Background

The Second Battle of Beaconsfield Park

23 May 1930

The skirmish at Beaconsfield Park Sunday May 20 ended with the All for Australia Party’s men in possession of the 18lb cannon they had sought. Next day still saw the gun in the Park as the 2nd Sydney Regulars were not able to successfully move it due to vehicle issues. Late in the afternoon Australian Federal Army troops of the 30th Battalion arrived and demanded the ‘insurgents’ turn over the weapon. In the face of well armed and trained infantry Captain Beatty succumbed and turned over his prize and withdrew his force.

At this point the cannon had already been hauled to the Queen Street side of the Park well away from the previous day’s action. Captain Smith ordered his men to set up a defensive perimeter around the old artillery piece all the while wondering why on earth anyone would try to use it in action after all it had been sitting in the elements for the best part of 15 years. The infantry of the 30th Battalion were aided by a section of Engineer Reservists.

Two days later on Wednesday May 23 a limber was too arrived in the evening to recover the big gun so the men of the 30th prepared to dismantle their defences and head back to the comfort of the barracks. Their work was interrupted just after 4:00pm as a local Landlord arrived with the news that a unruly Union Mob was on their way and they were looking for a fight!

Captain Smith ordered his men to stand to and prepare for action he then sent a runner for assistance unaware of the Mobs strength. He secretly hoped the sight of regular infantry would dissuade them from action.

Only a few hundred yards away fired up Unionists planned their attack on the Federals and claim the big gun. Their leaders Comrades Belt and Buckle had served in the Great War and knew the gun itself was of little value but as their Soviet advisers said a defeat of Government Soldiers would be a great boost to their cause and add fuel the rebellion. They planned a pincer attack and had the support of an Armoured Crossley truck so were confident, Belt and Buckle synchronised their watches and announced to their members the attack would begin at 4:00pm. One wag replied we’ll have to finish them quickly before the local Publicans call last drinks! There was a roar of laughter and the Unionists shuffled off to their assigned positions...

The Forces

Battle:                          The Second Battle of Beaconsfield Park
Location:                      Sydney NSW
Date:                            23rd May 1932
Commander:                 Captain Rupert Smith
Weather:                      Fine Still Mid Afternoon Visibility 48”
Notes:                          Orders can’t be changed:
                                   ‘Ensure 18lb gun doesn’t fall into insurgent control’

Detachment 30th Battalion - Captain Rupert Smith
Unit ID. Name
Figures
Officer Grade
Unit Initiative
Morale
Volleys
Grenades
Notes

Command Section

2

3

3

5

 7


Section 1

5

3

4

4

11 

2
Heavy weapons capable

Section 2

5

3

4

4

 11

2
Heavy weapons capable

Section 3

5

3

4

4

7 

2
Heavy weapons capable

Section 4

5

3

4

4

 9

2
Heavy weapons capable

Reservists

5


3

4

5

 7

2
Engineers -
Heavy weapons capable


Battle:                          The Second Battle of Beaconsfield Park
Location:                      Sydney NSW
Date:                            23rd May 1932
Commanders:               Comrade Ernie Belt
                                   Comrade Fred Buckle
Weather:                      Fine Still Mid Afternoon Visibility 48”
Notes:                         Orders can’t be changed:
                                   ‘Seize the gun in the park’

1st Liberty Brigade - Comrade Ernie Belt

Crossley Armoured Truck
Initiative 3+ - Crew 5 2 drivers/3 in rear - Volleys 5
Move 10” +1D6 - Armour 9 - 3 Rifle Volley (1 side only at a time) up 45 degree from gun port
Unit ID. Name
Figures
Officer Grade
Unit Initiative
Morale
Volleys
Notes

Command Section

1

3

3

4

 5


Section 1

8

2

4

3

6 
Molotov Cocktail on roll of 4+

Section 2

8

2

4

3

4 
Molotov Cocktail on roll of 4+

Section 3

8

2

4

3

 5
Molotov Cocktail on roll of 4+


3rd Liberty Brigade - Comrade Fred Buckle
Unit ID. Name
Figures
Officer Grade
Unit Initiative
Morale
Volleys
Notes

Command Section

1

3

3

4

 9


Section 1

8

2

4

3

7 
Molotov Cocktail on roll of 4+

Section 2

8

2

4

3

 4
Molotov Cocktail on roll of 4+

Section 3

8

2

4

4

5 
Molotov Cocktail on roll of 4+

Section 4

8

2

4

4

5
Molotov Cocktail on roll of 4+


Scenarios Rules

To clinch victory the Unionist must secure the 18lb cannon by having at least 4 figures adjacent to it at the end of the game or breaking the Army units, the Federal side must prevent the above.

Each Union Bannerman once during the game may 'rally the lads to the banner' and allow a reroll of a morale die throw.

Due to heavy rain before the action figures may only run for one turn then walk again.

The Army HMG has 12 Volleys.

The Army ATR has 7 Volleys.

Maximum Turns is 12.

The random events were updated from the previous games and listed using a regular card deck to regulate.

The AAR

Once again I'm going to let the pictures tell the tale here with some inspiring captions!

A view of the battlefield, the buildings are on the southern side of Beaconfield Park. The Unionist are advancing feom the west toward the army's entrenchments.

The Mobs from the east run forward for all their worth!

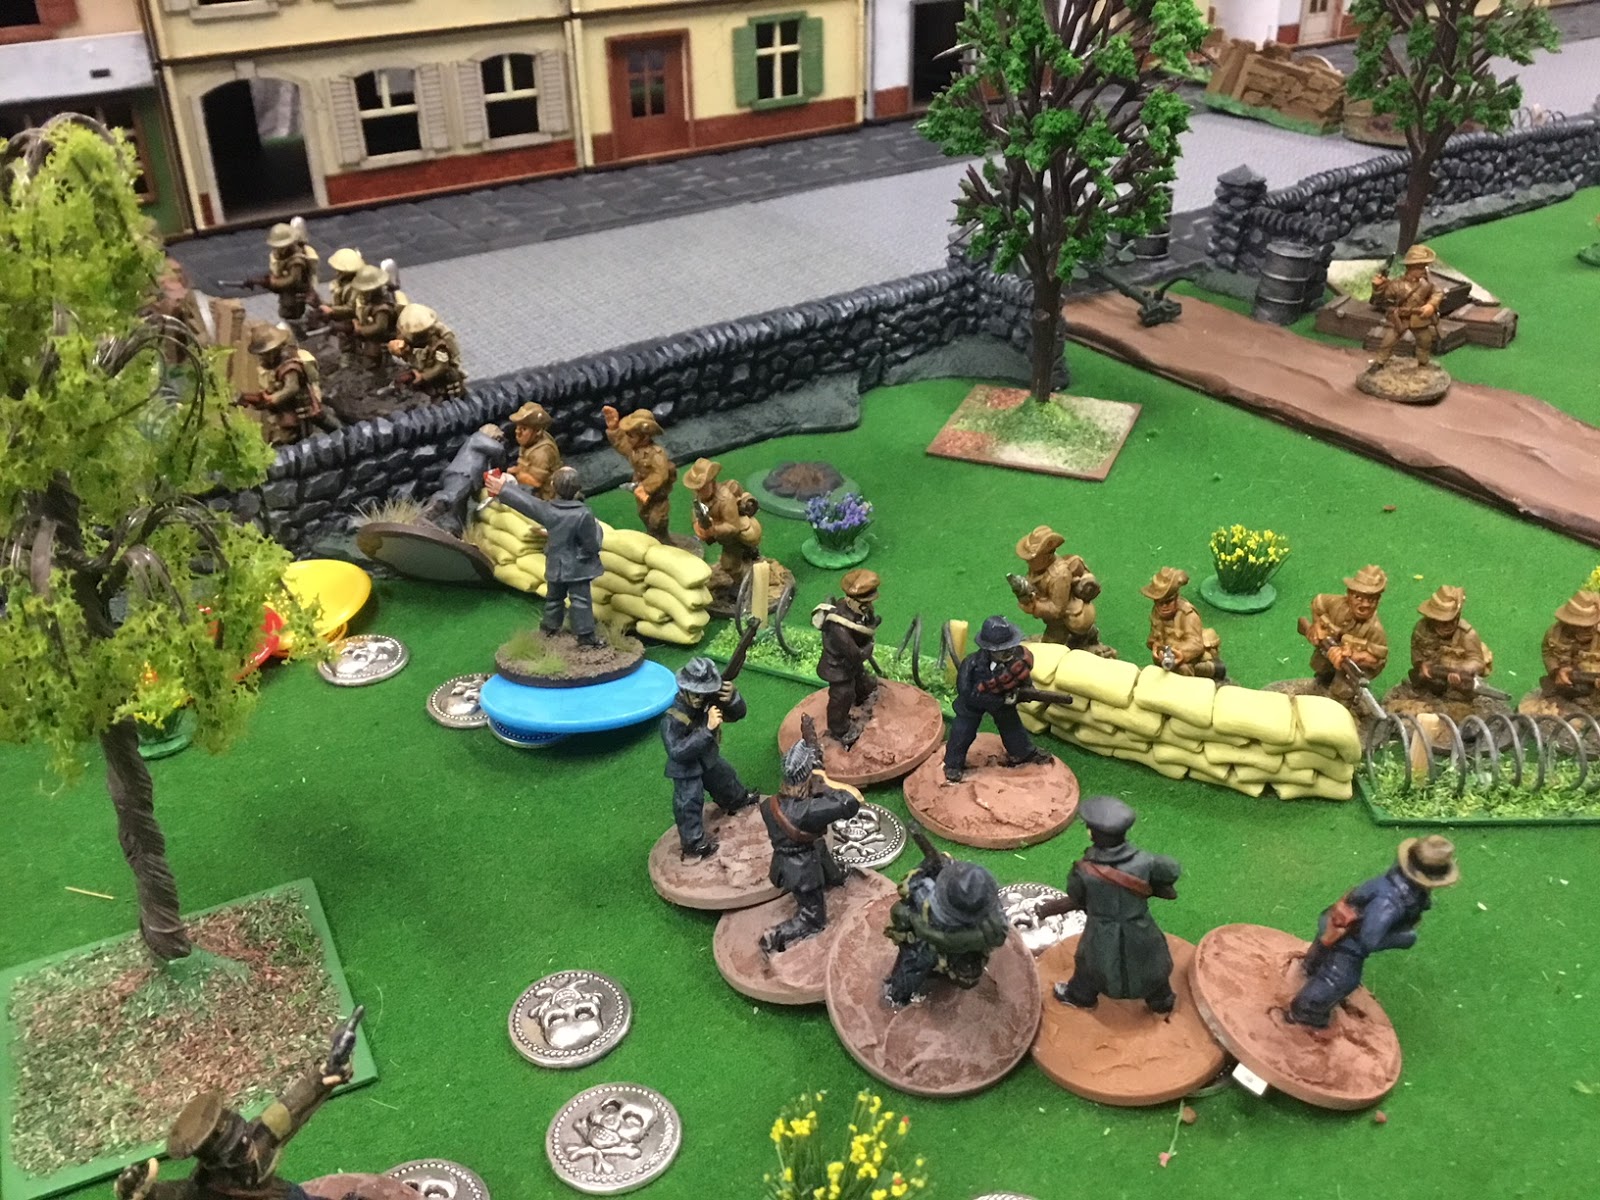
Casualties mounted quickly as the Army's Vickers MG mowed down the Unionist! The silver skull tokens mark the spot where men and women fell!

The advance from the west only faced musketry so closed with less losses...

Overview at the end of Turn Three it was already obvious to all the attack was doomed!

Turn Four and a Mob reached the Army's line but were beaten back!

 Turn Five and a last attempt was orgabised to breech the defences!
Meanwhile with all three Mobs attacking from the west broken their Armoured Truck tried to divert the Army's attention from the advance from the west...

...however a hit from the ATR although did not destroy the vehicle caused the occupants to bail out, here they are cowering behind their Cossley and out of the action!
 
 The final action of the battle was a last gasp lunge at the Army emplacements by the only remaining intact Union Mob...they were soundly beaten in the resulting melee...


It was an easy victory to the army! they suffered 2 casualties to the 30 plus the mob endured! The 18lb gun was never in danger of falling into the hands of the masses!

Well this turned into another bloodbath…especially if you were a member of the Unionist Faction! My prediction from the summary of the first game of this campaign that the Mobs would need better tactics than frontal charges to succeed proved prophetic! The Mobs charges against emplaced regular infantry with a Vickers MG were disastrous and heavy casualties were taken with only 2 out of 7 sections reaching the emplacements at which point they were dealt with easily by the Army lads. The armoured Truck was close to useless armed only with rifles and the ATR dealt with it easily! We discussed the activation rules in depth after the game and may try something a little different next time…

Monday, 13 August 2018

1/56 Generic HMG and ATR Weapons - TGAA

For The Great Antipodean Adventure games I’m going to be needing some specific ‘heavy’ Infantry weapons for forces that will include mainly civilian figures (though not exclusively!) and a) I don’t want to buy lost of specific figures for limited use and b) not sure if anyone makes 28mm civilian ATR, HMG teams etc that fit my requirement.

So I’ve decided to make up some heavy weapon bases that ‘normal’ figures can be positioned by. I want them to be simple/generic so I can make multiples but the still give an idea of what I require...


Later after mixing styrene, paperclips, lollipop sticks, spare German MG ammo boxes with a bit of superglue...


Then a lick of paint... 


And they are ready for tonight’s Great Antipodean Adventure A World Aflame game! Woo Hoo!

Sunday, 29 July 2018

X-Wing Action!

For our last catch up we were all set for a big night of X-Wing action with our resident expert but he called in sick! Stu stepped up and brought over his X-Wing kit!

We payed several games with 2 X-Wing and 4 Tie Fighters at our disposal!

We soon remembered the basic rules and mastered a few of the advanced ones!

Suffice to say there was lots of 'Pew Pewing' and 'Dadadadaaing' all punctuated with Darth and Yoda impersonations! It was good fun and we all found piloting X-Wings was much preferable to Tie Fighters, with their 'Lock' attribute we can see why the starter kit included only 1 X-Wing but 2 Tie fighters!

Some of the action...

After playing there was time for plenty of chat, this is the good thing about light games like this there's more time for socialising after the session!

Next session we are revisiting X-Wing but with much more extensive forces!

Thursday, 28 June 2018

Some More TW&T! July 1944 AAR - Into The Woods!

Well we revisited TW&T again this fortnight using a scenario I found online. This is the second game of TW&T for our group but I have a couple of extra games up my sleeve. We wanted to really test the rules out.

Germans watching the Tommies advance...

Into the Valley
July 1944 an Allied offensive around Caen has splintered the German defences. The British are attempting to push forward to find gaps that they can exploit, whilst the thinly spread German second line is attempting to stand firm until reinforcements can be brought up...

Defending Germans
1 Big Man Level IV
1 Big Man Level III
1 Infantry Section with LMG Team
2 Tripod HMG Teams

British Attackers
2 Big Man Level IiI
2 Big Man Level II
1 Big Man Level I
3 Infantry Sections each with a LMG Team
1 Light Mortar Team

The objective was for the British to emerge from a wood cross a serene gentle upward country slope with minimal cover and clear the 6’ x 4’ table of Jerries. Easy!

The table ready for the British to arrive from the west, top right in the picture the German blinds can be seen behind the luxuriant hedges at the top of the slope...


Note - sorry tried to find the site again that listed this game without luck so can’t credit it!

The Game

The Germans were deployed with their Infantry Section covering the centre third of the table with a HMG Team on each flank set up with a pre-targeted firing lane ready to sweep their fronts.

All three of the British Sections came on in the centre of the table quickly losing their ‘blind’ status due to the open terrain. The Dummy Blinds played little part in foling the Germans what they were up too. Doing so inadvertently saved initially them the wrath of the Jerry HMG’s!

All started okay for the Poms and one section reach some dead ground on the slope for cover while another moved up alongside them. Then the section in cover deployed their Bren Team to the crest of their dead ground to harass the Germans and this is where everything turned nasty for the Brits!

For several turns in a row they became bogged down, twice aircraft buzzed the field of battle (random event) stopping any movement for the turn and on the others the card draws gave the Germans multiple actions while leaving the British stranded! During this time the German fire kept taking a steady toll of British. Several HMG jams did keep the game alive though.

Both the up front British sections lost their Bren teams and were stuck half way up the slope. The third section tried to suppress the Germans from the cover of a stone wall with little effect and then to top off their bad luck when their mortar came into play another random event occurred and a small structure caught fire and the wind placement sent smoke across the mortars line of sight requiring it to relocate!

The British players now got their Platoon leader up to the men stranded on the slope and he got them moving, unable to move directly forward they followed the dead ground to their left flank and ran straight into one of the HMG’s!

At this point the game was over for the British but as the HMG they faced had jammed and the grenades barrage they had launched against it was ineffective we continued for one more turn to test the close combat rules. Here too the Germans were successful by losing just two men to three. The Brits were broken at this point so it was time for coffee and the debrief!

Some Pictures...didn’t take too many as I was busy umpiring!

The first British section sprints to a patch of dead ground as the advance 'into the woods!'

Germans awaiting the British to attempt to get 'into the woods!'


Just as the British mortar support got into the show a blaze broke out in a derelict building and the smoke obscured their view!

With things going badly the British platoon leader inspired his men to swing to the left!

Straight into the sights of a German HMG Team...

Luckily for the Brits the German HMG jammed and a melee ensued...

The defeated British fled, here's a few with their Platoon Leader trying to stem the tide...'Come on lads lets give Jerry some curry!"

I like these rules and the guys general feedback was good. The turns flowed well and quickly. We covered all the infantry rules from grenades to close combat and found they worked well.  I think the secret to these rules is get your best Big men attached to your strongest units ASAP! This game though the British drew the short straw getting pretty bad card selections but that’s what the fog of war is about troops don’t always do what you want. We will use these rules again and plan on trying out the newer version Chain of Command at some point too!

Sunday, 10 June 2018

TGAA - NSW Government Commissioned Armoured Car 1932

NSW Police and Dignitaries inspecting the Prototype MB v1 Armoured car in the Sydney Botanic Gardens, May 1932.

With the outbreak of armed hostilities from May 20 The Great Antipodean Adventure turned nasty and violence was rampant on the streets of Sydney New South Wales. With fighting iescalating many factions starting improvising various Armoured vehicles. Little did they know the Provisional New South Wales Government saw 'the cards on the table’ as soon as the first demonstrators filled the streets after the dismissal of the Lang Government and they had secretly placed an order for Armoured Cars for the State Police Force!

Provisional Premier Bertram Stevens knew that Federal Government assistance would not be immediate and his State based ‘Defence Forces’ would be hard pressed to fight armed insurrectionists. Therefore he decided in conjunction with his Cabinet to commission an Armoured Vehicle that would allow the NSW Police to maintain peace in the streets of the fine city of Sydney. The Police Department were to oversee the project. They approached the motor body building firm of Diskon & Molyneux, in the suburb of Bexley on May 14 and paid for twelve Armoured Cars to be delivered within a period of eight weeks with the first to be available as soon as the 24th of May! 

Diskon & Molyneux who had been building car bodies for imported Amercian Packard chassis gladly accepted the contract even though they had not the slightest inkling on designing an Armoured Car or how they could meet the tight deadlines. Their Manager though was a man of action and he promoted his best engineer, Bert Hinkler to produce a rear engined chassis using a Packard Light Eight one they had in stock. He also approached the noted Art Deco architect Emil Sodersten to draw up a design for the vehicle. The Diskon & Molyneux paint shop were set to finish the interior in flat white enamel while the exterior was coated in a fine full gloss British Green with Satin Black turret and wheel cover features.

The two men worked together day and night and their brilliance birthed the the curvaceous Diskon & Molyneux Armoured Vehicle Mark I which went from design to prototype in the space of a mere ten days!

The NSW Police were soon to test the first MB v1 Armoured Car in the heat of battle...

It was a rather unsuccessful design in the end and quickly superseded with only nine being delivered and an improved version replacing it. The completed vehicles soldiered on through the duration of the insurrection often being captured serviced by their new owners and being sent back into the fray, sometimes to be captured a second or third time!

The Vehicle

The modified chassis was shorter than the civilian equivalent and reinforced. The bodywork was all welded and the curved plating was layered sections supplied by a local boilermaker. One side door was included for the crew. The manually rotated turret contained four apertures; one each for the gun, the commander, the gunner and the driver. The low body meant the drivers head was in the turret space which meant that while I motion the turret was required to face forward. The driver location resulted in a few issues the least of which included the need for an efficient catcher for spent rounds lest they hit them when the vehicle was firing in its forward arc!

Specifications
Length 15’ 9”
Width 5’ 6”
Height 9’ 6”
Motor 320 cu in Straight Eight with 110hp
Gearbox 3speed manual
Top Speed 24mph
Crew 3
Armament 1 x Vickers HMG or 1 x QF 3-pounder 

The Model

Okay this model like most of my others is mainly sheet and rod styrene. I am also using this time some wheels and a HMG from Eureaka Miniatures, a Foreground building window frame, a bottle cap and some 1/35 Pz V parts!

Here's the first task assembling the floor and side you'll note a couple of braces to keep it square. The curved parts will be the wheel covers and the axles are lolly pop sticks with paperclip wire...

The new A/C parts with its oppostion in the background!

The sides and base are 1mm styrene for the curved end plates I glued and secured 0.5mm styrene sheet into place

Once the curved ends were completely dry I glued on the hull top and added the hull details; a door, the rear deck grill, a fire extinguisher, a headlight and an exhaust pipe...

The turret is a roll on deodorant bottle cap!

A lick of paint and the NSW Government forces have an Armoured car ready for action!


I like how this finished up! I still have one more Armoured Car to build for TGAA scenarios and after our Little Wars Melbourne ROAD TRIP and a stop at the Nhill RAAF Base Museum I am going to base it on the first ever Australian built Armoured Car! Also I really need to get back to my unfinished VSF projects though! I have a VSF scenario ready to play and a cool building to construct which will probably become the new secret lair of Dr Von Hades this too is thanks to Little Wars and the new Twisted game range of products!