Wednesday, 20 February 2019

Modified Trafalgar Rules


TRAFALGAR MODIFIED RULES
MOVING
·         Move Inertia 2cm straight Forward (unless in irons)
·         Must move full allowance determined by sail setting (or altered by luffing or tacking)
·         May not move into the wind unless tacking or "luffing"
·         Luffing reduces movement as desired.
·         Turns as allowed on roster sheet and turn templates
·         Reaching add 1/3 move distance
·         Beating lose 1/3 move distance

TACKING
·         Must be beating close hauled at start of turn
·         move inertia
·         turn into wind by pivoting around centre point
next turn
·         Place on opposite tack or original tack
·         end movement
Command check required only if under fire or masts have been damaged. If you fail a command check to tack, ship is left luffing or in irons at discretion of opponent.
Not permitted to tack on successive turns

Command Check: 2D6+Command>10 to pass
MOVING OUT OF IRONS/LUFFING
Pointing directly into the wind
Command Check Required unless tacking
Nominate tack to come to and turn ship on the spot to that tack
If Command Check Failed, luff or in irons at opponents discretion
Luffing is pointing anywhere into the wind except being in irons
COLLISIONS
·         moving ship may choose to collide, must pass a command check
·         target ship may choose to avoid by passing a command check, but only if sail worthy, move logically to avoid collision.
·         Collision is hull against base edge
·         Collision needed for boarding to take place
·         Collision with own ship if unavoidable


FIRING (4+ to HIT)
·         You may fire one broadside to both sides each player turn
·         Firing arc is straight out, perpendicular to ship's side
·          width = ships gun deck
·         "Fire as she bears" You may elect to fire the broadside at any time in your turn
·         There is no penalty for "Firing as She Bears"
·         6 is a critical hit, roll on Critical table
·         Randomise high hits to relevant masts

MODIFIERS (4+ to HIT)
·         +1 < 10cm short range
·         -1 > 20cm long range, no criticals
·         -1 firing high
SAVES (4+)
·         -1 bow raked
·         -2 stern raked, +1 critical roll
·         carronades -1, +1 critical roll
·         +1 4th Rate and higher Vs Light
·         note modifiers on data cards
RANGES
·         Carronade 10cm
·         Heavy and Light 30cm

Roll d6
LOW Criticals
HIGH Criticals
1
Normal damage
Normal damage and -1 crew
2
Normal damage, -1 crew
D3 relevant mast damage and -1 crew
3
Rudder hit, no turns until repaired on 4+
D3 damage to relevant mast  -1 crew
4
D3 damage, -1 crew
D3 damage to relevant mast, -1 crew
5
D3 damage, -D3 crew, below waterline save
D3 damage to relevant mast, -D3 crew
6
D6 damage, -D3 crew, below waterline hit
D6 damage to relevant mast, -D3 crew

BOARDING (need a collision)
·         Boarder rolls 2d6 + 1 (for the boarding crew and crew get crossed off)
·         Ship being boarded rolls 2d6 + half crew remaining (as the repellers)
·         loser crosses off 1 crew as killed

·         Boarding continues next turn, boarder can elect to keep sending men (1) across if able until defender strikes.
·         If the vessel being boarded wins, they are able to counter board next turn (or not)
·         Cannon fire from both ships is halved during boardings


Design Notes:

We liked lots about GW Trafalgar. Those roster sheets with convenient firepower stats, damage tables, the simplistic mechanic of hit and save, lots of dice being rolled, raking effects and so on. But there was a lot not to like. We wanted more than some comic simulation, we wanted a bit more reality. This is what we came up with. 

Time and Distance Scale

We figure that Trafalgar is based on a turn time of about 90-120 seconds. This is the reload time for the cannon, which can fire every turn. It also corresponds to the movement distance, 14cm to scale for a first rate being 183 yards in real life, which, in 90 seconds, represents a speed of 3.66 knots at 1:1200 scale. Not too bad an approximation. The IgoUGo  turn sequence complicates this a bit and makes ships pack more firepower than they really had, since the turns are presumed to overlap.

Sailing Template

The sailing template is modified so that ships cannot now outperform 12m yachts. Or, in fact, any sailing craft ever designed. A significant bone of contention. Even sailing 60 degrees into the wind is very optimistic.

0 to 60 degrees either side of the wind is “luffing” or “in irons”, ships can only point into this zone if they wish to luff, change tack or involuntarily be caught “in irons”. Luffing is executed to reduce speed, and means walking the line between beating and being too close to the wind. It is a voluntary maneouvre.

60 to 90 degrees either side of the wind is beating. You must be beating to windward in order to initiate a tack.

90 to 150 degrees either side of the wind is reaching.

150 to 180 degrees is running.

You might like to modify these arcs slightly for different rates of ships, making it worse for higher rated ships (80 degrees is the closest a first rate could sail to the wind, if that, from my research).

We used old CD protector blanks to make templates, from the days when CDs and DVDs could be bought in packs and had one on the top of the stack.

Tacking

Tacking was a well practised and common maneouvre. It didn't result in damage to masts and rigging 10/36 of the time (a command check for a 6th rate or higher captain, worse odds if you were in a more nimble ship). You only take a command check if under fire or with damaged rigging.

The Trafalgar tacking maneouvre was woeful. You move “normally” into the wind after taking a command check and executing a sharp turn. It could, therefore, execute its full remaining distance allocation almost directly into the wind and simply tack out of this position the next turn. Huge advantage to be able to move upwind in this fashion. Add to that the beating angle was around 15 degrees, wth ? The whole essence of this game is to treasure the weather gauge. Not to turn 74s into speedboats.

So, replace that with the simple maneouvre shown in the above rules, essentially this represents losing all way off the ship, turning through the wind in a whole turn and end up facing on the opposite tack with way on. This takes two turns, which, according to the time scale, is 3-4 minutes, which is somewhat under that reckoned for a frigate (5 minutes) but at least in the ball park.

Firing

This is a problem for any IGOUGO play sequence. It is ludicrous to imagine two ships, on parallel courses, travelling at the same speed, where ships alternately overtake each other and fire with a penalty as they pass.

To resolve this we adopted the fire as you bear rule without penalty.You may fire at any point in the movement phase without penalty as she bears. Essentially, you do not wait until the end of the turn to initiate firing unless you want to. This method permits ships alongside each other, firing at the start of a players turn as one ship moves away and then at the end of the next players turn where they move alongside each other again. 

The firing arc is changed as well. With the fire as you bear rule modification, it is simpler to use a straight out arc of fire. You will get shots off without having to position your ship at the end of the turn. Thank Sam Mustafa for that simplification, taken from Lasalle.

If you are really keen, you might like to adopt a superiority gunfire rate. Brit ships fire every turn they are able, everyone else fires two out of three turns.  Or worse.

 Hits Table

Modified as above. Removing the comic effect ship on fire or explosion results.

The roster cards have been rewritten to account for progressive damage. As each shaded box is crossed off, remove one of the specified crew, guns or rigging.

Weather Rolls

The Trafalgar rules writers have obviously never been to sea or contemplated that the weather does not change significantly in the space of a minute or two. Sure the rules only give a 1/6 chance of this happening, but that could result in significant sailing condition changes. Considering a game turn is about 90 seconds long, these odds mean the wind changes, possibly significantly, on average every 9 minutes. More if you are good at rolling ones. You could, also, on a roll of 1-6-1/2 and a subsequent roll of 1-6-5/6 go from becalmed to a gale. Unlikely odds wise, improbable in real life. Trafalgar Authors, go home, you are drunk.

We simply don't use wind or weather changes for our short games. If you must, I suggest a mechanism for a possible change after 6 turns, varying the wind strength and direction by a Beaufort scale or a point. Up to you. 

Tacking in light winds is also a problem, anything less than 10knots and tacking is probably not possible for the square rigged ships we are dealing with.

Collisions

We gave the option to a ship to avoid a collision by sailing away. This might not be possible, so apply some logic. If you allow half movement for the ship to avoid a collision it represents the half turn overlap. The ship might then have half movement available next turn. A ship upwind would find it difficult to collide with a ship with the same sailing characteristics which is downwind that has time to react.

Boarding

After a collision. We tried to simulate a boarding ship sending crew across, a total of 1 crew box while the ship being boarded puts half of her crew up to defend. Example, boarding ship rolls 2d6 +1, defending ship rolls 2d6 +4 (for a fully crewed first rate). The loser crosses off the crew box. The ship being boarded continues to fight if she loses, possibly fighting with worse odds next turn as the boarder sends across more crew. If the attacker loses, they have the option of boarding again or might have to fend off a counter attack. Boarding is not easy.

 The Future

We came to the conclusion that most Age of Sail games run into most difficulty with the IgoUGo sequence. A possible workaround is to use the mechanic from Wings of War or X-Wing: have maneouvre templates for each ship depending on their orientation to the wind. Chose one, which represents 30 seconds of movement, and play it simultaneously with all other players. Repeat a total of three times (90 seconds) and allow firing once in a sequence of three movements. Lots of cards, lots of ships. Lots of counters or smoke markers to see who is eligible to fire. I think this would capture the essence of swinging the large ships around. 

The other deficiency I see in the modified rules are the speed changes. You are obliged to move full movement allowance. In reality ships could spill wind and slow down. This would be a progressive thing, so optional to allow players to move any distance up to their movement rate, with possible speed indicators to allow +/- 3cm from the previous speed.

Tuesday, 12 February 2019

Chain of Command - Trial Game

Well we girded up our lions, watched the Lardies instructional YouTube clip on Playing Chain of Command (CoC), scanned the rules and QRS (6 pages!) and had a run through game using the Probe Scenario!

There's not a lot to say on the rules yet but after our next go I think we'll have a good idea of our thoughts on CoC.

For this trial set in 1940 the Poms were on the attack with an infantry platoon beefed up with and extra section, a Mk VI tank and two UCs. The Germans had an infantry platoon and selected an ATR and PAK 36 ATG to boost their defences.

We played one full turn which was terminated by a triple 6.

We ran through the Patrol Phase and because the British rolled well as part of the scenario rules it put the Germans in a tight spot from the beginning basically starting on their edge of their side.

Basic infantry movement and firing and close combat all worked okay (no one tried chucking a grenade though).

Regarding Command Dice the 3's and especially the 4's were interesting as we tried to get our Leaders to use as many of their actions as possible.

No one combined dice at any point because we didn't think of it!

Oh and we never used any of our CoC points even though the British gained 8 as we were so tied up learning the basics.

There was a lot of rules and table referencing but I suspect that will diminish as the rules get used more. I think these hold promise and are an improvement on TW&T (ableit leaders in TW&T maybe are reflected better no sure yet at this stage). We are going to try another game next Fortnight and we will try the Patrol scenario.

A few pictures taken after our session...

The field of battle, from this angle the British were attacking from the left across the fields.

My late war Brits posing as BEF guys sheltering in shell holes...

A German PAK 36 and crew, they spent their time taking pot shots at infantry as the British never deployed their armour (learning the infantry rules were enough to keep us busy!)

The British extra infantry section arrived late and started to flank the Jerry position!

Alan's excellent JOP's which we used for the game...

My el cheapo JOP's...

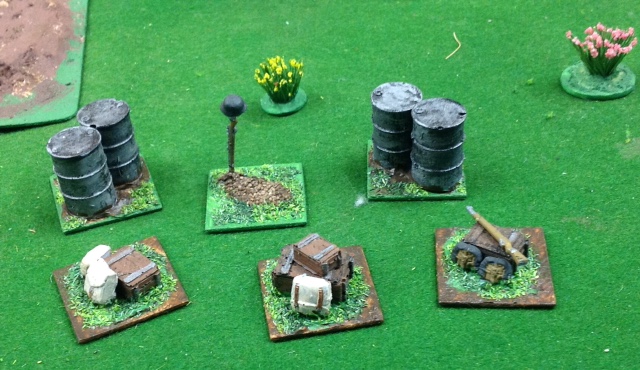
Our Patrol Phase markers are just painted poker chips with relevant flags, eminently suitable and look the part...they are only used briefly anyway...

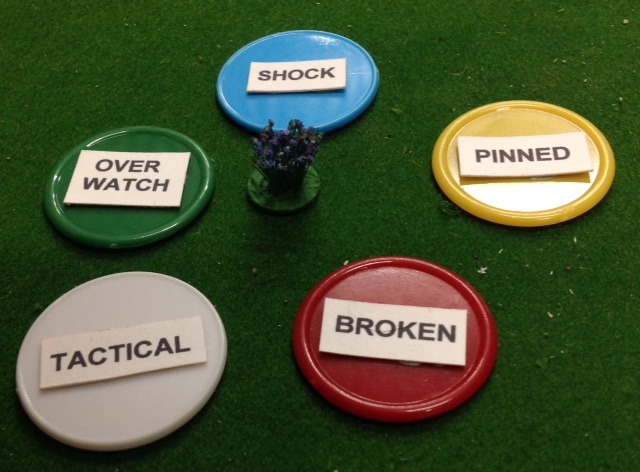
We are using poker chips to determine units status, these are the 'key' ones so we know whats what...

....they fit under the figures stands nicely as seen below the section deployed along the hedge have two 'levels' of shock...

Thanks!

Thursday, 31 January 2019

TSOGers Escape from Colditz!

We started the years fortnightly catch-ups with a good feed and a game of Parker Brothers Escape from Colditz!


Picture thanks to Boardgamegeek!

So it was pizza and a sea of dips washed down with ample amounts of amber liquid to start proceedings! Dave left after dinner as he had work to do leaving Al, Stu and myself...

Out came the game and Stu took up the Cudgels as the Germans (black) while Al selected the USA prisoners (blue) and I used the Polish inmates (green)...

Play went on slowly while Al and I gathered gear and planned our escapes, Stu kept the cells of Colditz full arresting our prisoners as often as he could. During play Al's Yank prisoners (blue) changed nationality to British ones (red) as he and Stu were having a hard time distinguishing their pawns!

One of my Poles made a dash over the walls from the safe space near the Guard House only to be shot dead 4 spaces from safety. After that the British got a prisoner to safety outside the walls employing the Canteen tunnel. And then Poles were planning to make a dash to freedom with the Staff Car when our time ran out!

Final Stats;
Colonel Al +1 for carrying out one successful escape
Pulkownik Pete -1 one dead prisoner shot trying to escape
Oberst Stu a transfer to the Russian Front for allowing an escape!


Our game just before the British successfully got a prisoner out!

Good fun was had by all and we'll definitely be revisiting Escape from Colditz in the future!

Friday, 18 January 2019

Home Made Cornfields!

A period picture of Yankee Zouaves emerging from a lush cornfield, Northern Virginia 1861...

Well you can never have enough terrain for your ACW Skirmish games...and I suppose any other theatre of war where corn crops were grown! Anyway to make a short story long I wrote a review for the 61-65 rules for the ACW Gamer, The Ezine and got a copy of it so I could check out my handiwork and in it I noticed on page 16 an article, Planting Corn intrigued I went to page 16 and low and behold there was an article on making your own cornfields. Now these were for 54mm figures and included pumpkins but the corn stalks made out of twistie ties looked good so I decided to give them a go for my 1/56 figures!

From Ebay I order 800 ties for the princely sum of A$4.89. I then followed Mannie Gentile's instructions; I proceeded to twist bundles of 7 and 8 while my partner watched the two Annebelle movies which are far too horrific for me! Later I snipped and sprayed the 'stalks' and attached them to 2mm styrene plastic squares (6cm x 6cm). finally I dry brushed the stalks with a second shade of green and made the bases look a bit earthy...

The finished lot!
Sorry about the picture quality on this post they taken with an old phone...

The first picture without effects...

I didn't document the process its all on the Toy Soldiers Forever blog...but used some off cuts once done to make a baby stalk so you can see the original colour of the ties...

The whole process for making cornfields can be found on Mannie Gentile's Toy Soldiers Forever Blog...
Toy Soldiers Forever Blogspot

And if you're interested the ACW Gamer, The Ezine detatls can be found here...
The ACW Gamer

That's all for this time folks...

Tuesday, 18 December 2018

Longstreet 4 Player Campaign Game 3 - Battle of Pebble Mountain

Game 3 of our four player Longstreet Campaign started with Dave and I winning the scouting role and electing to attack, heck we had defended the last two times and even though the Union army had an advantage in numbers that sort of thing never bothers us boys from the South! The two scenarios combined together for our Battle of Pebble Mountain were the Crossroads and the Clear the Tree Line ones...

Colonel Clampett personally directing the Confederate batteries during the Battle of Pebble Mountain...

Here’s our forces...

Alan - Colonel Firefly from Massachusetts (European Service & Artillery Officer &
Friend in the State House & Scout) 44 Bases
5th Massachusetts Volunteer Infantry S R 4 Bases
9th Massachusetts Infantry S R 6 Bases
14th Massachusetts Infantry S R 3 Bases
21st Massachusetts Infantry E R 6 Bases
6th Irish Regulars E R 8
7th Venerables Infantry E R 7
4th Boston Light Cavalry S V 56 Bases
2nd US Cavalry E R 3 Bases
4th Battery Light Artillery 1 x 6lbr 1 x Howitzer
7th Auxilary Art Coy 2 x Howitzer

Dave - Colonel Leghorn from Alabama (Scout & Cavalry Officer & Indian Wars) 36 Bases
3rd Alabama Infantry E R 5 Bases + Hero
1st Alabama Infantry S V 6 Bases Old Reliables
14th Alabama Infantry S V 4 Bases
2nd Alabama Infantry E R 5 Bases
4th Alabama Infantry E R 7 Bases
1st Alabama Volunteer Cavalry S R 5 Bases
1st Battalion Alabama Artillery 1 x 6lbr 1 x Howitzer
2nd Battalion Alabama Artillery 2 x 6lbr

Peter - Colonel Clampett from Tennessee (Drillmaster & Artillery Officer & Personal Physician) 42 Bases
14th Tennessee Infantry E R 7 Bases + Hero
7th Tennessee Infantry E R 7 Bases
Walkers Legion E R 7 Bases
1st Colm's Tennessee Bn E V 6
2/22 Tennessee Cavalry S R 4 Bases
2nd Tennessee Cavalry E R 4 Bases
Baxters Artillery Company I Batt  2 x 6lbr 1 x Howitzer
Baxters Artillery Company II Batt 1 x Nap 1 x LR

Stu - Colonel Zook from New York (Political Savvy & Indian Wars) 41 Bases
52nd New York Infantry German Ranger or Sigel Rifles S R 2 Bases
53rd New York Infantry D'Epinuil Zouaves S V 6 Bases + Hero 'old Reliables'
57th New York Infantry National Guard Rifles E R 4 + Hero
66th New York Infantry Governors Guard E R 7 Bases
140th Pennsylvania Infantry S V 6 Bases + Hero
141st Pennsylvania Infantry E R 6 Bases
140th Pennsylvania Infantry E R 6 Bases
2nd New York Volunteer Cavalry S R 2 Bases
Battery B 1st New York Light Artillery 1 x 6lbr 1 x Howitzer

Let the fun begin!


Confederate Colonels Clampett and Leghorn massed their guns on a central hill know as Pebble Mountain by the local populace and pushed forward all their cavalry and infantry in two massed attacks, on the Crossroads area a field was the funnel for the attack and on the tree line area a wood covered their advance.

During the initial turns the Yankees dug in for all their worth as the Rebels coordinated their Units.

Clampett’s men secured the unguarded objective on the crossroads but the Yankee commander, Colonel Zook preempted a perceived Rebel Yell charge with their own charge after deadly fire using the Charge Bayonets card. This gave the Confederates a bloody nose but around the fields they continued to push on with three consecutive charges slowly grinding forward and inflicting losses. On the Rebel far left the boys in blue roughly handled Colm's Tennessee Battalion.

Leghorns cavalry charged the Yankee guns with the Colonel himself at their head and they defeated two Union batteries before retiring to allow the Infantry to advance. The Rebel Yell went up and the Southerners slowly pushed Colonel Firefly’s Union units back with successive charges.

On the Crossroads battlefield with the Confederates of Clampett spent the Yankees went over to the attack but the Rebels hung on while on the Treeline battlefield the Southerners drove the Yankees back to the edge of the battlefield dropping just short of capturing their objective!

At this point the during turn 10 the Federal Armies morale broke as their losses plus the Confederate Victory die roll exceeded their Shatter Point. The Rebels carried the day.

Well we hadn’t played Longstreet Street for a while and made a couple of mistakes with the rules but will be ready next time to ensure these do occur again.

Some pictures! Some are a bit dodgy not sure why and also there are no end of game pictures as we moved straight into the Campaign Phase as we were running late!

The sides line up, CSA to the left and the USA to the right, interestingly the Yankees did not occupy the objective in the Crossroads Game giving up easily to the CSA...


Early in the game on the Rebel right Colonel Leghorn lead his Cavaliers directly at the Union artillery batteries... 

...and successfully charges them causing the casualties and capturing guns. At that point the Union gunners limbered up and retired into the woods! 

Meanwhile Colonel Clampett's Regiments formed up to attack the Union forces around the crossroads...

But Zook's Yankees pre-emptied Clampett and his men fired and charged pushing the Rebels back with casualties! 

In the woods (trees have been removed to allow play just and outline remains) the Yankees were driven back and the Rebs came within a whisker of capturing their objective from superior numbers! 

After their initial repulse Clampett's boys launch a couple of successful charges but shot their bolt and were left hanging in the face of larger Federal Units... 

Confederate reserves on the right watch the lead Regiments advance into the woods... 

The Confederate left flank attacks continued against superior numbers, racking up Epic Points! 

Picture of the Tree Line area on the penultimate turn, the Union troops retain the objective and their cavalry start a run at turning the Rebel flank! 

Picture of the Crossroads area on the penultimate turn, the Union troops are trying to turn the reel flank but crucially in the centre the Confederates retain the objective giving them 2 dice when making victory rolls... 

Battle Summary:

Break Point was 38 Bases

Losses:
USA 36 Bases

CSA 33 Bases

Game wise it’s now 3 Confederate wins to 0 Union ones but more importantly the Epic Points are currently standing at...

Epic Points:
Alan 5 Campaign Total 16
Dave 7 Campaign Total 20
Pete 5 Campaign Total 14
Stu 5 Campaign Total 10


Campaign Game 4 is going to look different to anything I've seen before the Union Armies have only a single Artillery base! In general during this campaign so far it's been viewed that artillery is not very effective so a few players are shunning cards for it. It'll be up to the Confederates to change that perception in game 4! As per the last game even more units have been whittled down to only a few bases, four now sitting on just two! I suspect they'll see little action next game!

Game 4 will be the first of the 1863 games so the card decks will be balanced and the army sizes will move slightly in favour of the Union.